MiSTer FPGA Guide
A Beginner's Complete Guide

Changelog
| 2025-03-27 | How to migrate SD |
| 2025-03-27 | AmigaVision update |
| 2024-04-09 | Corrected comparisons |
| 2025-03-27 | How to migrate SD |
| 2025-03-27 | AmigaVision update |
| 2024-04-09 | Corrected comparisons |
MiSTer is hardware emulation of arcade machines like Galaga and Ms.
Pac-Man, consoles such as NES and SNES, and computers like the
Commodore 64 and Amiga.
MiSTer uses thousands of physical gates in a so-called
field-programmable gate array (FPGA) to emulate the original
circuitry.
MiSTer offers lower latency and more authentic graphics and sound
than software emulation.
New games or systems, so-called cores, are released every month for
the MiSTer by dedicated and mostly hobbyist developers.
MAME, RetroArch, Hyperspin, and RetroPie benefit from save
states and extensive game libraries, but fall short in
delivering authenticity and low latency.
My expensive MAME/Hyperspin machine is now collecting dust. I
can't go back to software emulation after MiSTer.
I own original Commodore 64, Amiga, SNES and N64s. They offer
authenticity, but using and maintaining 40-year-old machines
is cumbersome.
The guide is split into seven, color-coded parts. Follow them chronologically to get the most out of the guide.

Let's begin with some tips to help you get the right gear!
You can build a MiSTer yourself or you can purchase a prebuilt
MiSTer. This guide focuses on the latter.
All MiSTers use a Terasic DE10-Nano board, but there are differences
when it comes to expansion boards, inputs and outputs, the case, and
the cooling method.
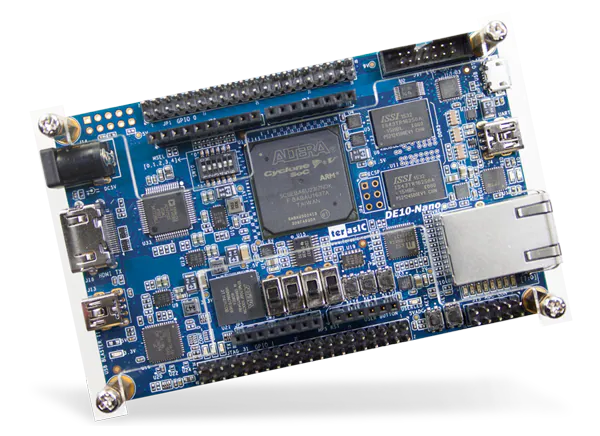
Terasic DE10-Nano FPGA board
In the US, and for world-wide exclusive products, I recommend
MiSTer Addons, run by Porkchop Express.
In Europe I recommend
Ultimate MiSTer, run by Ricardo Saraiva out of Portugal.
Good communications and service. Full setups from around
€500 excluding VAT.
For parts and accessories in the UK, I recommend
MiSTer FPGA
run by Nat.
| Feature | Ultimate MiSTer PRO | MiSTer Addons Bundle Analog I/O | Ultimate MiSTer PRO DUAL RAM | MiSTer Addons Bundle Digital I/O |
|---|---|---|---|---|
| RAM (MB) | 1 x 128 | 1 x 128 | 2 x 128 | 2 x 128 |
| Analog sound out | ✓ | ✓ | - | - |
| Digital sound out | ✓ | ✓ | ✓ | ✓ |
| Audio/tape in | ✓ | ✓ | ✓ | ✓ |
| Built-in VGA out | ✓ | ✓ | - | - |
| HDMI out | ✓ | ✓ | ✓ | ✓ |
| USB ports | 7 | 7 | 7 | 7 |
| Cooling | Fan | Heatsink | Fan | Heatsink |
| Power button | - | - | ✓ | ✓ |
The main difference between the Ultimate MiSTer and MiSTer Addons prebuilt machines is the cooling method:
I've got an Ultimate MiSTer (no dual RAM) with a Noctua fan. Noise is low, dust intake is minor.
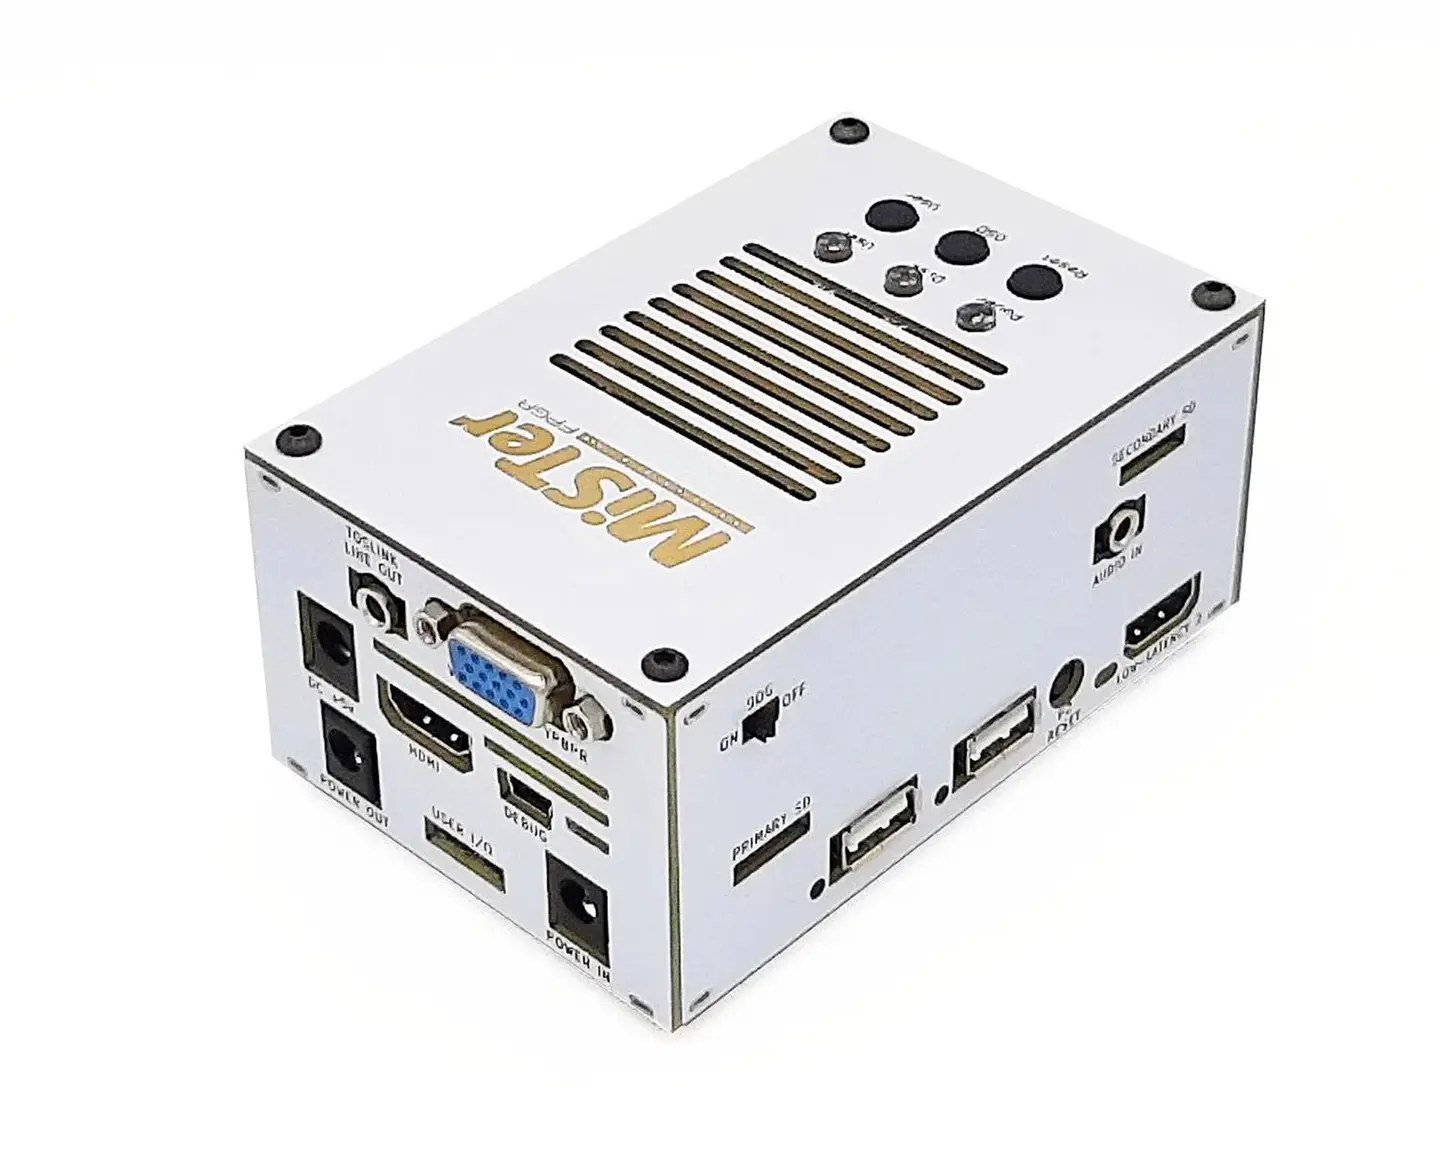
Ultimate MiSTer Pro with active cooling
Dual RAM doesn't double the total amount of RAM, instead it
increases the bandwidth when moving large chunks of memory.
Extremely few cores benefit from or require dual RAM.
Dual RAM requires the digital I/O card, which lacks analog
sound out and built-in VGA output.
If you don't need or mind this, then dual RAM is more future
proof.
For Ultimate MiSTer PRO models I recommend upgrading the following:
The optional RTC lets cores such as the Amiga, C64 (GEOS), and
AO486 PC always keep time.
Files written to the SD card are always correctly time
stamped, and startup time is reduced when there's no Internet.
Ultimate MiSTer installs the RTC for you. With MiSTer Addons
you'll need to install it yourself.
The operating system (OS), cores, games, and various user data is
stored on a microSD card.
With prebuilt MiSTers, the card comes pre-installed with the
essentials.
I recommend SanDisk Ultra, speed class 10/U1 or higher.
| GB | Size fits |
|---|---|
| OS, cores, and scripts | |
| 128 | Enough for most essential arcade, console, and retro computer games |
| 256 | As an alternative to a USB stick or network-attached storage (NAS) |
| 512 | As an alternative to a USB stick or NAS |
My card contains:
This takes up 160 GB in total.
Add a USB flash drive for larger collections. Add a NAS for
CD-ROM games (e.g. PlayStation).
An arcade style controller is a must for arcade games.
It's also essential for fighting games, which often require six to
eight buttons.
For console games, an 8Bitdo gamepad is a good choice.
Another option for consoles and home computers is to use original
peripherals with an adapter.
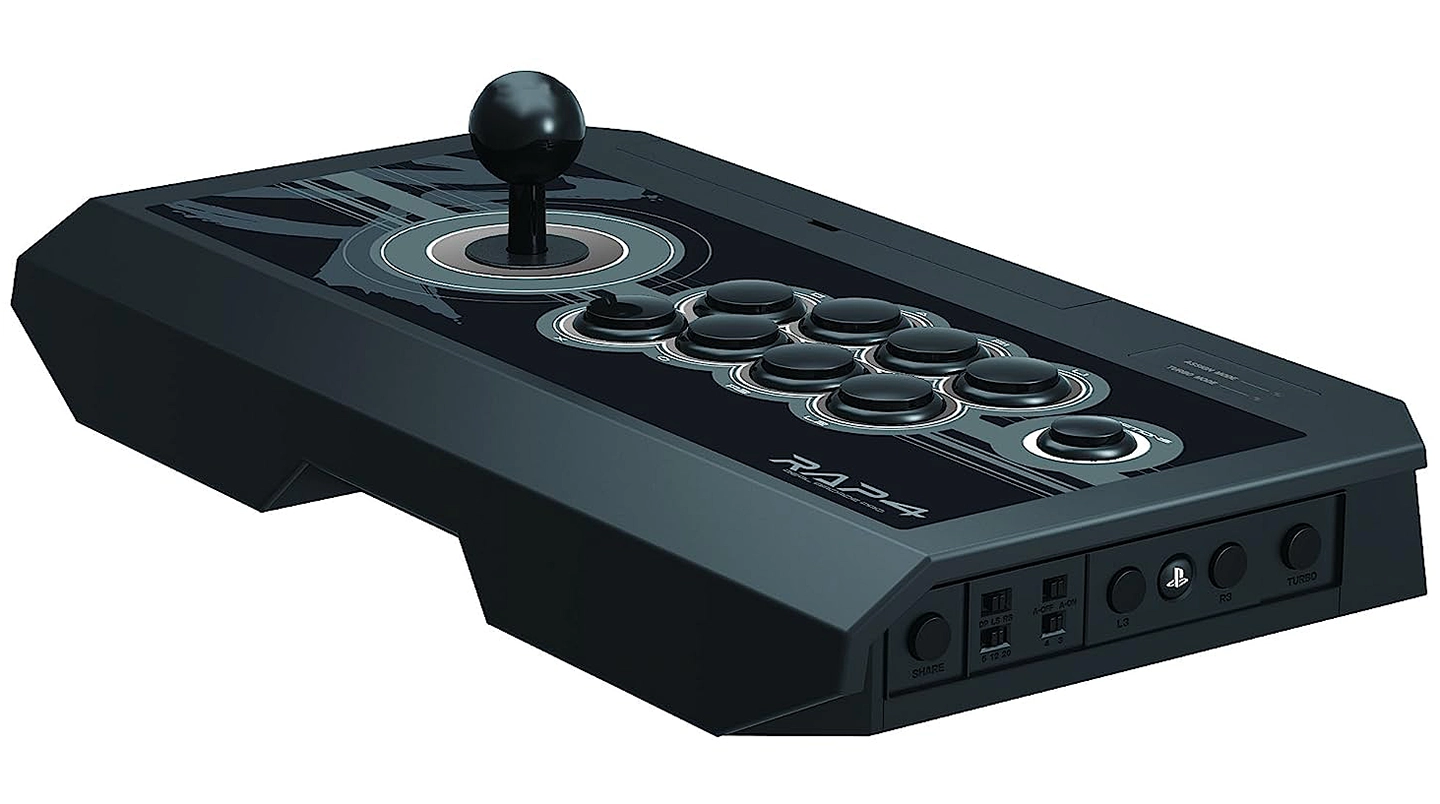
Hori Real Arcade Pro 4 Kai controller
Look for controllers with ≤5 ms of latency in this
sheet:
MiSTer Controller Latency Comparison
Here are some examples (ms):
Qanba Obsidian controller
Hori RAP4 Kai controller
8BitDo Arcade Stick
Logitech Dual Action gamepad
| Feature | Reflex Adapt | DaemonBite | SNAC/SNAX | BlisSTer |
|---|---|---|---|---|
| Connection | USB | USB | User Port | Board install |
| Added lag (ms) | <~1 | <~1 | 0 | <~1 |
| General support | ✓ | ✓ | (✓) | - |
| Standard cores | ✓ | ✓ | ✓ | ✓ |
| Works in menu | ✓ | ✓ | - | ✓ |
| Cross core compatible | ✓ | ✓ | - | ✓ |
| Multiple controllers | ✓ | ✓ | (✓) | ✓ |
| Standard voltage | ✓ | ✓ | - | ✓ |
| Input checker display | ✓ | - | - | - |
| PSX rumble | ✓ | - | ✓ | ✓ |
| N64 rumble | ✓ | - | ✓ | ✓ |
| Lightguns | G-Con 1 | - | ✓ | NES Zapper |
| Paddles | Jogcon | - | (✓) | ✓ |
The Reflex Adapt from MiSTer Addons is the most flexible adapter.
New controllers and features are continually supported via the
Update All script (more on Update All later).
Each original controller requires its own adapter cable, such as the
DB9 (joystick) to HDMI (Reflex Adapt) shown below.
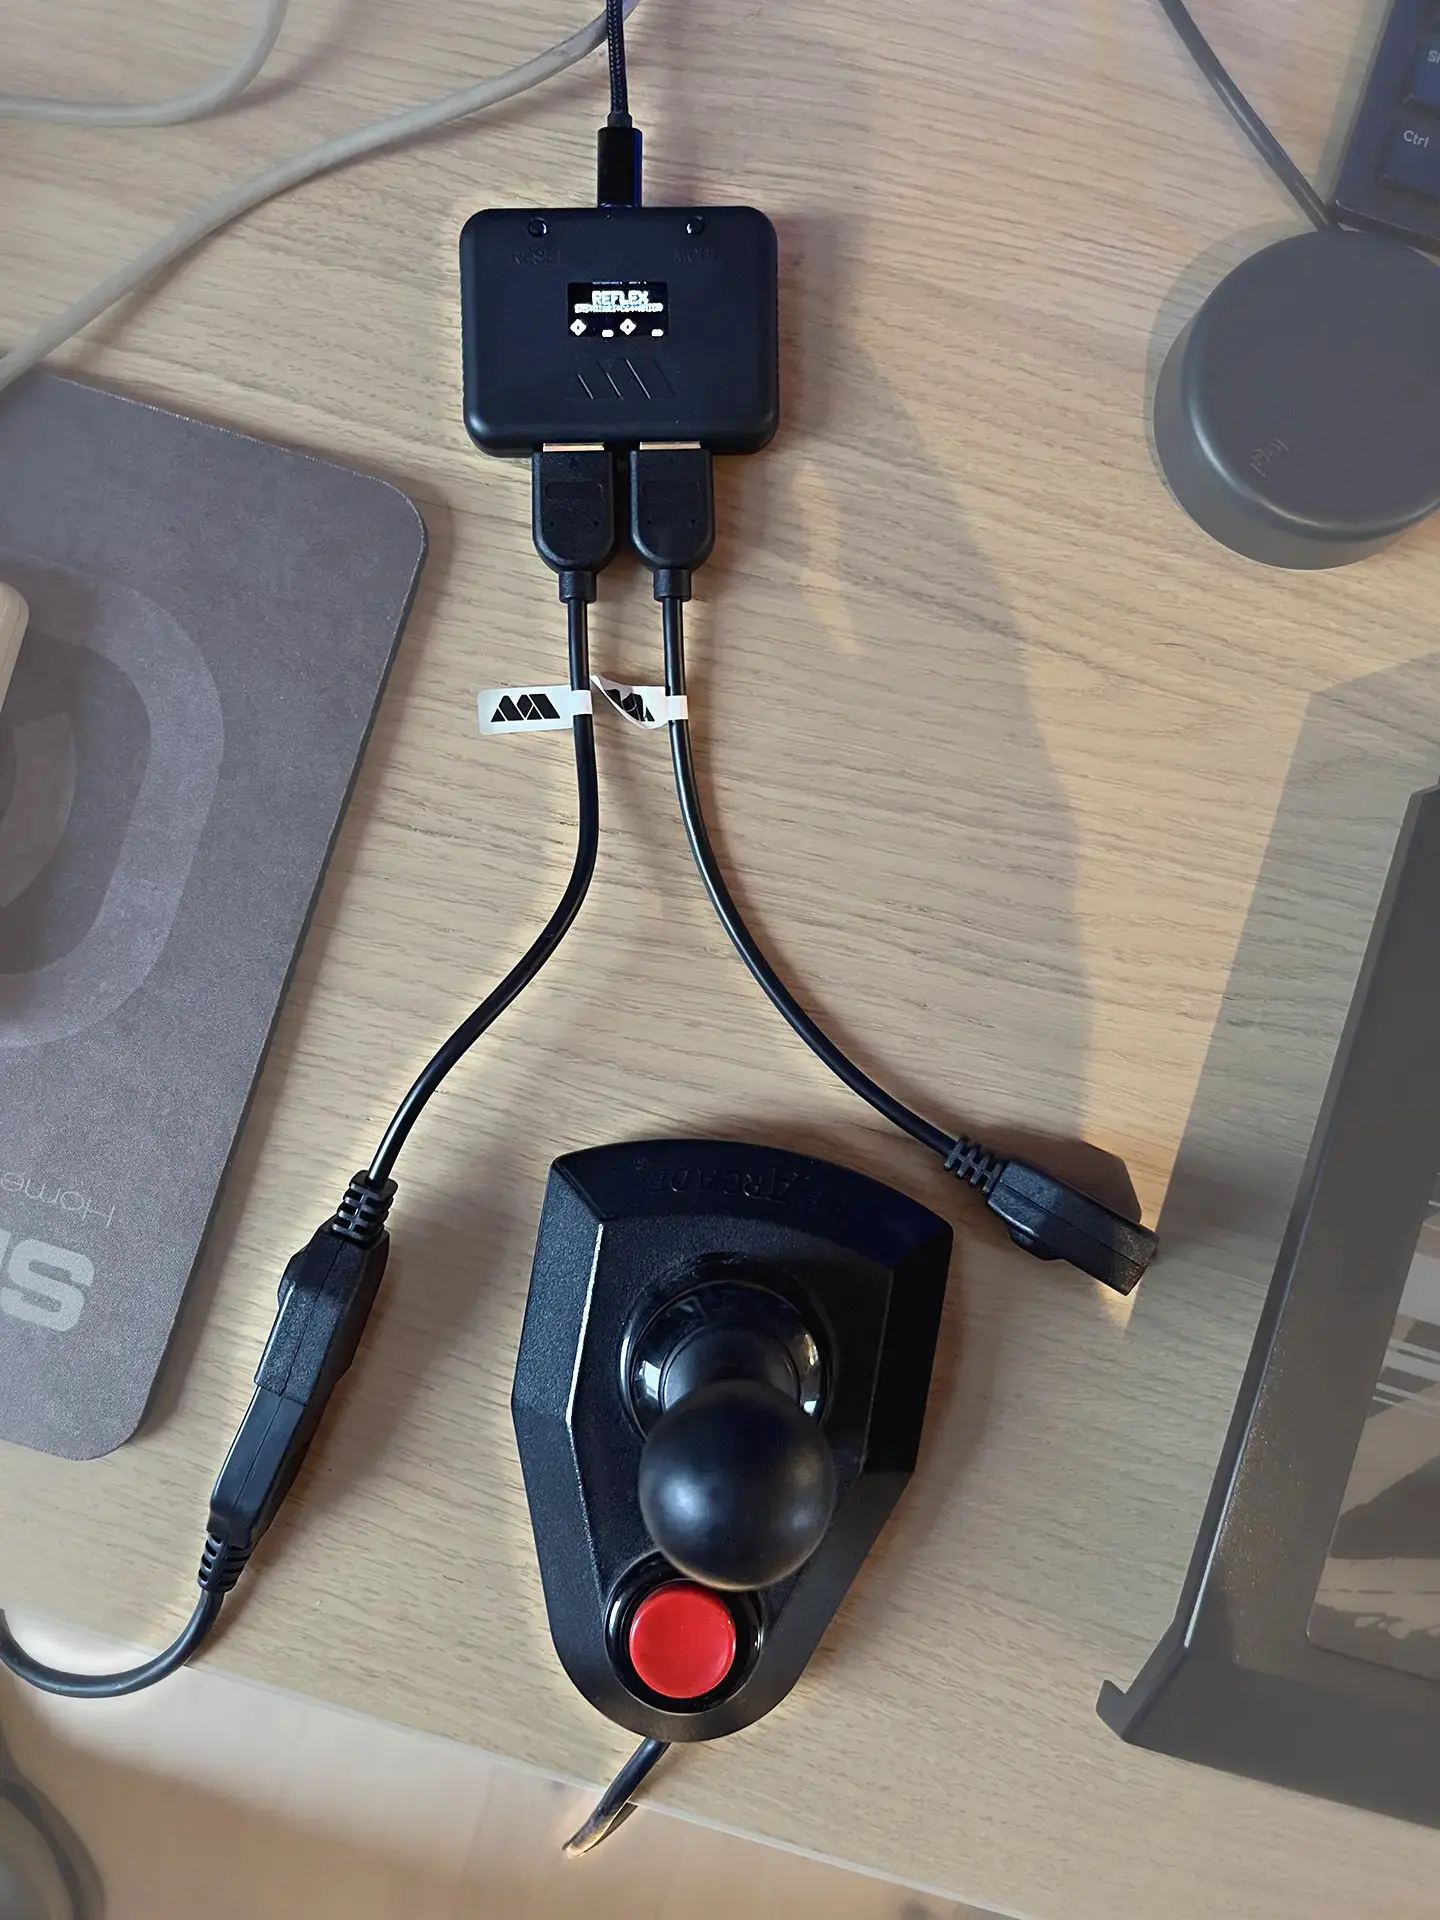
Reflex Adapt with The Arcade joystick from 1987
SNAC or SNAX, the latter an updated PlayStation accessories
version, is the fastest adapter.
It interacts directly with the FPGA board, without going
through USB first.
As the comparison table shows, there are pros and cons to all
adapters.
In practice, the latency differences here are negligible,
while compatibility and functionality are more important.
MiSTer uses a lightweight distribution of Linux that defaults to US
PC keyboard layout. This affects special characters with non-US and
Mac keyboards.
I use a cheap Dell KB216 US International keyboard for my MiSTer.
After initial setup, you can remote edit files from your PC/Mac, or
you can add the keyboard layout in Linux, if you're proficient in
the terminal.
Keymaps for menus and games can easily be re-mapped from the MiSTer
menu's system settings.
Cores like the Commodore Amiga and the AO486 PC require a
mouse. It's also an alternative to spinners/paddles in arcade
games like Arkanoid.
Most wired mice and wireless mice with a dongle will work. I
use a Logictech M-series mouse with a dongle.
The dongle is usually placed in the MiSTer's front-facing USB
port.
MiSTers with the analog I/O board feature a 3.5 mm analog audio output ("mini-jack") for connecting PC speakers.
More later on how to adjust gain staging to avoid distortion.
Logitech Z407 is a cost-effective solution for deep and powerful
game sound.
It consists of two speakers (20 cm), a mini subwoofer (24 cm), and a
remote for volume adjustment.
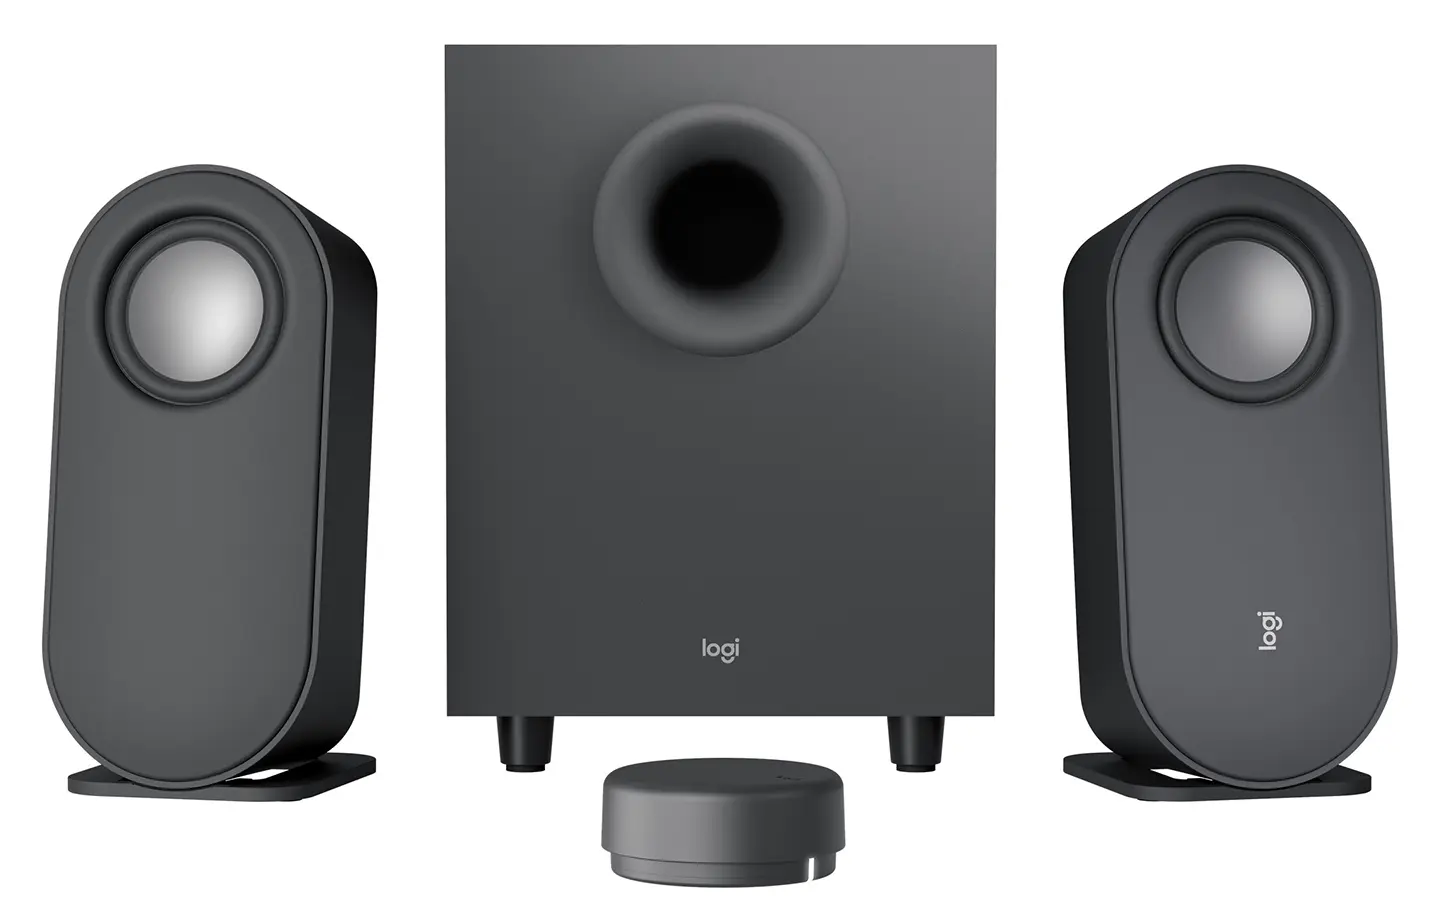
Logitech Z407 2.1 sound system
The analog I/O board can also output digital sound from the
same output via Mini TOSLink.
The digital I/O board only outputs digital sound, either Mini
TOSLink or TOSLink.
The receiving end must synchronize to 48 kHz to avoid a sample
rate mismatch.
For now, this guide only covers digital displays. More about connecting a CRT to your MiSTer in the official documentation.
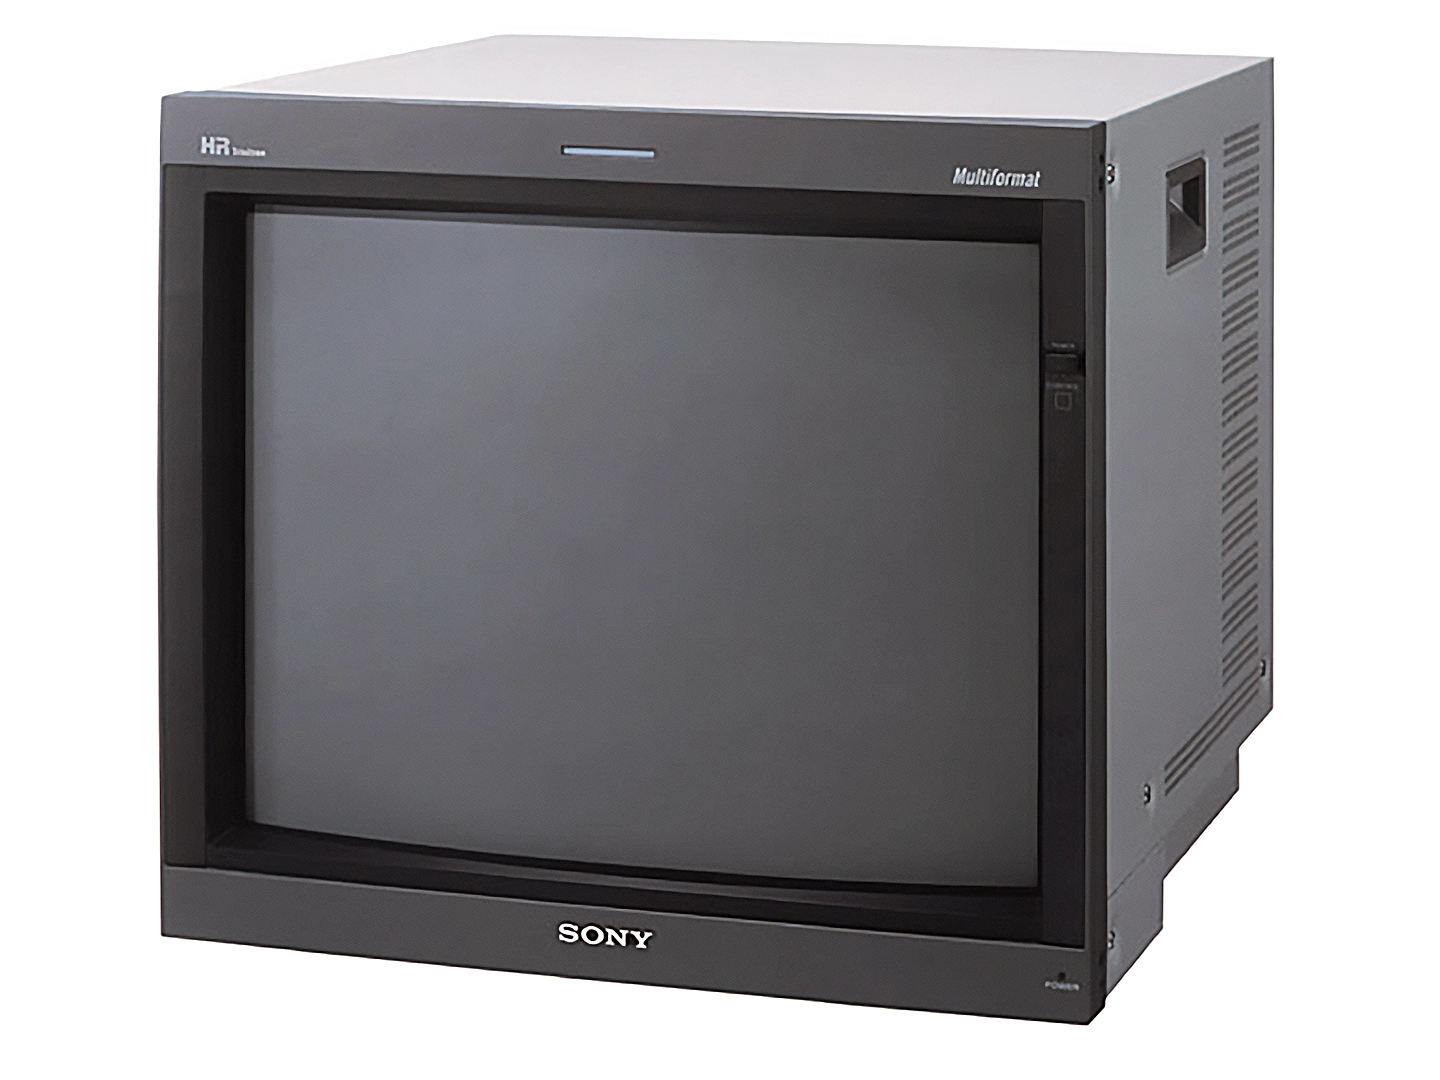
Sony PVM 20L5 20" CRT monitor
| Category | WUXGA | FHD | WQHD | UHD | WQXGA | UXGA | XGA |
|---|---|---|---|---|---|---|---|
| Resolution | 1920 x 1200 | 1920 x 1080 | 2560 x 1440 | 3840 x 2160 | 2560 x 1600 | 1600 x 1200 | 1024 x 768 |
| Also known as | 1080p | 1440p | 4K | ||||
| Aspect ratio | 16:10 | 16:9 | 16:9 | 16:9 | 16:10 | 4:3 | 4:3 |
| Black borders | Medium | Large | Large | Large | Large | None / small | None / small |
| Inches | 24.1" | 23.8" | 27" | ≥42" | 27" | 20.1" | 15" |
| Panel | IPS | IPS | IPS | OLED | IPS | VA / IPS | VA / IPS |
| Panel quality | Good | Good | Good | Very good | Good | Medium | Low |
| HDMI without adapter | ✓ | ✓ | ✓ | ✓ | ✓ | - | - |
| VRR | (✓) | (✓) | (✓) | (✓) | (✓) | - | - |
| Can pivot | (✓) | (✓) | (✓) | - | (✓) | (✓) | (✓) |
| Avoids pixel repetition | ✓ | ✓ | - | - | - | ✓ | ✓ |
| Sharp, no crop 5x scaling | ✓ | - | - | - | - | ✓ | - |
| Mr. RePlay score (1-10) | 9 | 6 | 5 | 5 | 5 | 4 | 3 |
1080p is a popular format with PCs, but WUXGA generally has better
scaling and smaller black borders with MiSTer.
See chapter 20 for aspect
ratio and scaling examples of WUXGA vs. 1080p.
Three of the best WUXGA displays are:
Read
my reviews.
Picture adjustments for all three can be found at the end of this
guide.
Eizo 2456 FlexScan display
More is sometimes less when it comes to matching a display to
the MiSTer.
1440p and 4K resolutions exceed the MiSTer's maximum
horizontal resolution of 2,048 pixels.
To get a picture you'll need to lower resolution/pixel clock,
and enable pixel repetition.
This results in blur and, since the 16:9 aspect ratio is
inferior to WUXGA's 16:10, larger black borders.
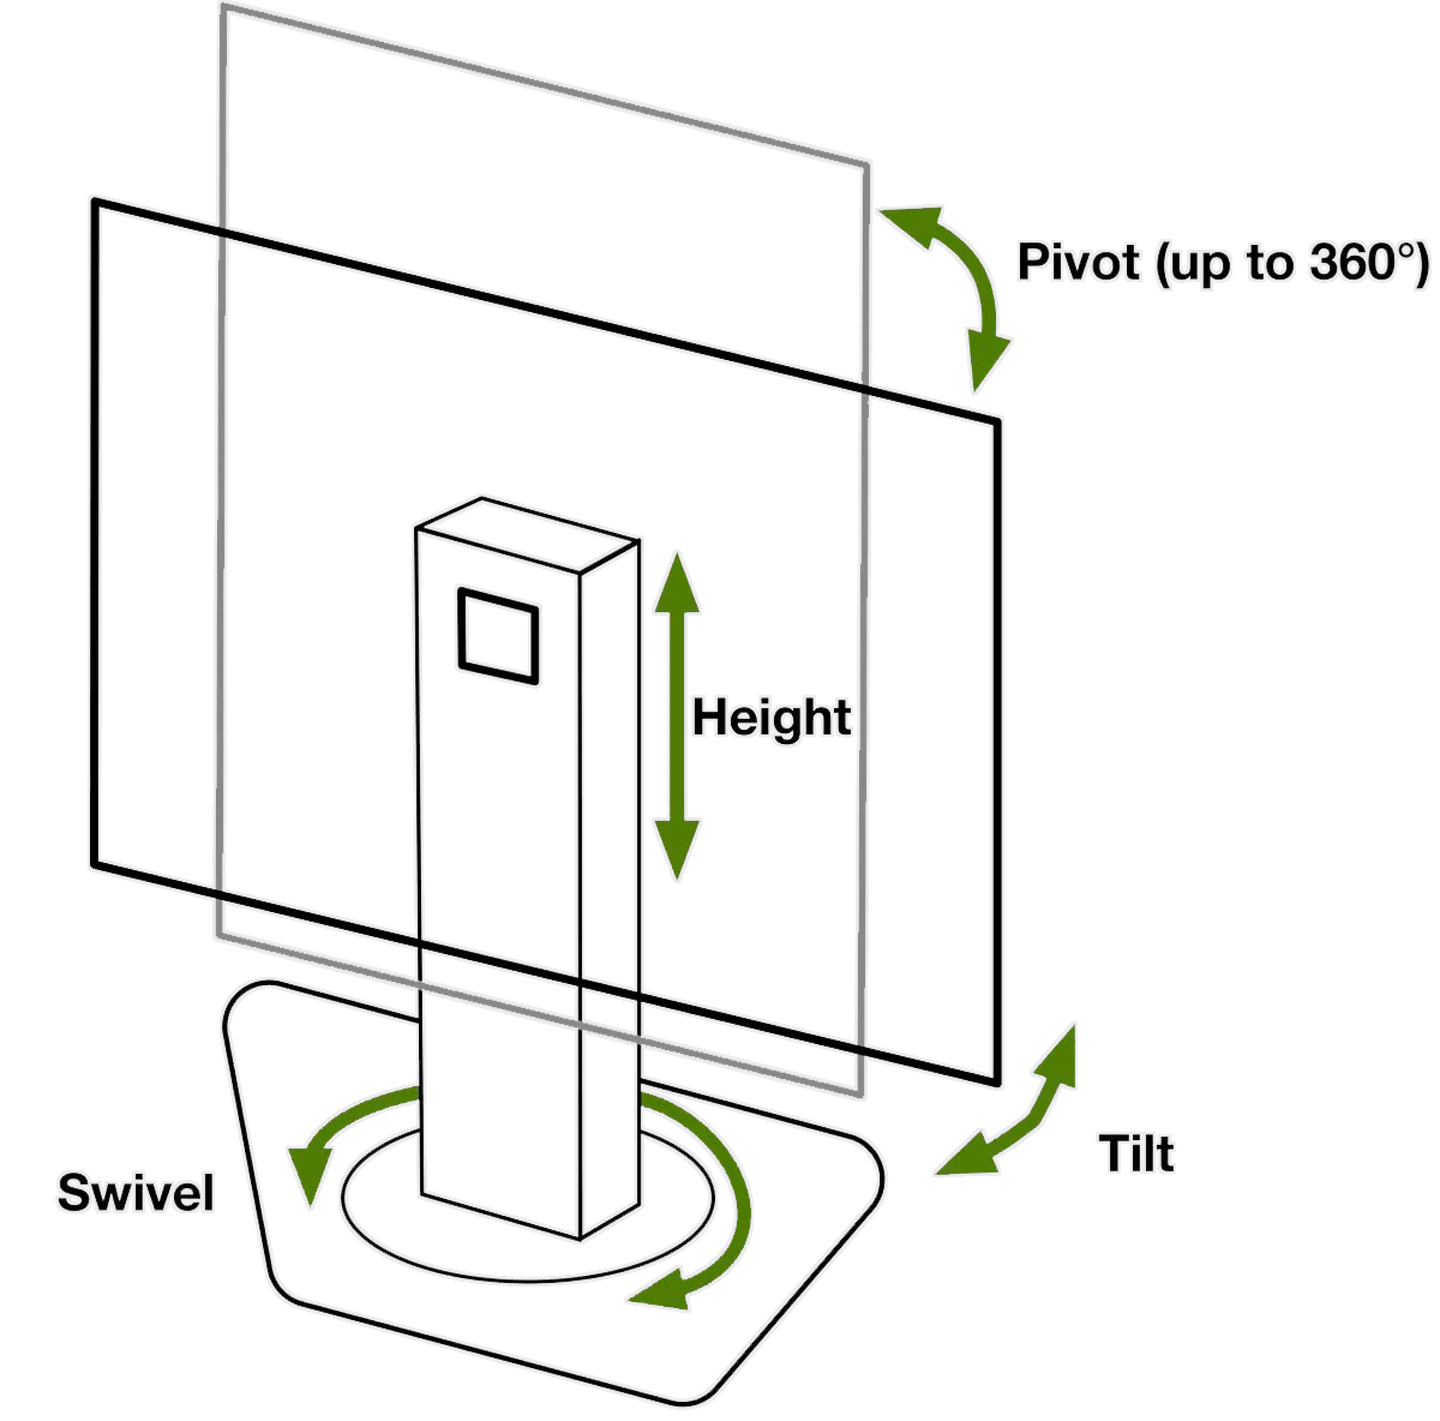
Many arcade games require the display to be pivoted 90 degrees in
either direction.
Some displays can't pivot at all, some need tools, some can only
pivot in one direction.
Your display should work with a wide range of vertical refresh
rates.
Check the tech specs for e.g. "Digital Signal Frequency: 48~75
Hz (V)."
A few cores, like the WonderSwan, go above 75 Hz. They run in compatibility mode on ≤75 Hz displays.
The MiSTer's maximum resolution is 2048 x 1536 pixels or a pixel
clock of 210 MHz.
A High Speed HDMI 1.4 cable works with all computer monitors without
VRR.
You'll need a HDMI 2.1 cable to support HDMI Forum VRR, ARC or ALLM.
A HDMI 2.1 cable is the go-to choice for most TVs and monitors.
If your display supports FreeSync or VESA Adaptive-Sync, you'll need a USB-powered HDMI to DisplayPort cable to enable VRR. See chapter 19 section XIV for more about VRR.
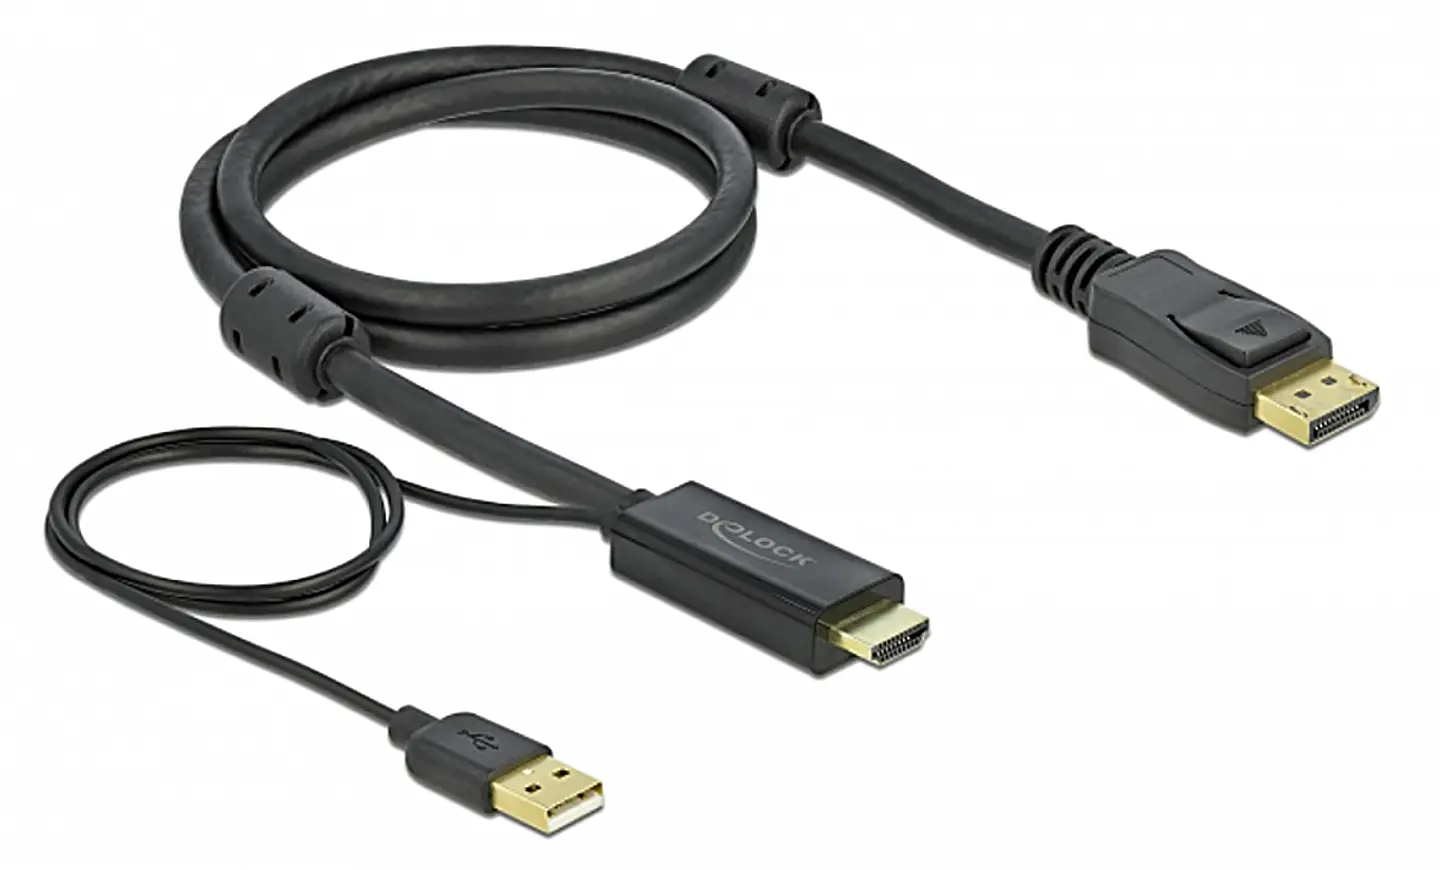
Delock USB-powered HDMI to DisplayPort
I recommend buying a Consumer Electronics Control (CEC)
blocker to put on one end of your HDMI cable.
It's a small adapter that blocks faulty control signals sent
from the MiSTer, by disconnecting pin 13.
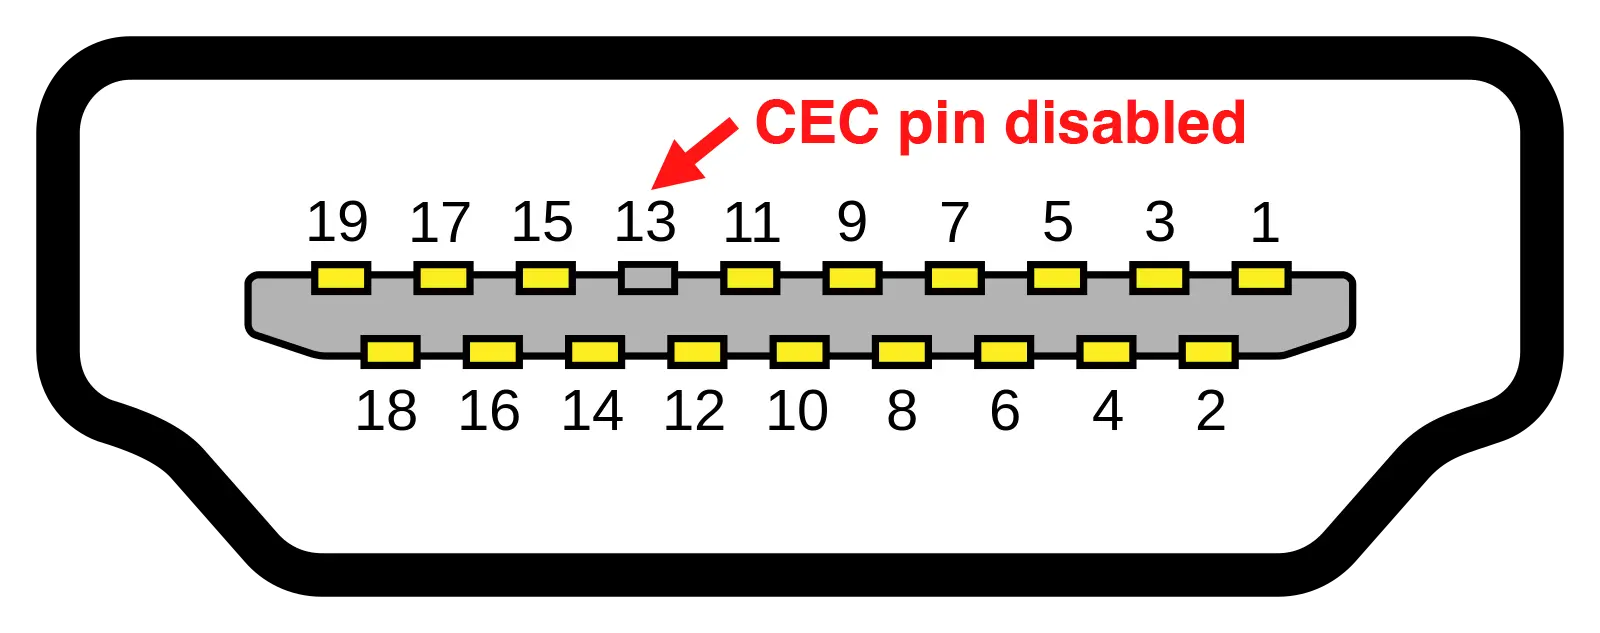
CEC-less HDMI adapter
Now on to the basic installation!
Use a wired USB keyboard for navigation. Here are the most important shortcuts:
| F12 | Show / hide the menu |
| Esc | Go back in the menu |
| Return / Enter | Select |
| ↑ / ↓ | Navigate options |
| ← / → | Switch subpages (in certain menus) |
| F1 | Cycle through menu wallpapers |
| F2 | Hide /show core dates |
| F9 | Go to Linux terminal (F12 to return) |
| F11 | Pair Bluetooth device |
| Alt+F12 | Core select menu shortcut |
| Win+PrtScrn | Save scaled screenshot |
| Shift+Win+PrtScrn | Save raw screenshot |
theypsilon's Update All script can collectively update your MiSTer's
firmware, OS, cores, scripts, and arcade ROMs.
If you have a prebuilt MiSTer, Update All may already be installed on
your card.
It takes about 15 minutes the first time. If your MiSTer doesn't connect to the Internet immediately, try a few times.
| 1 Main Distribution Settings | Enabled. Main MiSTer cores from MiSTer-devel |
| 2 JT Cores for MiSTer | Enabled. Cores made by Jotego Team (jtpremium) |
| 3 Coin-Op Collection | Enabled. Cores by Coin-Op Org |
| 4 Other Cores | LLAP, Unofficials, Y/C Builds... |
| 5 Tools & Scripts | Names TXT, Arcade Organizer, Scripts... |
| 6 Extra Content | ROMs, BIOS & Wallpapers |
| 7 Analogue Pocket | Firmware Update & Backups |
| 8 Patrons Menu | Taito Spinner, Themes, etc... [yyyy.mm.dd] |
| 9 System Options | _ |
Select
SAVE
from the menu, then
EXIT and RUN UPDATE ALL.
Use Update All regularly, e.g. once a week or once a month at least.
bgm
plays background music on your MiSTer.
Download C64 chiptunes and a boot sound from the
Vault.
Place music and the boot sound in the folder
/media/fat/music/
and restart the MiSTer.
favorites
is an essential script for creating shortcuts to your favorite
arcade games and other cores.
You can also rename favorites, largely negating the need for
Names.txt mentioned in
chapter 13, section II, point 5.
migrate_sd, available in the Vault,
lets you backup your entire SD card. Requires a USB card reader and an equal or larger sized target card.
Disconnect USB sticks and hard disks from your MiSTer to eliminate the risk of overwriting the wrong device.
Format the target SD card to ExFat on your PC/Mac, then connect it to the MiSTer via the USB card reader, and follow the on-screen instructions.
timezone
adjusts your time zone.
rtc
goes online to set the time and date of the optional Real Time
Clock module.
FileZilla is a beginner-friendly way of transferring files and games from your computer to your MiSTer.
You can now drag & drop files from your computer to your MiSTer.
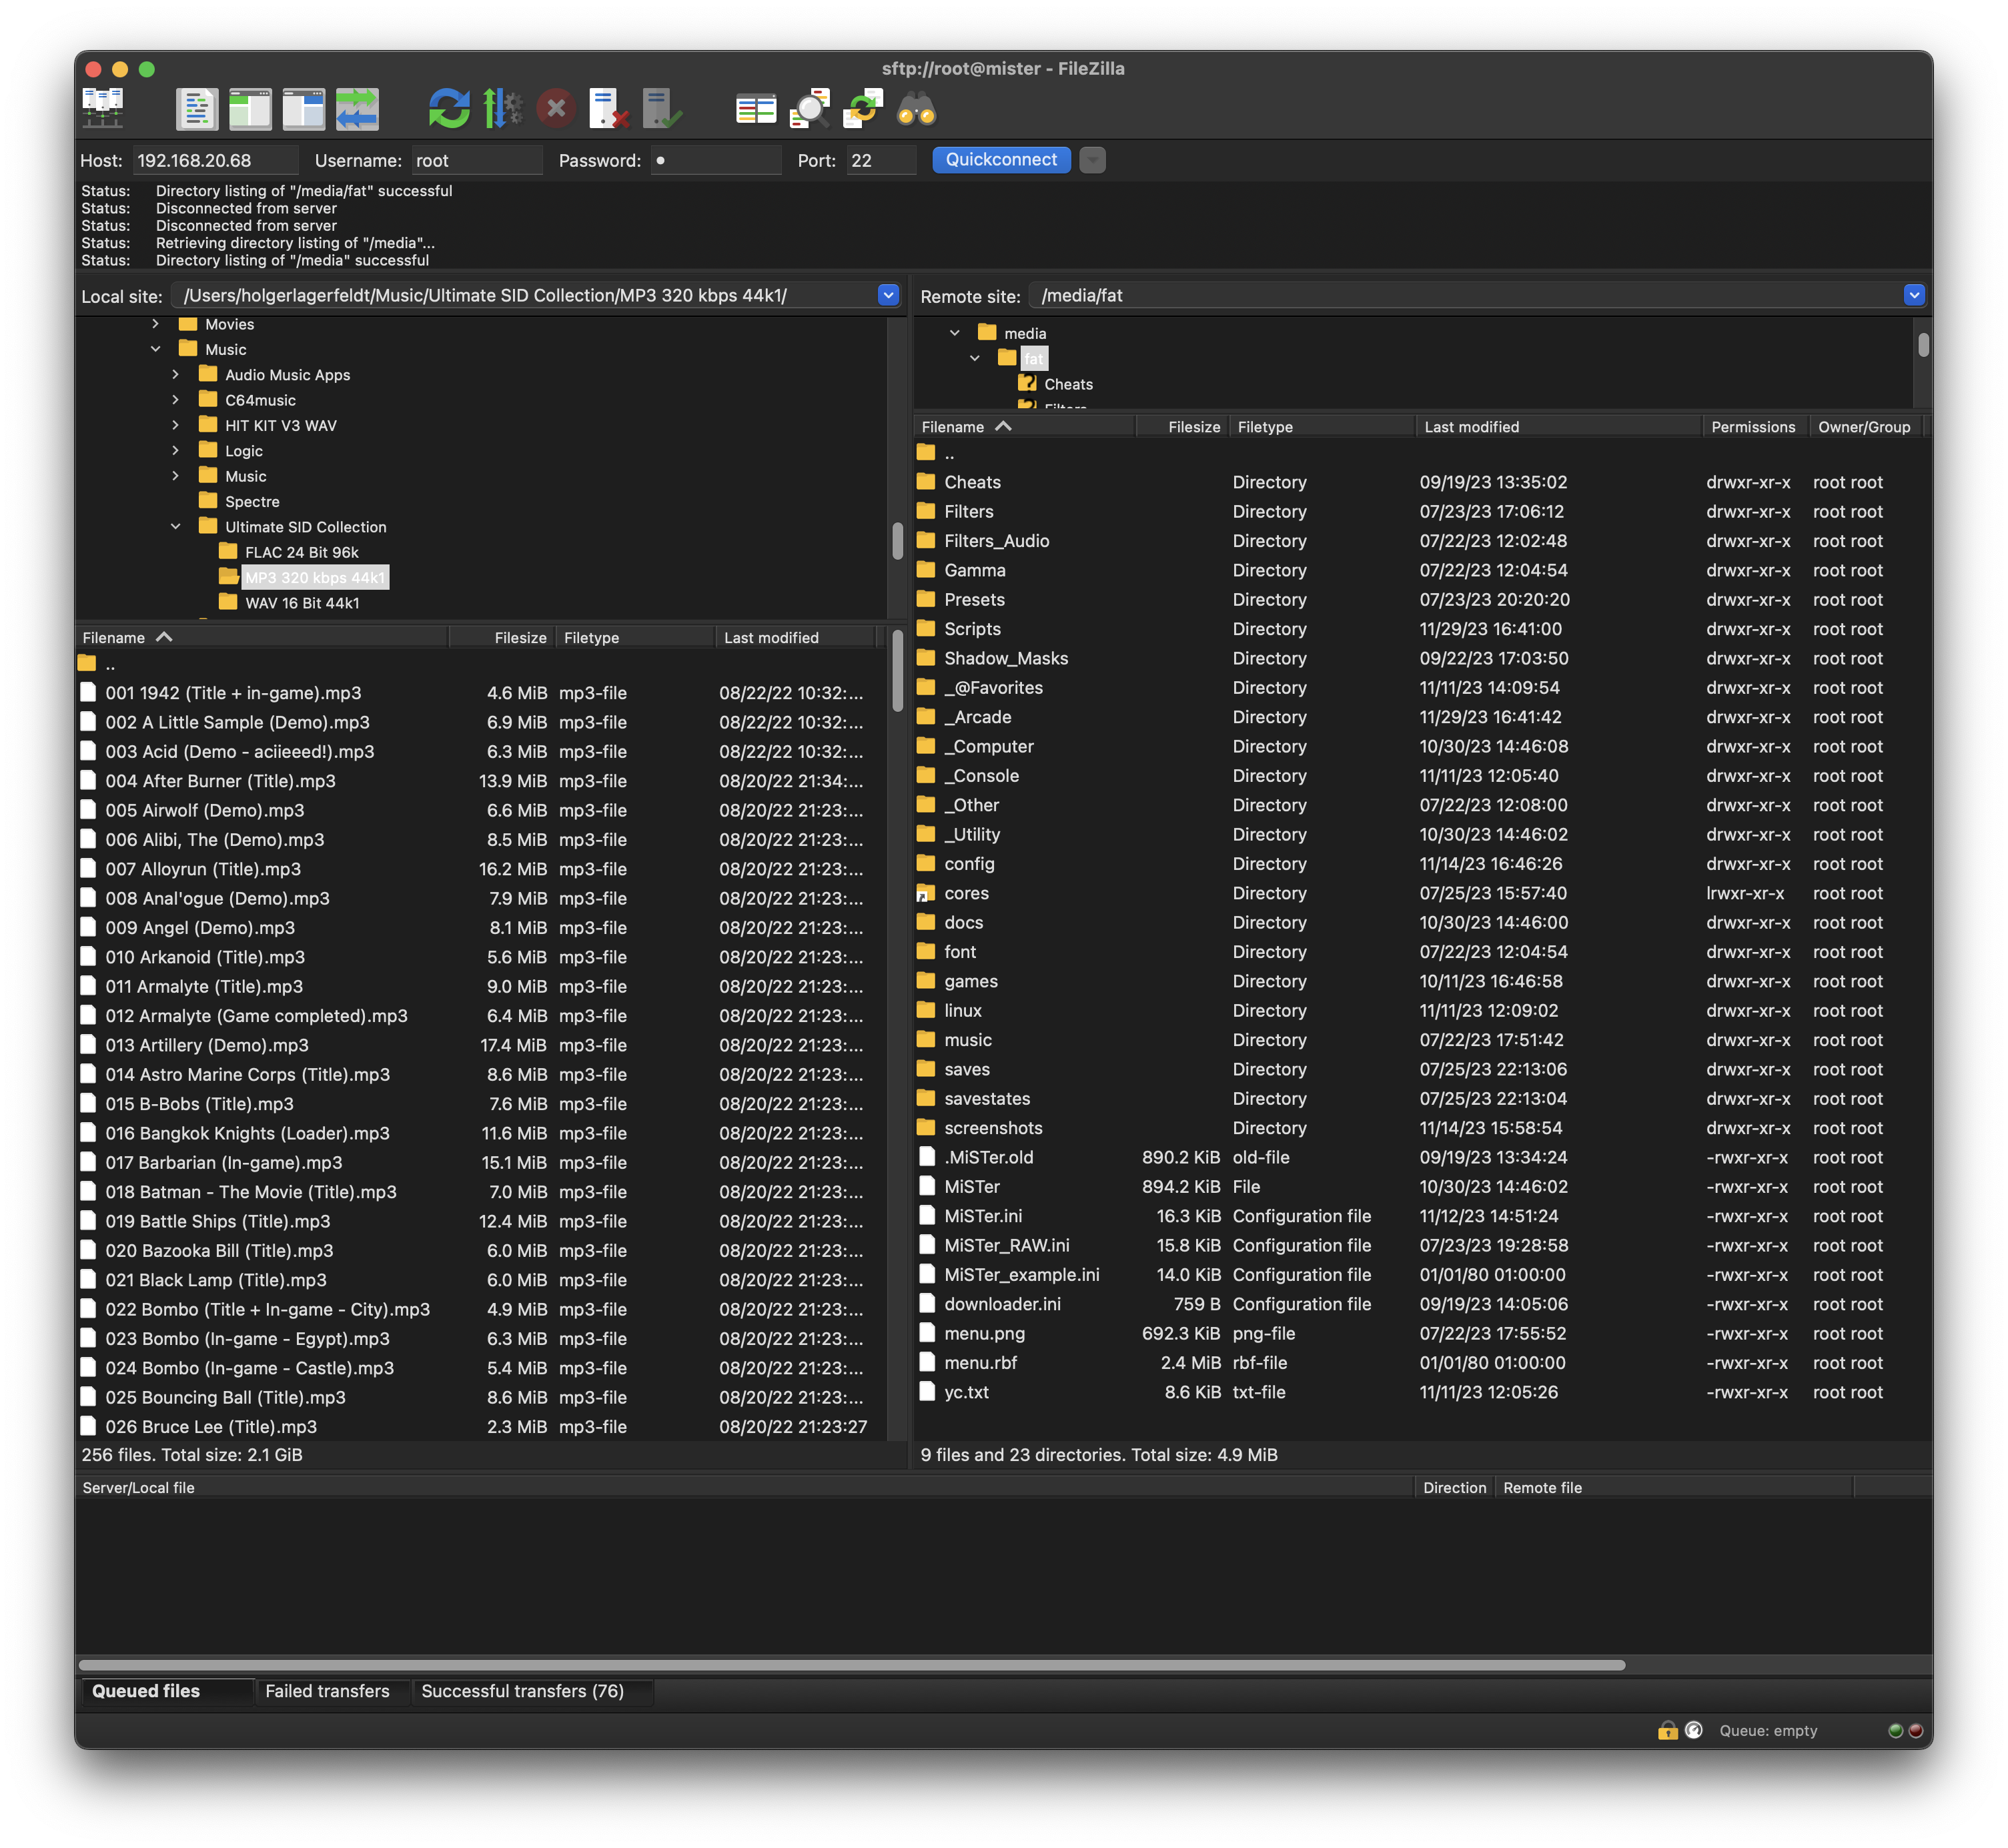
FileZilla - the free FTP solution
If you suddenly find that you can't connect, it's most likely because
your Internet router has dynamically assigned a new IP address to your
MiSTer.
Simply note your MiSTer's new IP address (see step
3 in the FileZilla step-by-step guide) and replace it in FileZilla.
Fix this permanently by having your router assign a static IP address
to your MiSTer, based on its MAC address.
Your MiSTer's MAC address was created randomly during installation,
and can be found in
/media/fat/linux/u-boot.txt
To view this file, first exit to the Linux terminal from the MiSTer
main menu by pressing
F9.
Then log in:
Login: root
Password: 1
After the
/root#
prompt, type the following and press return/enter:
cat /media/fat/linux/u-boot.txt
Your MiSTer's MAC address is unique, but an example output could be:
ethaddr: 06:F2:FD:F0:EC:68
The screen might still appear compressed and blurry. This will be addressed in chapter 19.
You can download my wallpaper below by right-clicking on the image:
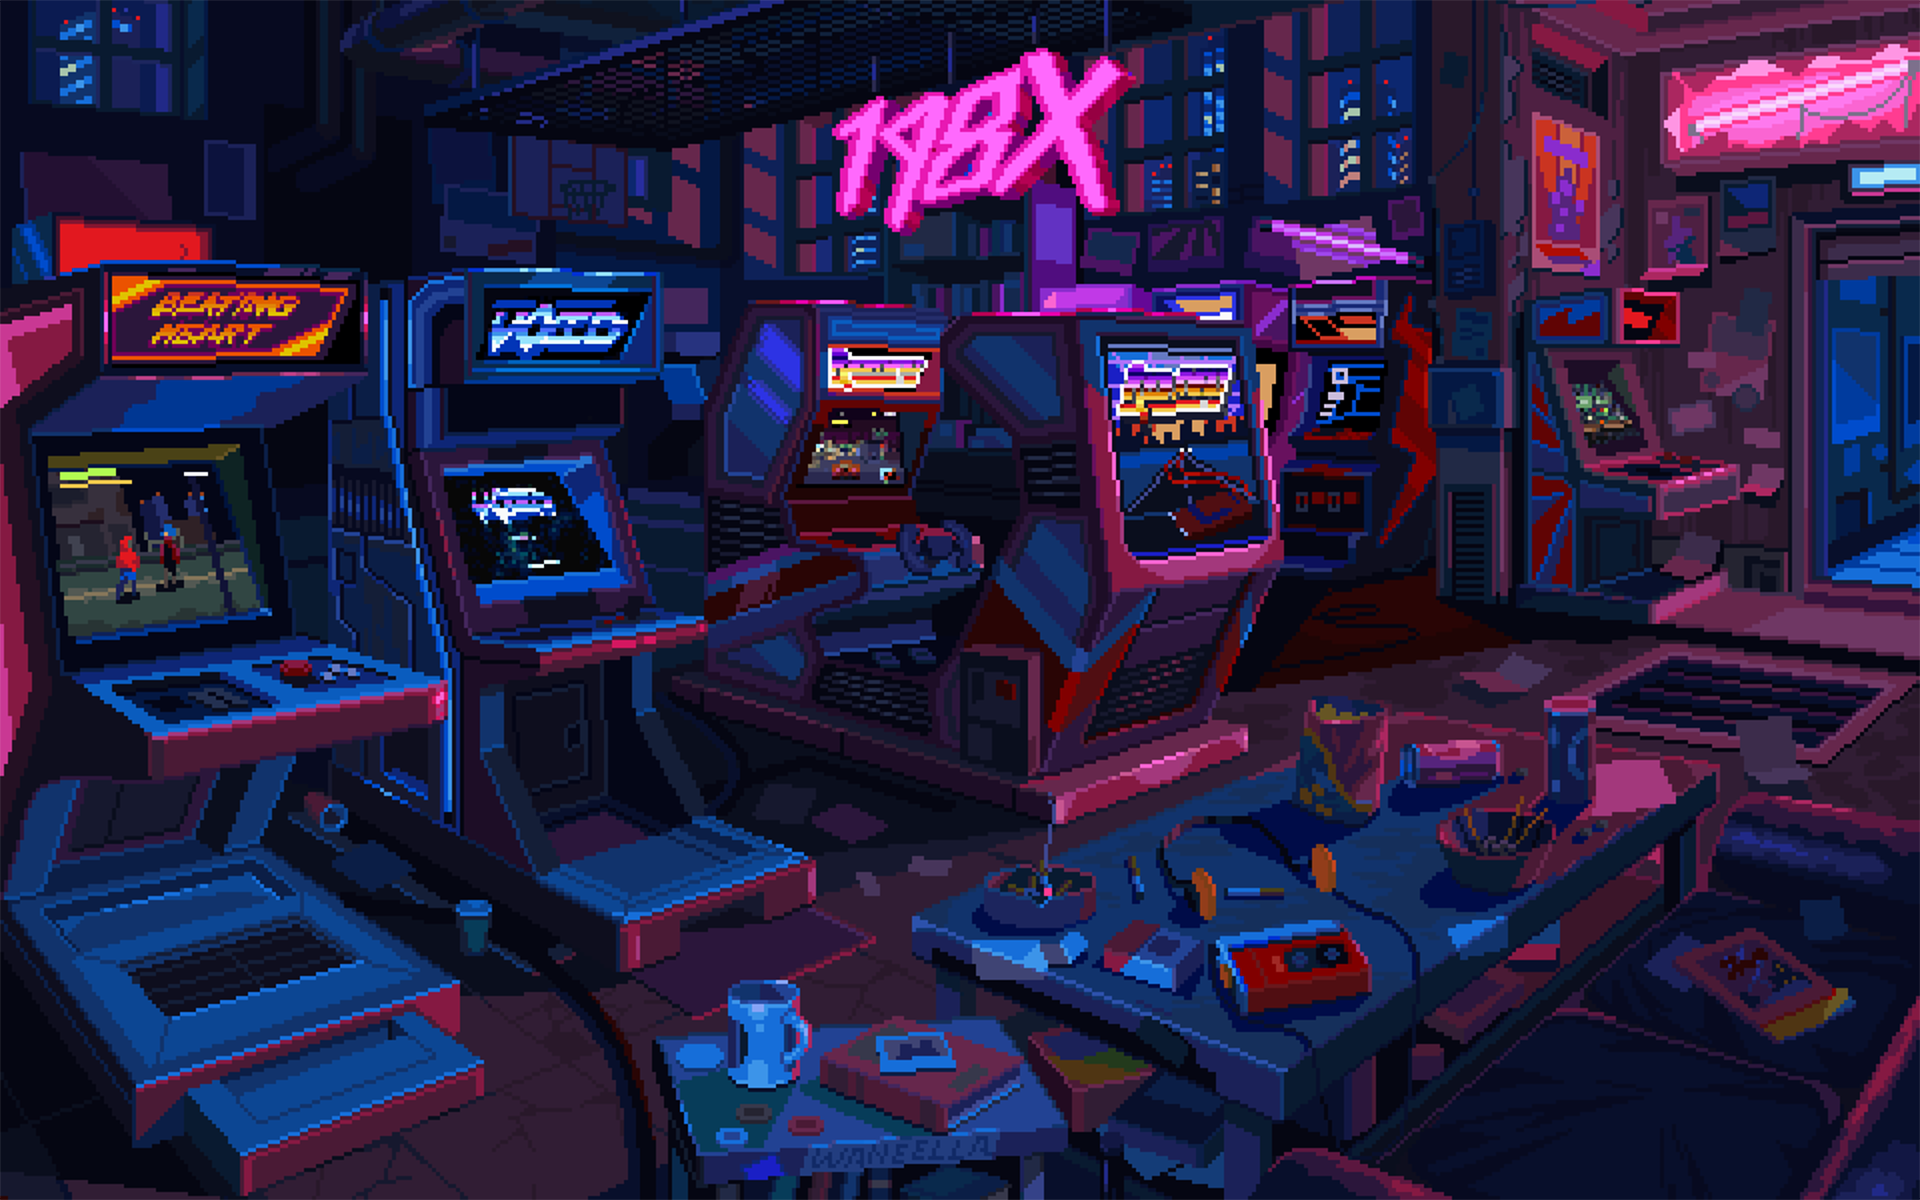
198x © Waneella (1920 x 1200)
There's a global volume level for the machine, and a
subsidiary volume level for each core.
Go to
Misc. Options
and
Global Volume.
Set it one notch below maximum to avoid overdriving the input
on PC speakers.
When you're in the main menu,
Core Volume
sets the level for the boot sound and background music.
Elsewhere,
Core Volume
adjusts the volume level of the individual core.
Configure your controllers in the MiSTer
System Settings
menu under
Define joystick buttons.
This needs to be done per controller since it's based on each
controller's unique ID.
Skip functions your controller doesn't have or you don't wish to
use.
The definitions are automatically applied to all cores, however some
cores need individual remapping, as explained in section II.
Open a core, navigate right for the
System
menu, select
Define [Core] buttons
and define buttons for the core's specific needs.
These are often actions such as shoot, jump, special, insert
coin, and start game.
Core definitions overrule global definitions. Unchanged
buttons still rely on global definitions.
Remember to save your settings.
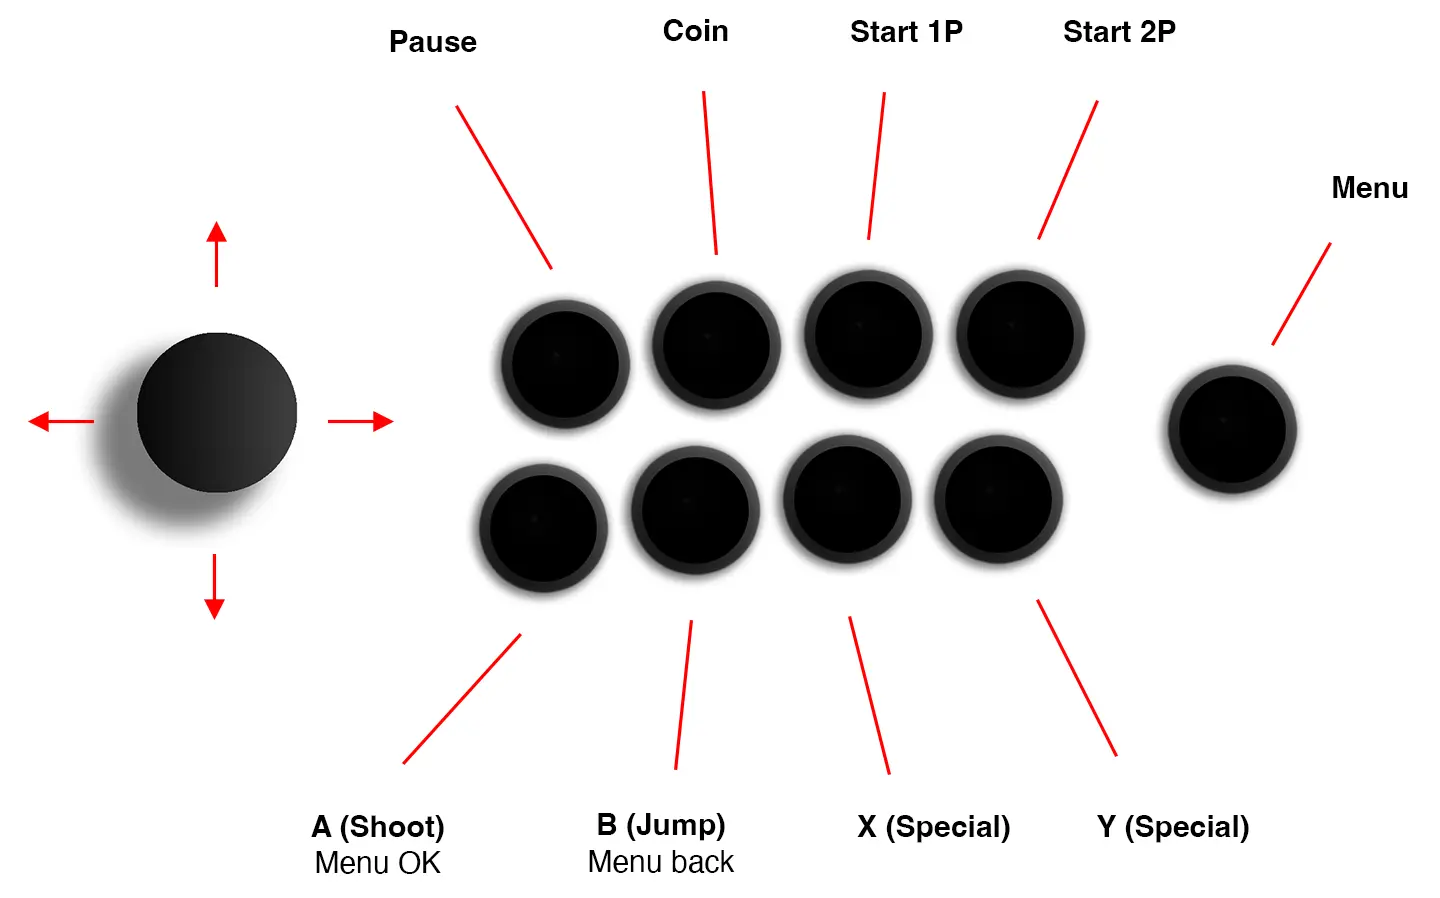
Arcade core controller layout example
Now you get to tweak your MiSTer!
The INI file, or more precisly the MiSTer.ini file, is the global
configuration file.
Intially, here's only a sample file named MiSTer_example.ini in the
root directory.
You can have several INI files to accommodate different setups. Each must have a unique name. Switching between configurations requires a reboot.
The MiSTer has a built-in INI editor.
Here's a quick guide to using the built-in INI editor:
Instead of using the built-in INI editor, you can use Visual Studio Code (VSC) on your computer to remotely edit the INI.
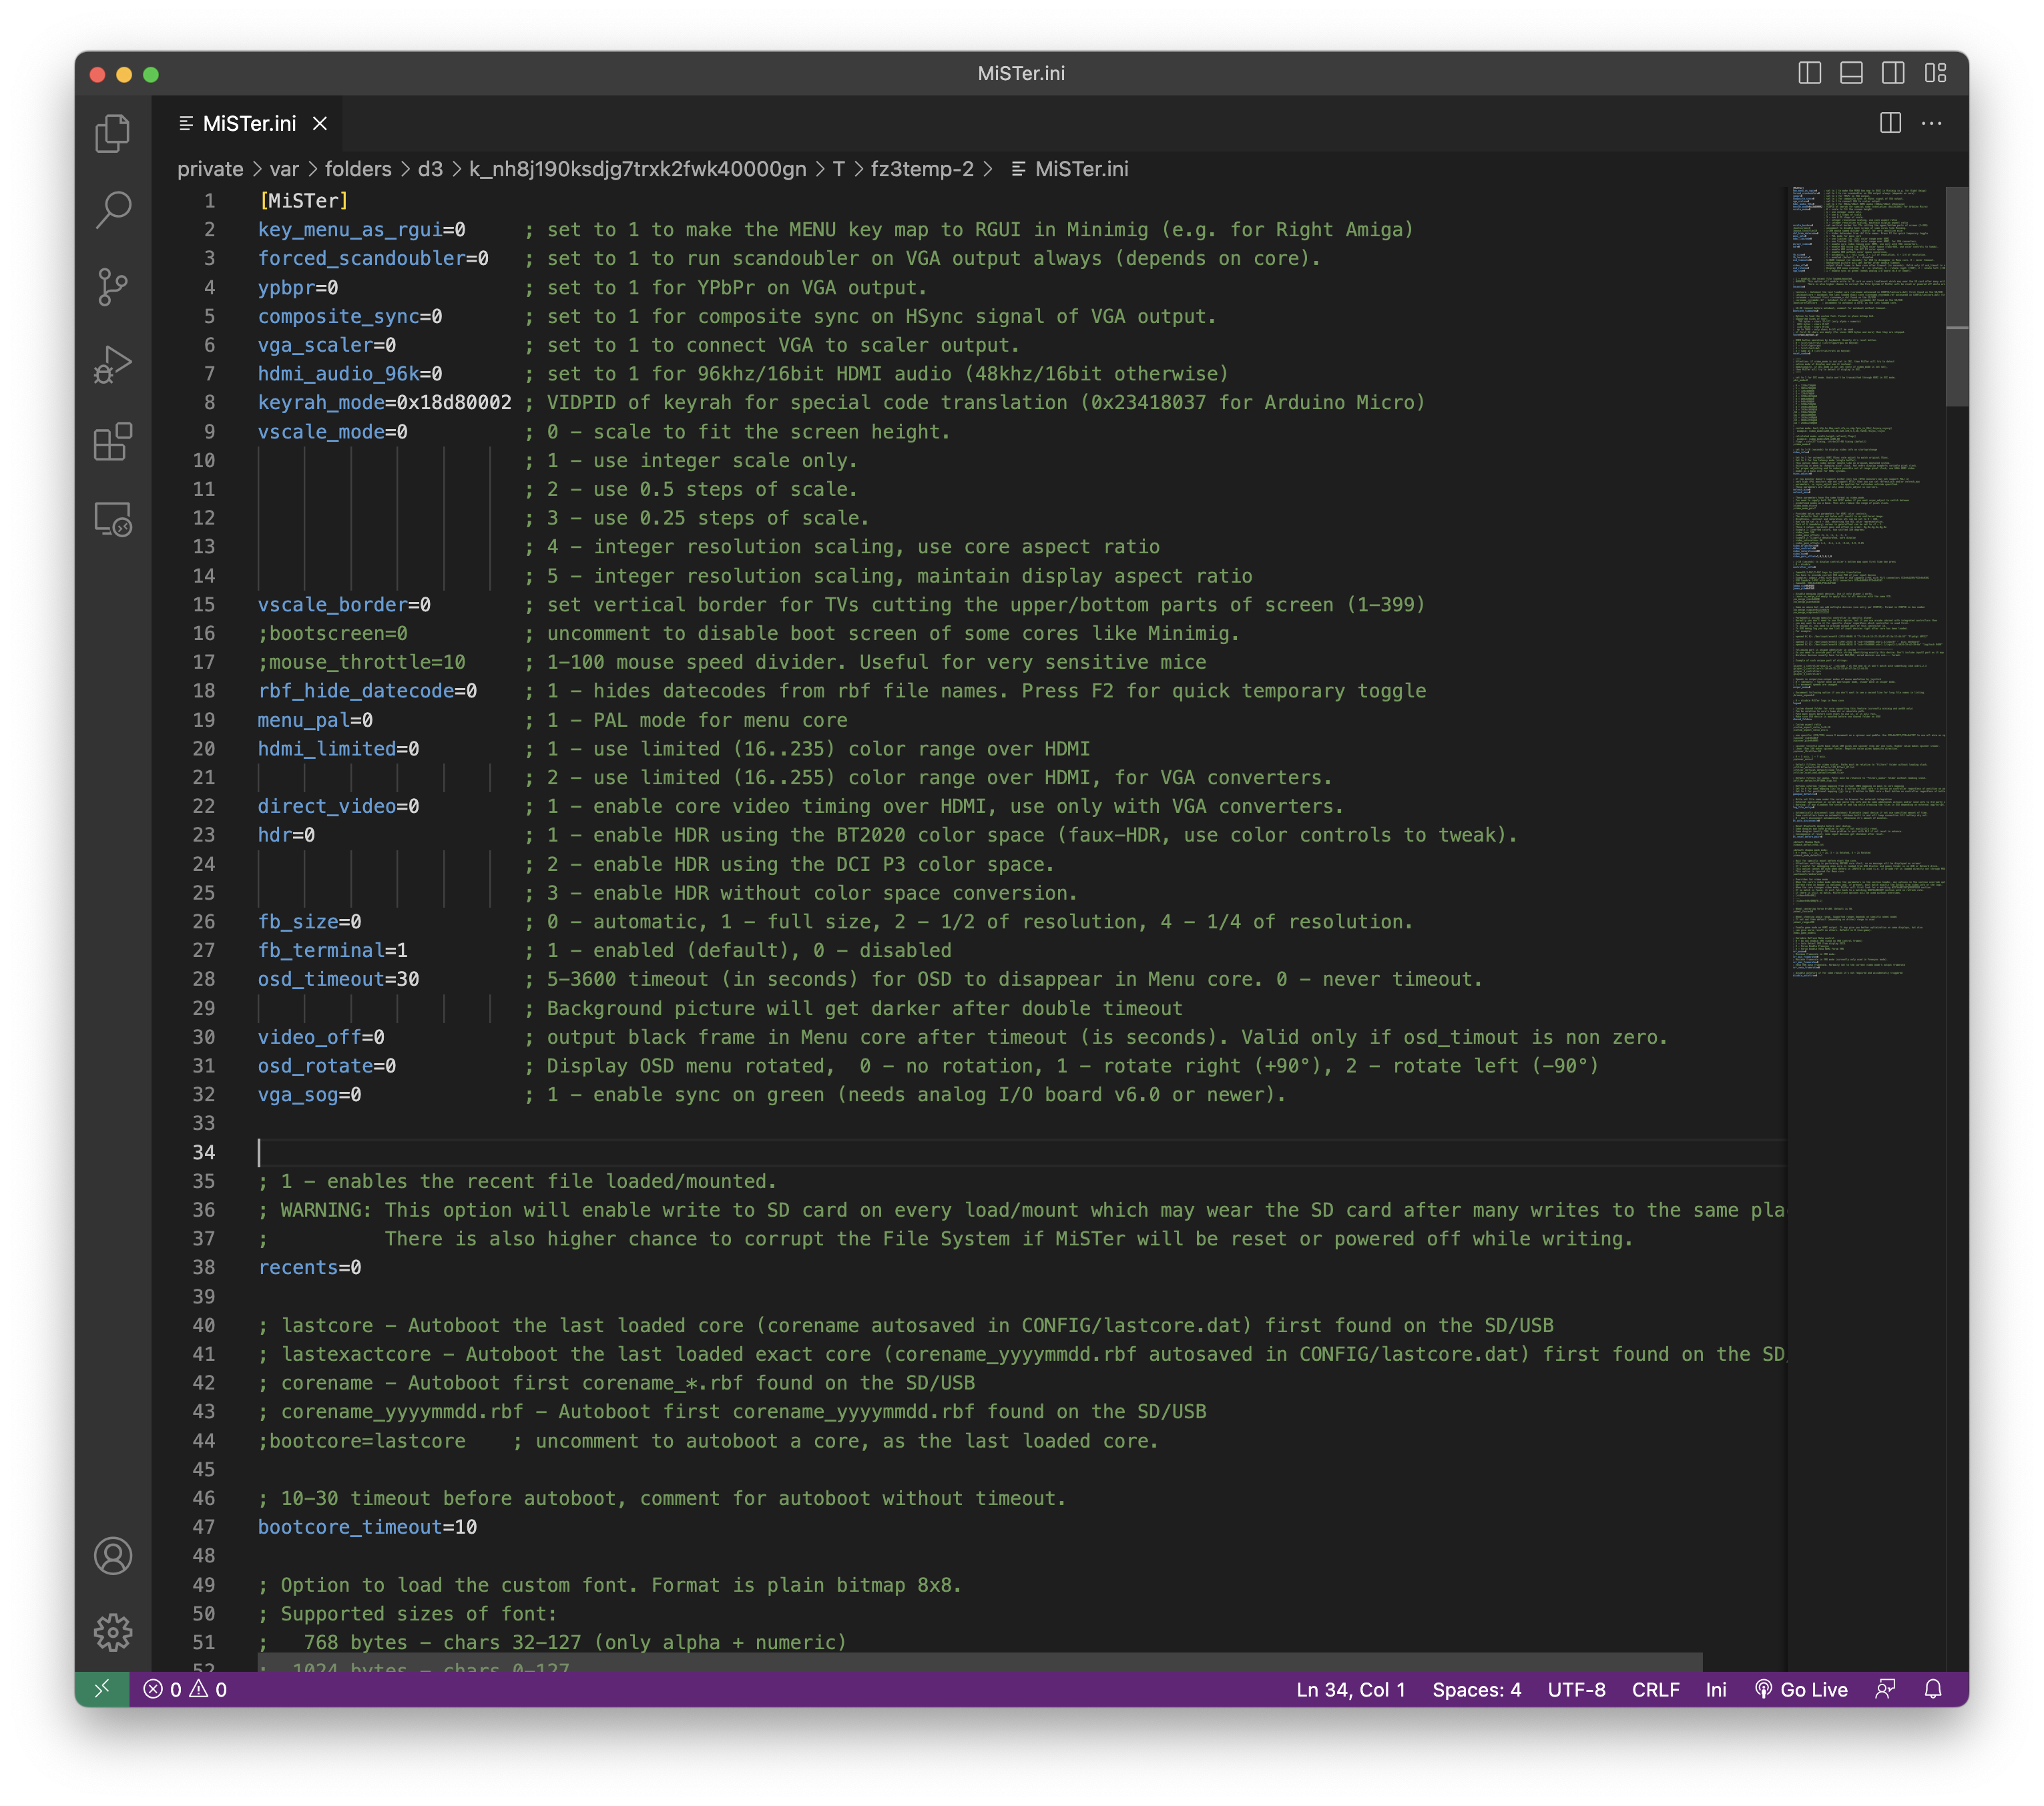
The INI in Visual Studio Code
Quick guide to remote editing:
Save changes in VSC to prompt FileZilla to overwrite the INI on your
MiSTer.
You can also install an SFTP extension in VSC,
bypassing the need for FileZilla when editing.
Most functions are structured like this:
function_name=value ; explanatory comment.
You must adhere to the syntax, including the exact spelling,
underscores, spacing or lack of spacing. Remove the semicolon in front
of any currently deactivated line in order to activate it.
VSC highlights incorrect formatting through the use of colors.
Most things can remain unchanged, but some things you need to
consider:
vscale_mode=1 ; 0 - scale to fit the screen height.
Set mode 1 (integer) to upscale the image in whole numbers, typically
up to 5x with WUXGA and 4x with 1080p.
Integer scaling is preferable because it avoids irregular pixels and
uneven scanlines. See
chapter 20 for examples of
integer vs fractional/stretched scaling.
mouse_throttle=10 ; 1-100 mouse speed divider. Useful for very sensitive mice
Mouse throttling is disengaged unless you remove the preceding
semicolon.
The higher the value, the less sensitive the mouse becomes.
font=font/Arcade_Namco_Classic.pf
Replace the menu's font by changing
font/myfont.pf
to e.g.
font/Arcade_Namco_Classic.pf
or
font/Computer_C64.pf
See the complete
MiSTer Fonts list
and scroll down for font previews.
dvi_mode=1
If you've got external speakers connected directly to your MiSTer, set DVI mode to 1 to mute sound over HDMI.
video_mode=1920,1200,60
Insert the above calculated video mode for WUXGA @ 60 Hz.
MiSTer generally prefers 60 Hz as the base frequency, due to variable
pixel clock. However, in section X we'll set up additional video modes
for PAL and NTSC.
If you've got a 1080p display, use the following preset video mode for 1080p @ 60 Hz instead:
video_mode=8
video_info=10
Displays the resolution and refresh rate of the core and the display,
for up to 10 seconds.
When vsync adjust is set to 2, video info will be slightly incorrect
due to the continuous nature of this mode.
| vsync_adjust= | 2 | 1 | 0 |
|---|---|---|---|
| Smooth graphics | ✓ | Almost | - |
| Original vsync | ✓ | ✓ | - |
| Original pixel clock | ✓ | - | - |
| Frame delay | <1 (min. 0.25 ms) | 2 (~32 ms) | 2 (~32 ms) |
| Framebuffer | ≤1 Single | Triple | Triple |
| Compatibility | High | Very high | All |
vsync_adjust=2
With vsync adjust set to 2, the MiSTer continuously synchronizes the display to the core's original pixel clock and vertical refresh rate.
refresh_min=48
refresh_max=75
Set the minimum and maximum refresh values based on your display's official tech specs. See chapter 10 section V.
video_mode_ntsc=1920,1200,60
video_mode_pal=1920,1200,50
Insert the above calculated video modes for NTSC and PAL modes on a
WUXGA display.
Some cores offer a choice between PAL and NTSC. Others, such as
AmigaVision, automatically switch to the relevant format depending on
the loaded game.
If you've got a 1080p display, use the following preset video modes
instead:
video_mode_ntsc=8
video_mode_pal=9
logo=0
Removes the MiSTer logo overlay on the menu wallpaper.
custom_aspect_ratio_1=4:3
custom_aspect_ratio_2=7:5
Allows you to switch between to up two custom aspect ratios of your own choosing.
;hdmi_game_mode=1
Tells Auto Low Latency Mode (ALLM) capable TVs and audio receivers to
switch to ALLM by turning off unnecessary image and audio processing.
Requires HDMI 2.1 cables.
vrr_mode=0
VRR is intended to reduce frame rate inconsistencies, but ironically
it can both reduce and increase lag as well, depending on how your
display reacts.
VRR may also disable important overdrive / trace free options on your
monitor.
If your display doesn't have VRR or you simply wish to avoid VRR, set
it to 0.
Ignore auto detection (mode 1) and force mode 2 for Freesync / VESA
Adaptive-Sync or mode 3 for HDMI Forum VRR. See
chapter 11 section I
for cable requirements and a word of warning.
Set the minimum and maximum VRR framerates as explained in section IX:
vrr_min_framerate=48
vrr_max_framerate=75
VESA VRR framerate is based on your video mode base frequency, typically 60 Hz regardless of PAL / NTSC. See section VI.
vrr_vesa_framerate=60
preset_default=Mr RePlay/01_Default_Crt
Video processing allows you to apply a range of filters for a more
authentic and historically accurate look. Video processing doesn't
affect latency.
Download the Mr. RePlay video processing presets from the
Vault, unpack, and place the folder in
/media/fat/Presets/
The presets are now selectable from any core's video processing menu
as well:
| 01_Default_CRT | Aperture grille, adaptive scanlines, and vibrant gamma for most cores |
| 02_Darker_1943 | Same, but dark pure gamma for overly bright, washed out cores (1943, etc.) |
| 03_Lighter_RoboCop | Same, but poly gamma and bright scanlines for murky cores (RoboCop, etc.) |
| 04_Commodore_1084 | Commodore 1084 Philips monitor for Amiga / C64 / C128 / VIC-20 |
| 05_PC_VGA_Monitor | Late 1980s PC monitor for use with the AO486 core |
For the Commodore monitor preset to work, you'll also need to download
the accompanying
Commodore 1084 Philips [Mr RePlay].txt
shadow mask from the
Vault
and place it in the root of
/media/fat/Shadow_Masks/. See
chapter 21 section VII.
The preset is an amalgamation of the ten Commodore 1084, 1084S,
1084S-D1, and CM8833-II monitors I've got. On average two 1084s die on
me a year, and they're harder and harder to find, so emulating the
look in MiSTer was important to me.

Commodore 1084 monitor with Philips CRT from 1987
Anything written in a core exception will only affect the targeted
core. All exceptions must be placed at the end of your INI file.
The syntax for a core exception is:
; Note the core name
[setname]
function_name=value
; explanatory comment.
The setname is the internal name for the core. Open the core, go to
System, select
About, and note the exact spelling of the setname.
You can affect all arcade cores by using
[arcade], only vertical arcades with
[arcade_vertical], or the main menu with
[Menu]
as the setname.
You can affect multiple, but specific, cores with the same
exception(s) by adding to the setname brackets. You must follow this
syntax and observe correct linebreaks:
; Core names or collection
[setname
+setname
+setname
]
function_name=value
; explanatory comment.
Here are some examples of core exceptions:
Now you'll learn how to get authentic looking graphics on a modern display!
MiSTer upscales the resolution of the original core to match the
resolution of the modern display.
Integer scaling is based on the vertical resolution, and is
performed in whole numbers, rather than in fractions or by
stretching the image to the edges.
Since retro games were typically made for an aspect ratio of 4:3,
the compromise is pillarboxing on modern widescreen displays. Read
more on display differences in
chapter 10.
The formula looks like this:
A higher scaling factor means better use of the screen estate, as well as sharper video processing, such as scanlines and shadow masks.
Fractional scaling:
Stretched scaling:
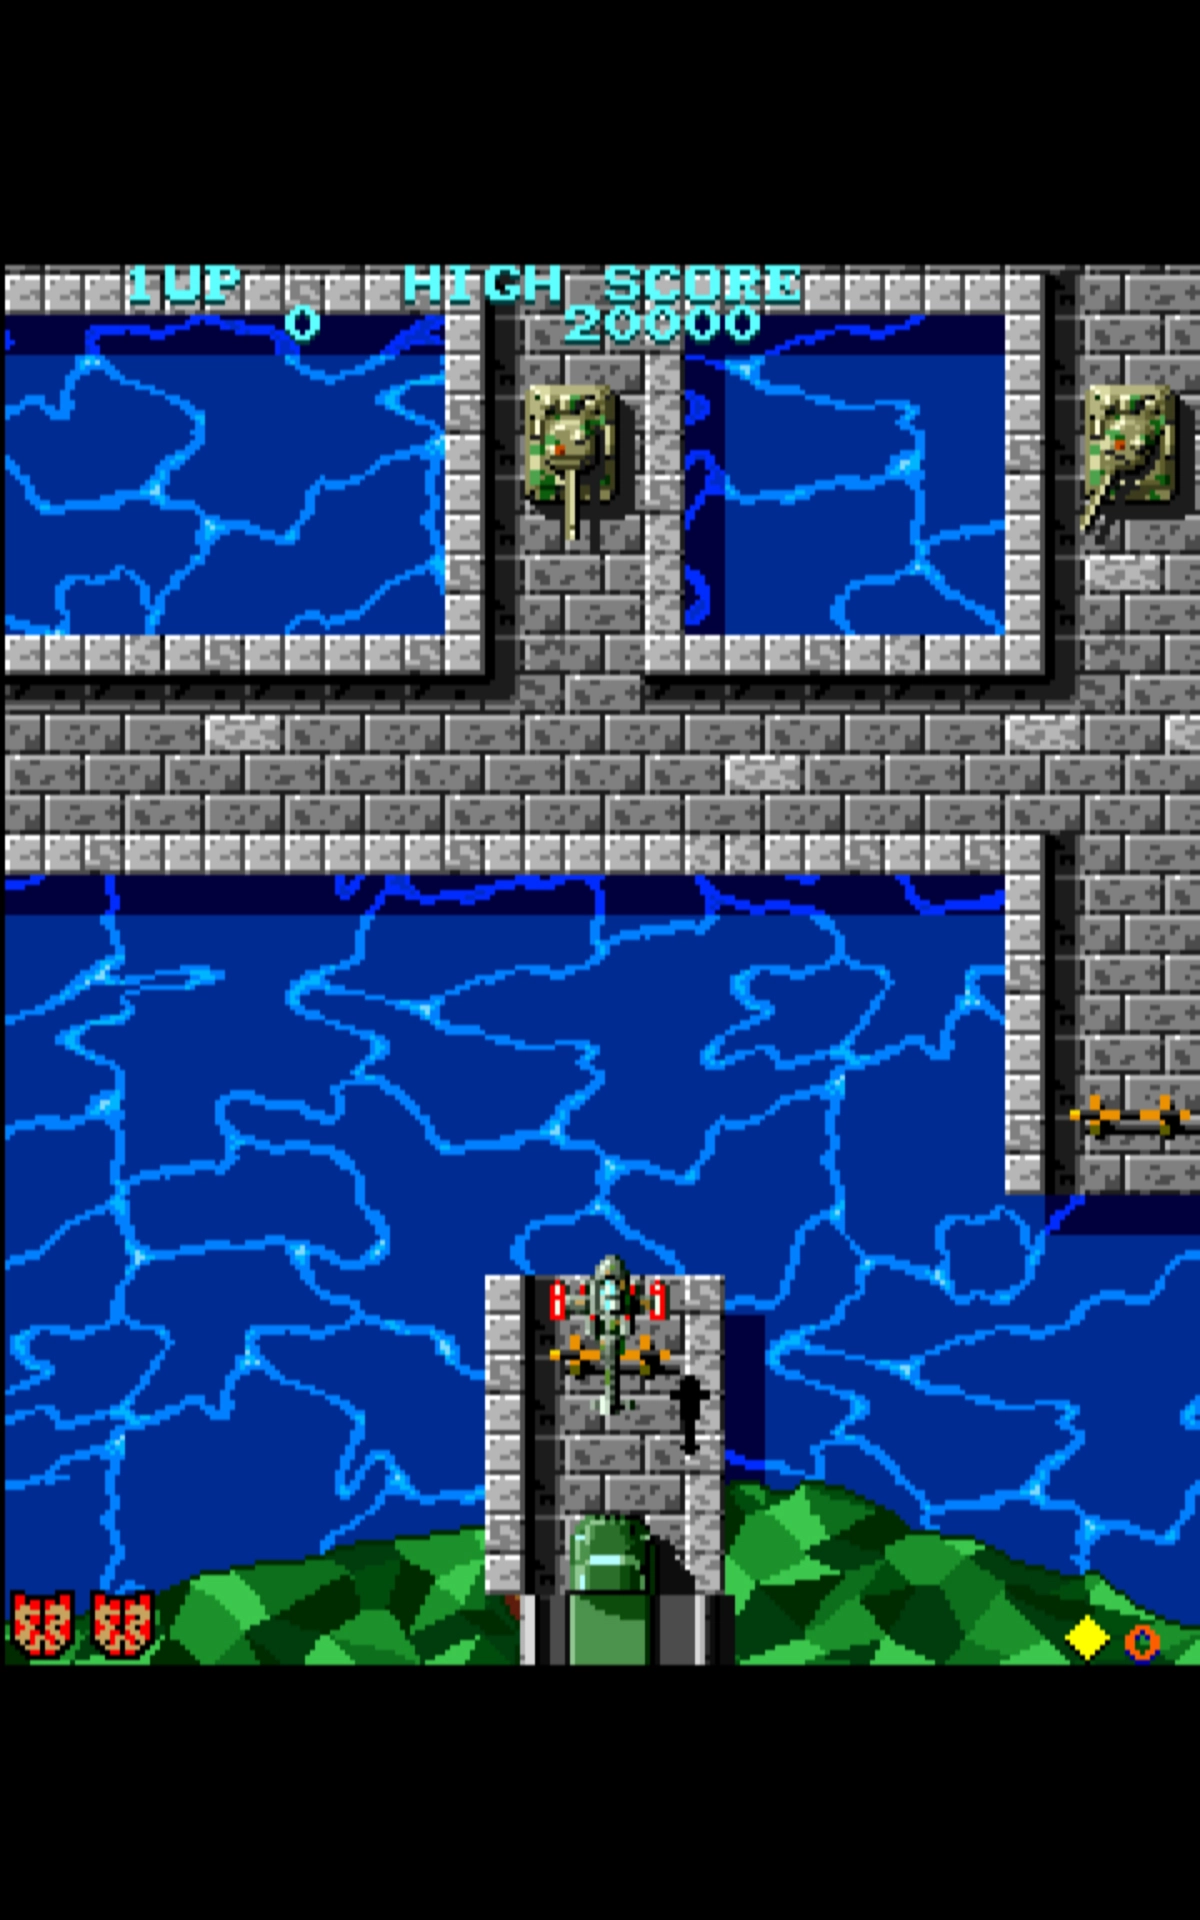
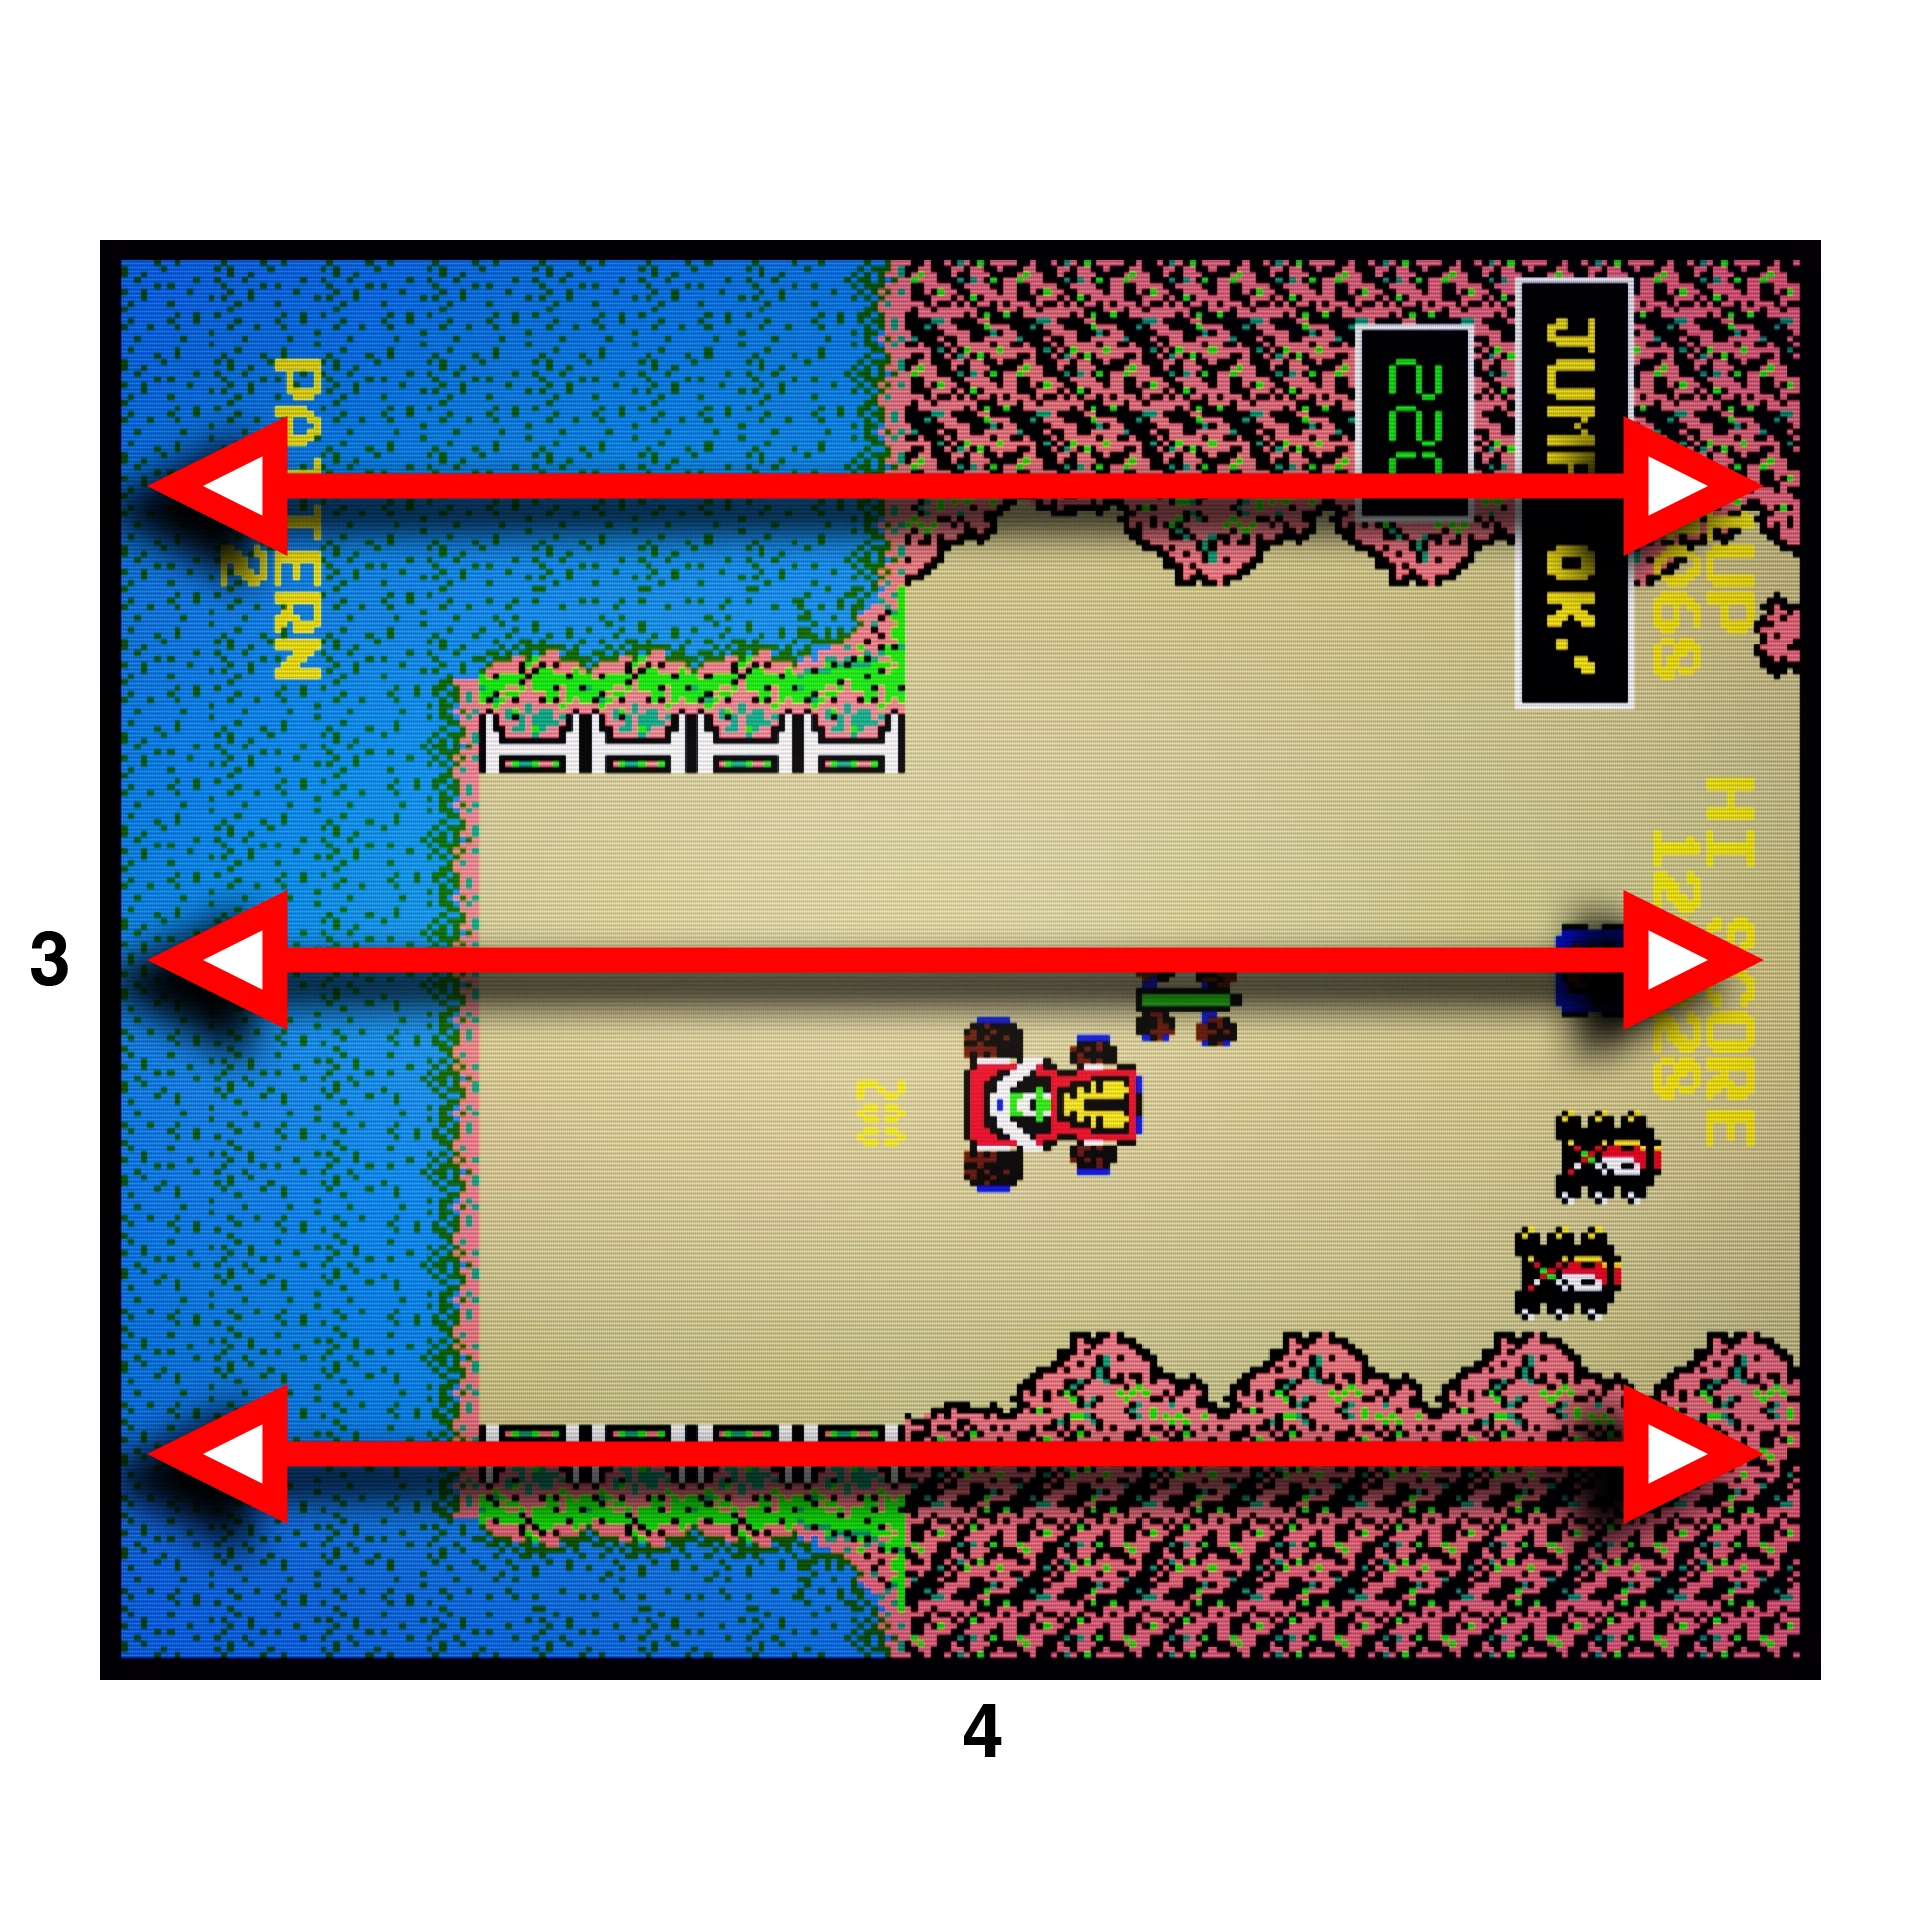
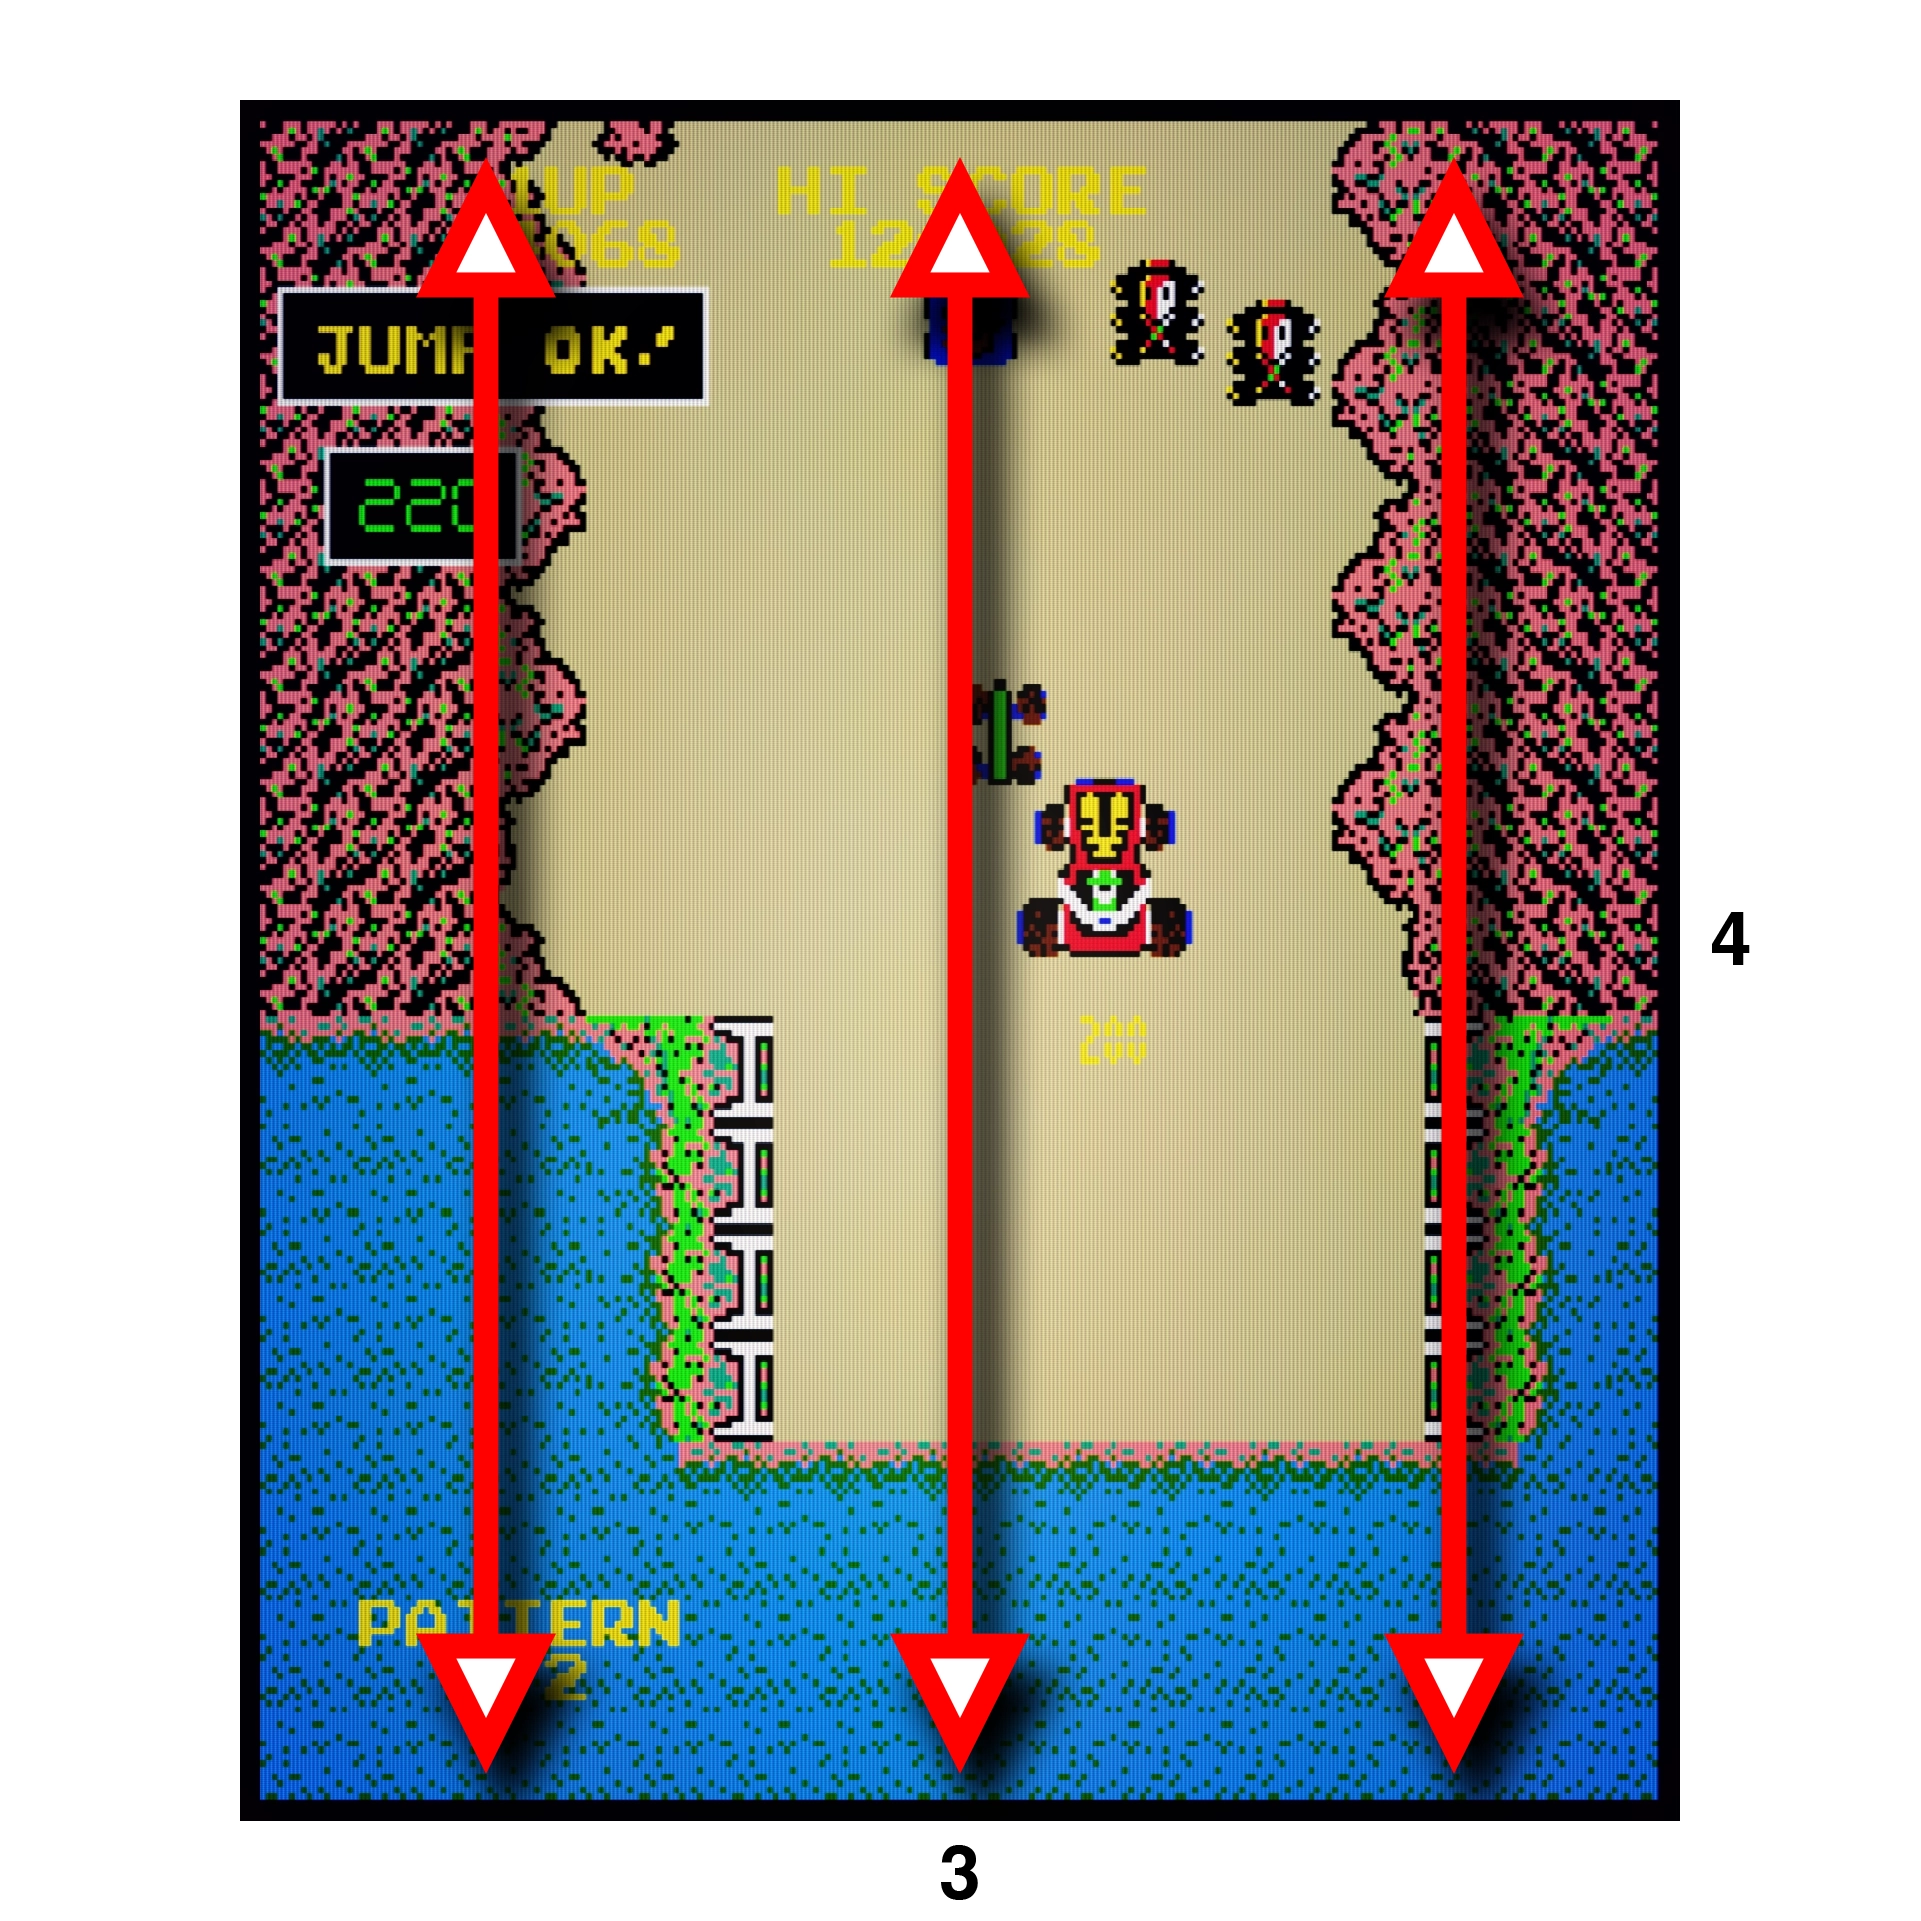
Tiger-Heli from 1985 has a resolution of 285 horizontal x 240
vertical pixels. The display is then pivoted -90° for vertical
play.
Tiger Heli's vertical resolution scales perfectly on a WUXGA (1920 x
1200) display: 1200/240 = 5, resulting in 5x vertical scaling.
With 1080p, 1080/240 results in 4.5, which rounds down to 4x
scaling. This results in a smaller image and larger black borders.
Try for yourself:
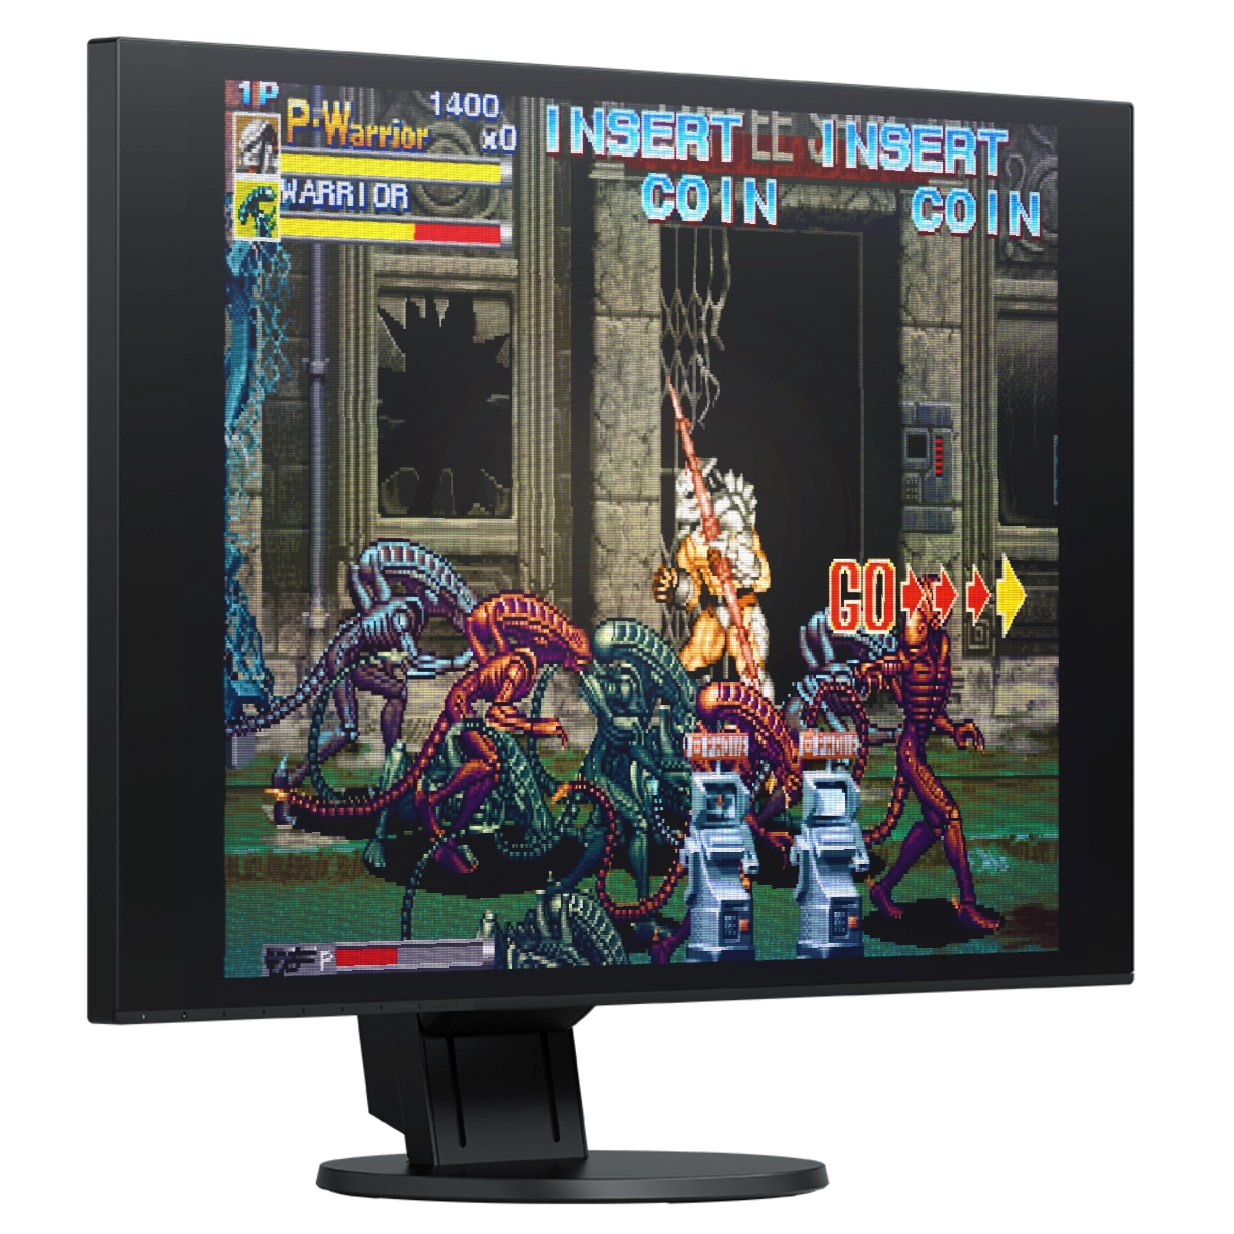
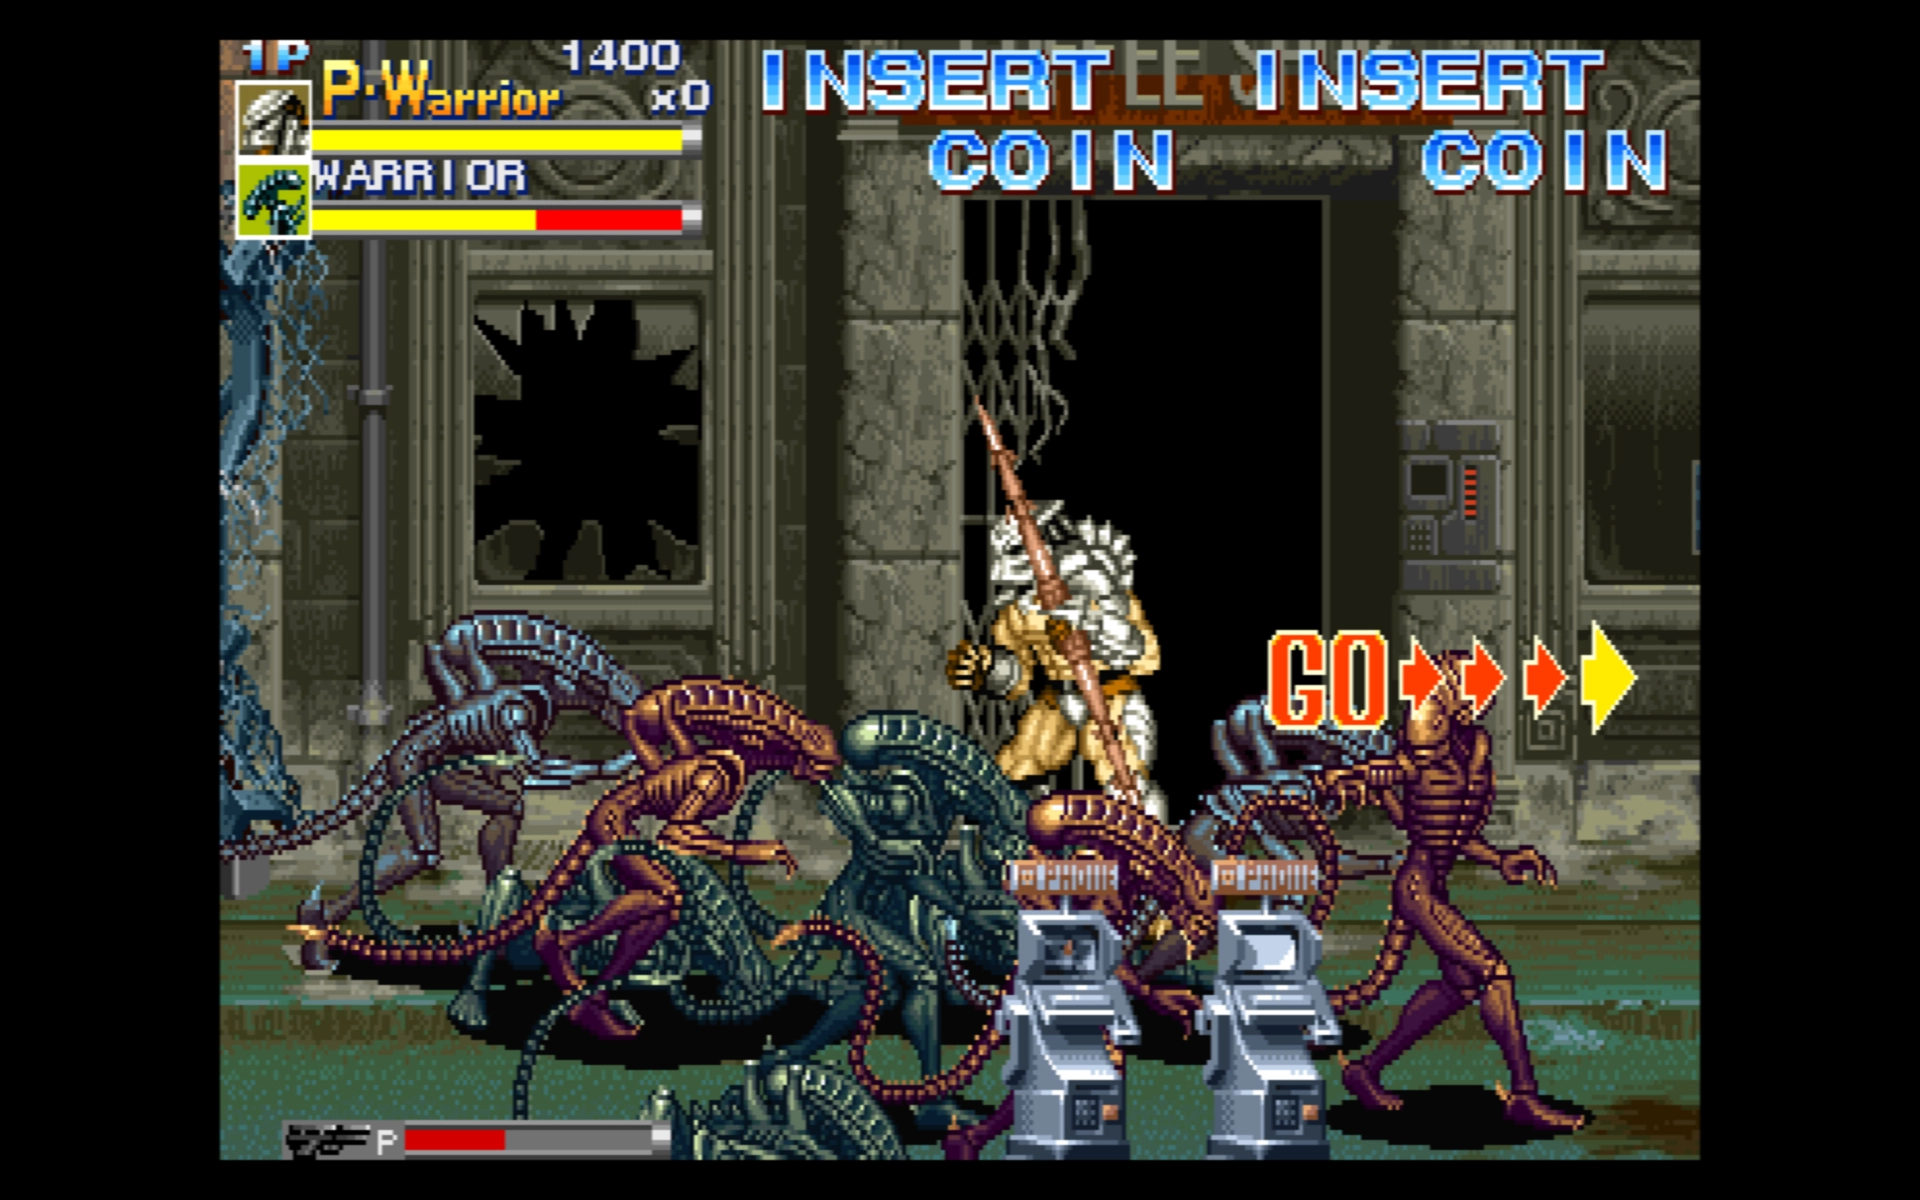
Alien vs. Predator from 1994 has a resolution of 384 x 224 pixels.
To maintain pixel aspect ratio it's fractionally scaled
horizontally, while maintaining integer vertical scaling.
The vertical resolution of 224 pixels (1200/224 = 5.357) rounds down
to 5x vertical scaling on a WUXGA display.
On a 1080p display, 1080/224 = 4.82 rounds down to 4x vertical
scaling.
Try for yourself:
The pixel aspect ratio (PAR) is how square or rectangular each pixel
looks.
NTSC pixels are taller than they're wide, while PAL pixels are wider
than they're tall. In general, pixels should appear fairly square.
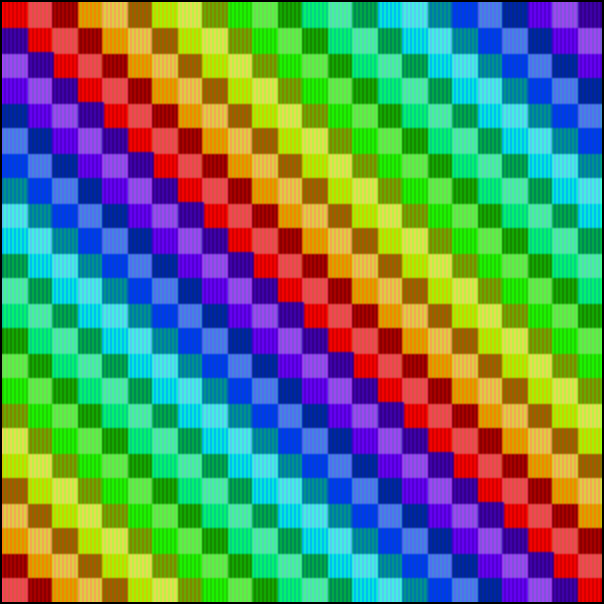
Many games have correct PAR by default and will scale correctly with
integer vertical scaling. However, some still have an elongated or
narrow look, as shown in picture A:
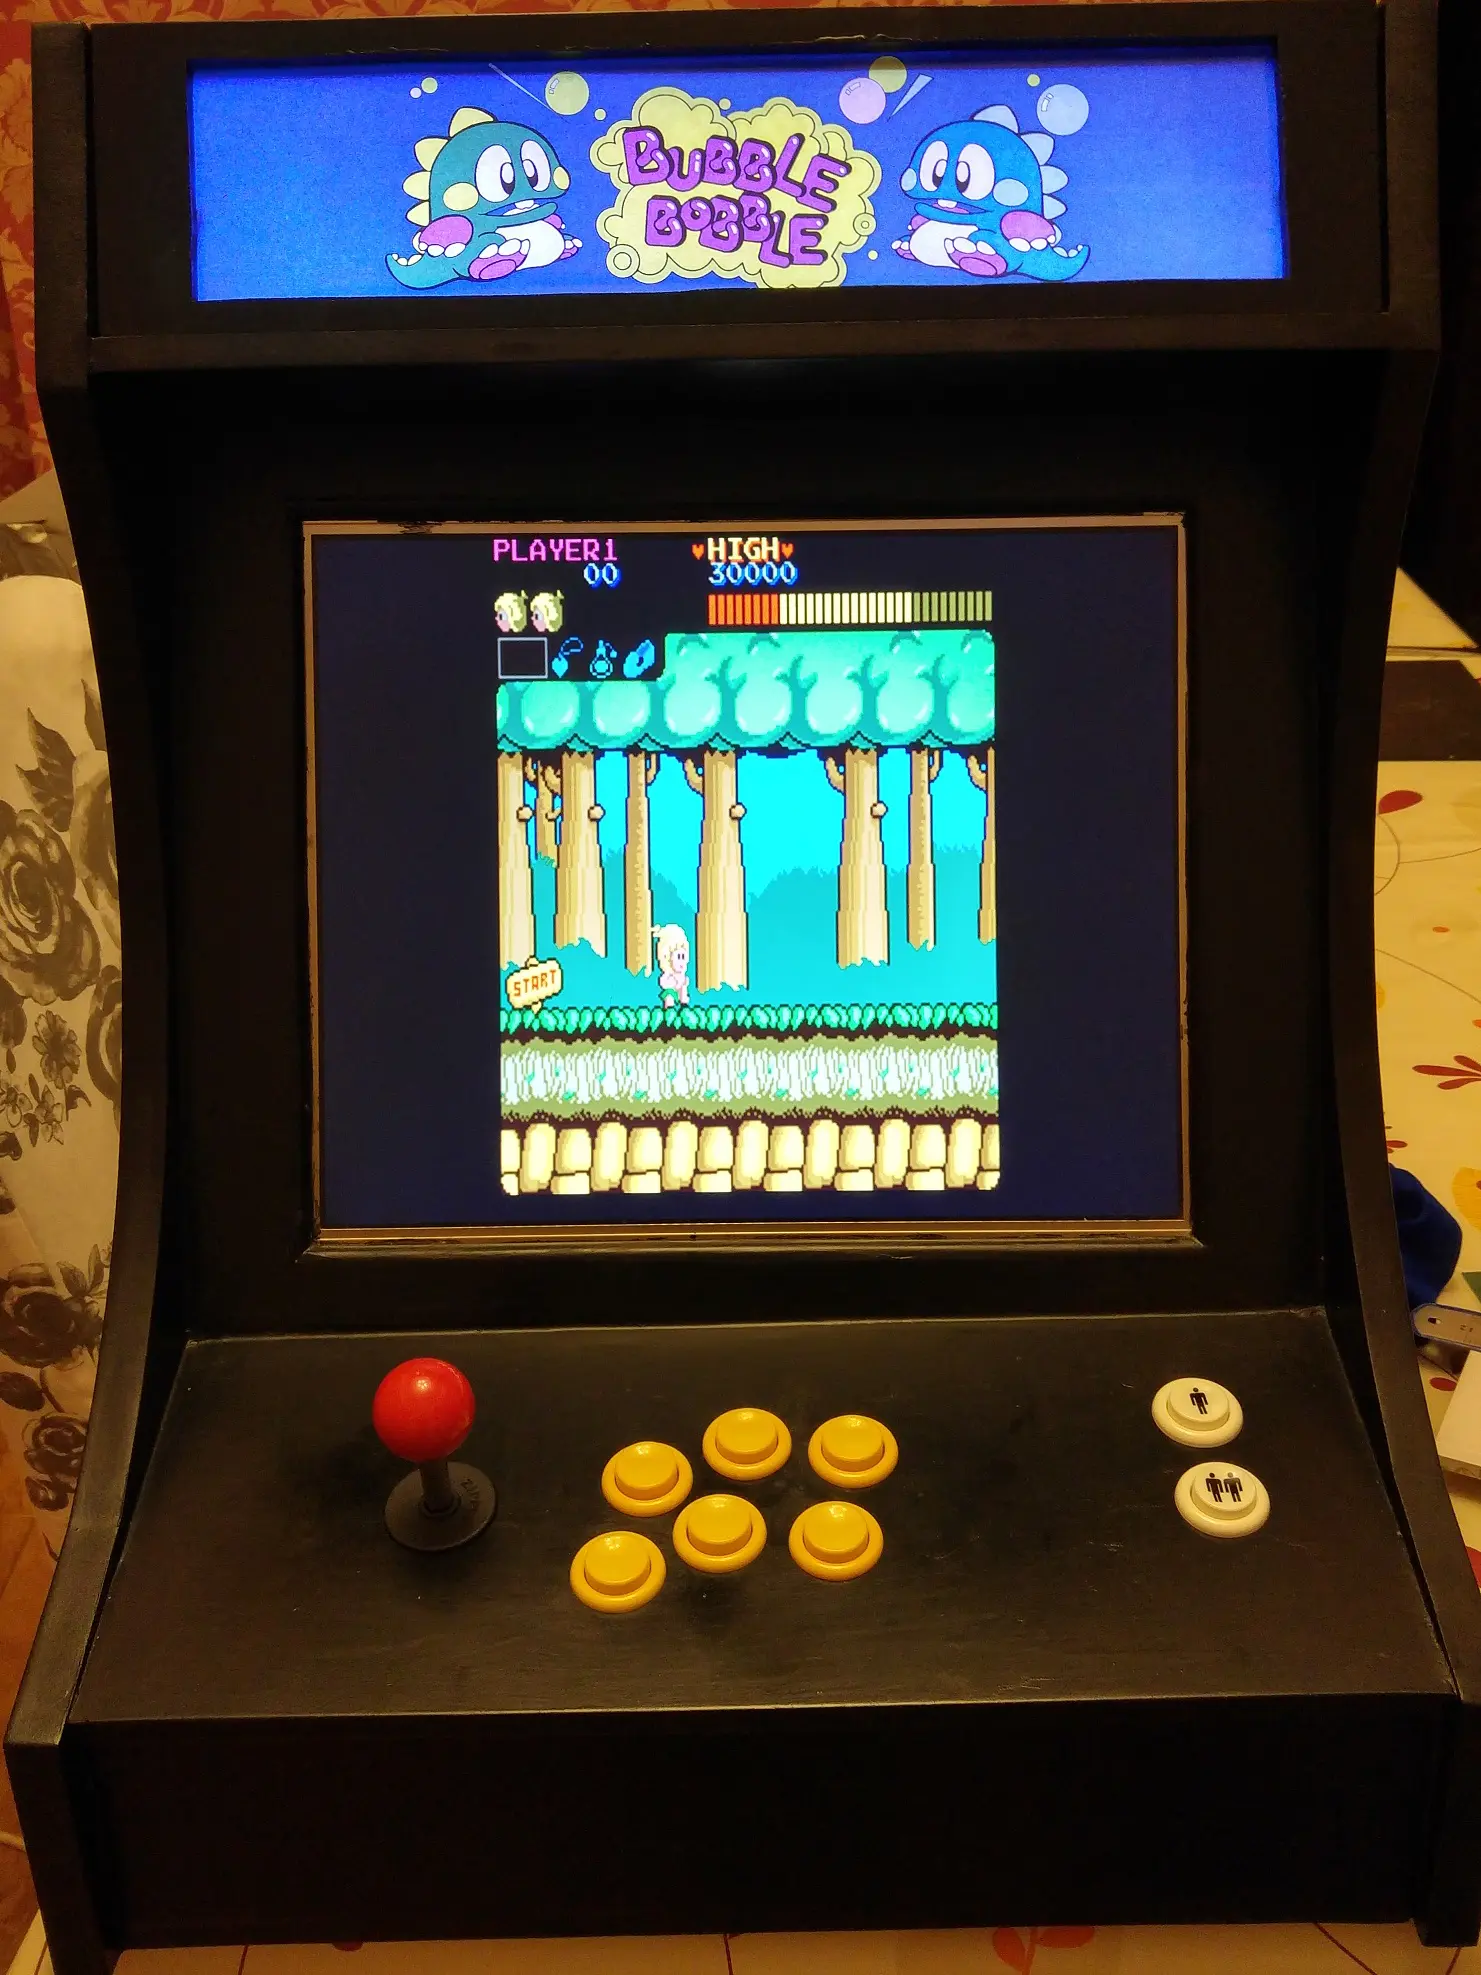
A. Incorrect, narrow PAR (DIY MAME cabinet)
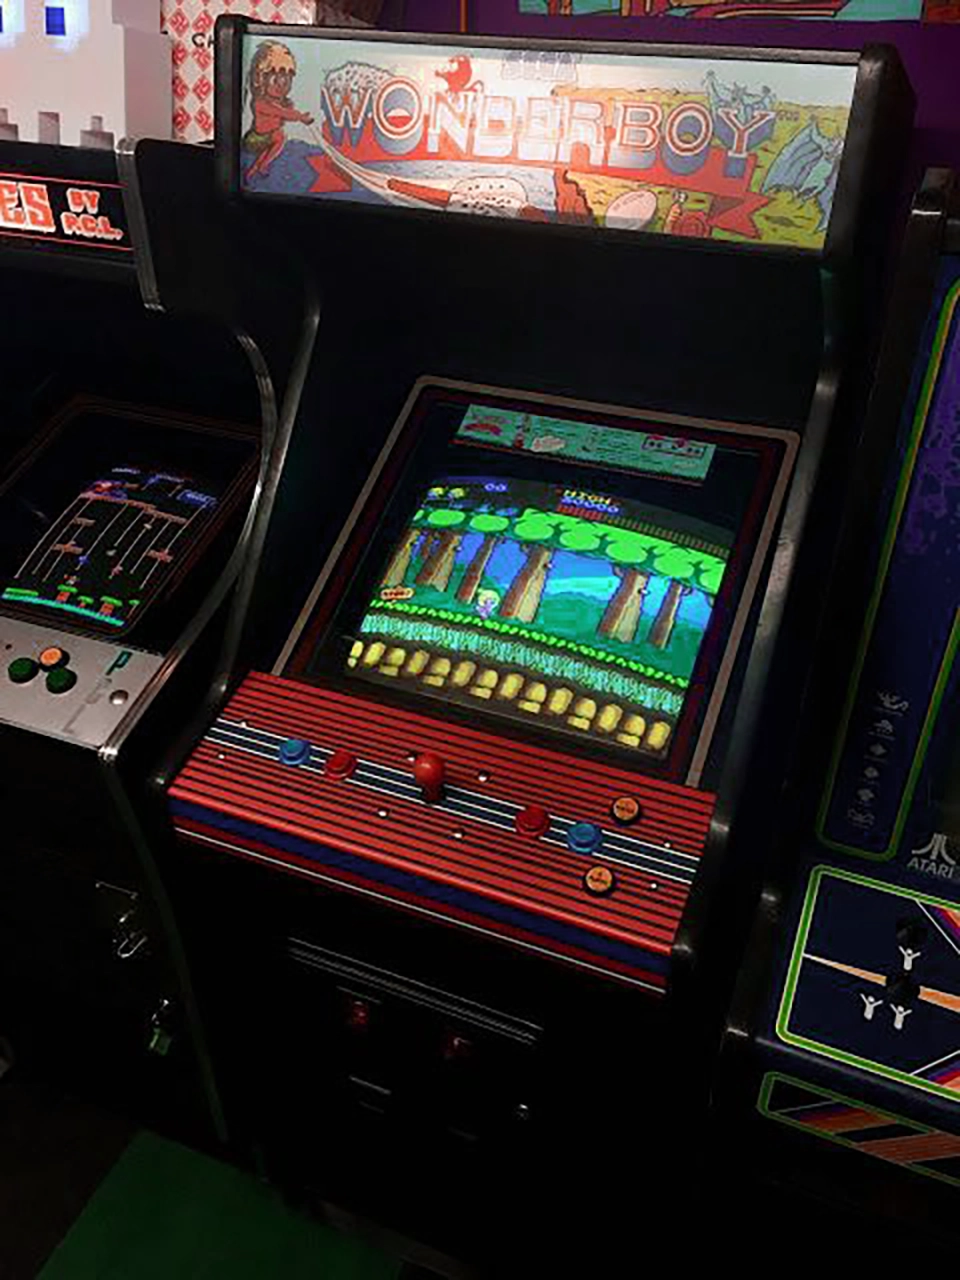
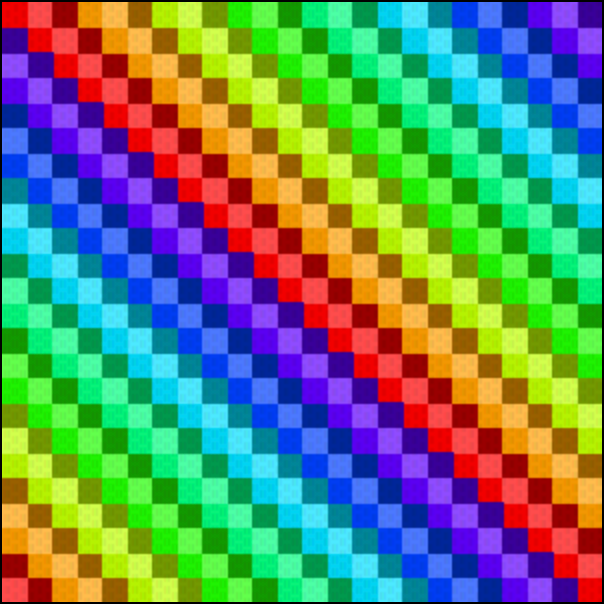
B. Slightly overstretched PAR (CRT in Electrocoin cabinet)
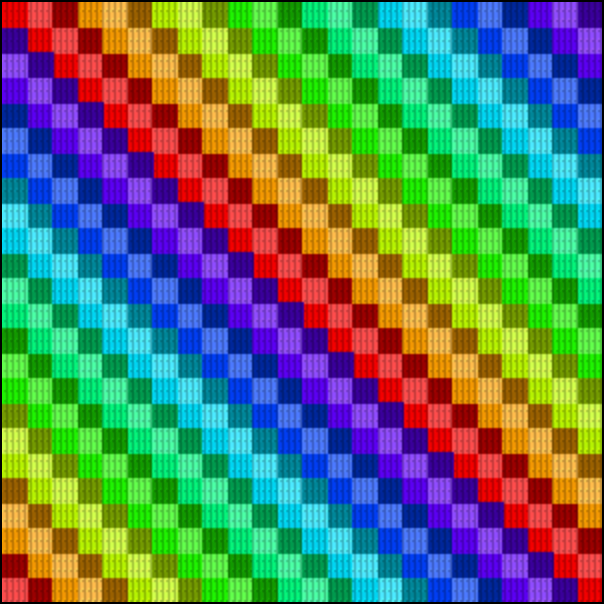
During installation of an arcade machine, the operator would activate
the built in geometry test grid. He would then adjust the horizontal
size knob on the CRT until the individual cells in the grid appeared
square.
Failing to use the test grid would sometimes lead to slight
overstretching, as shown on the CRT in the Electrocoin Midi cabinet in
picture B.
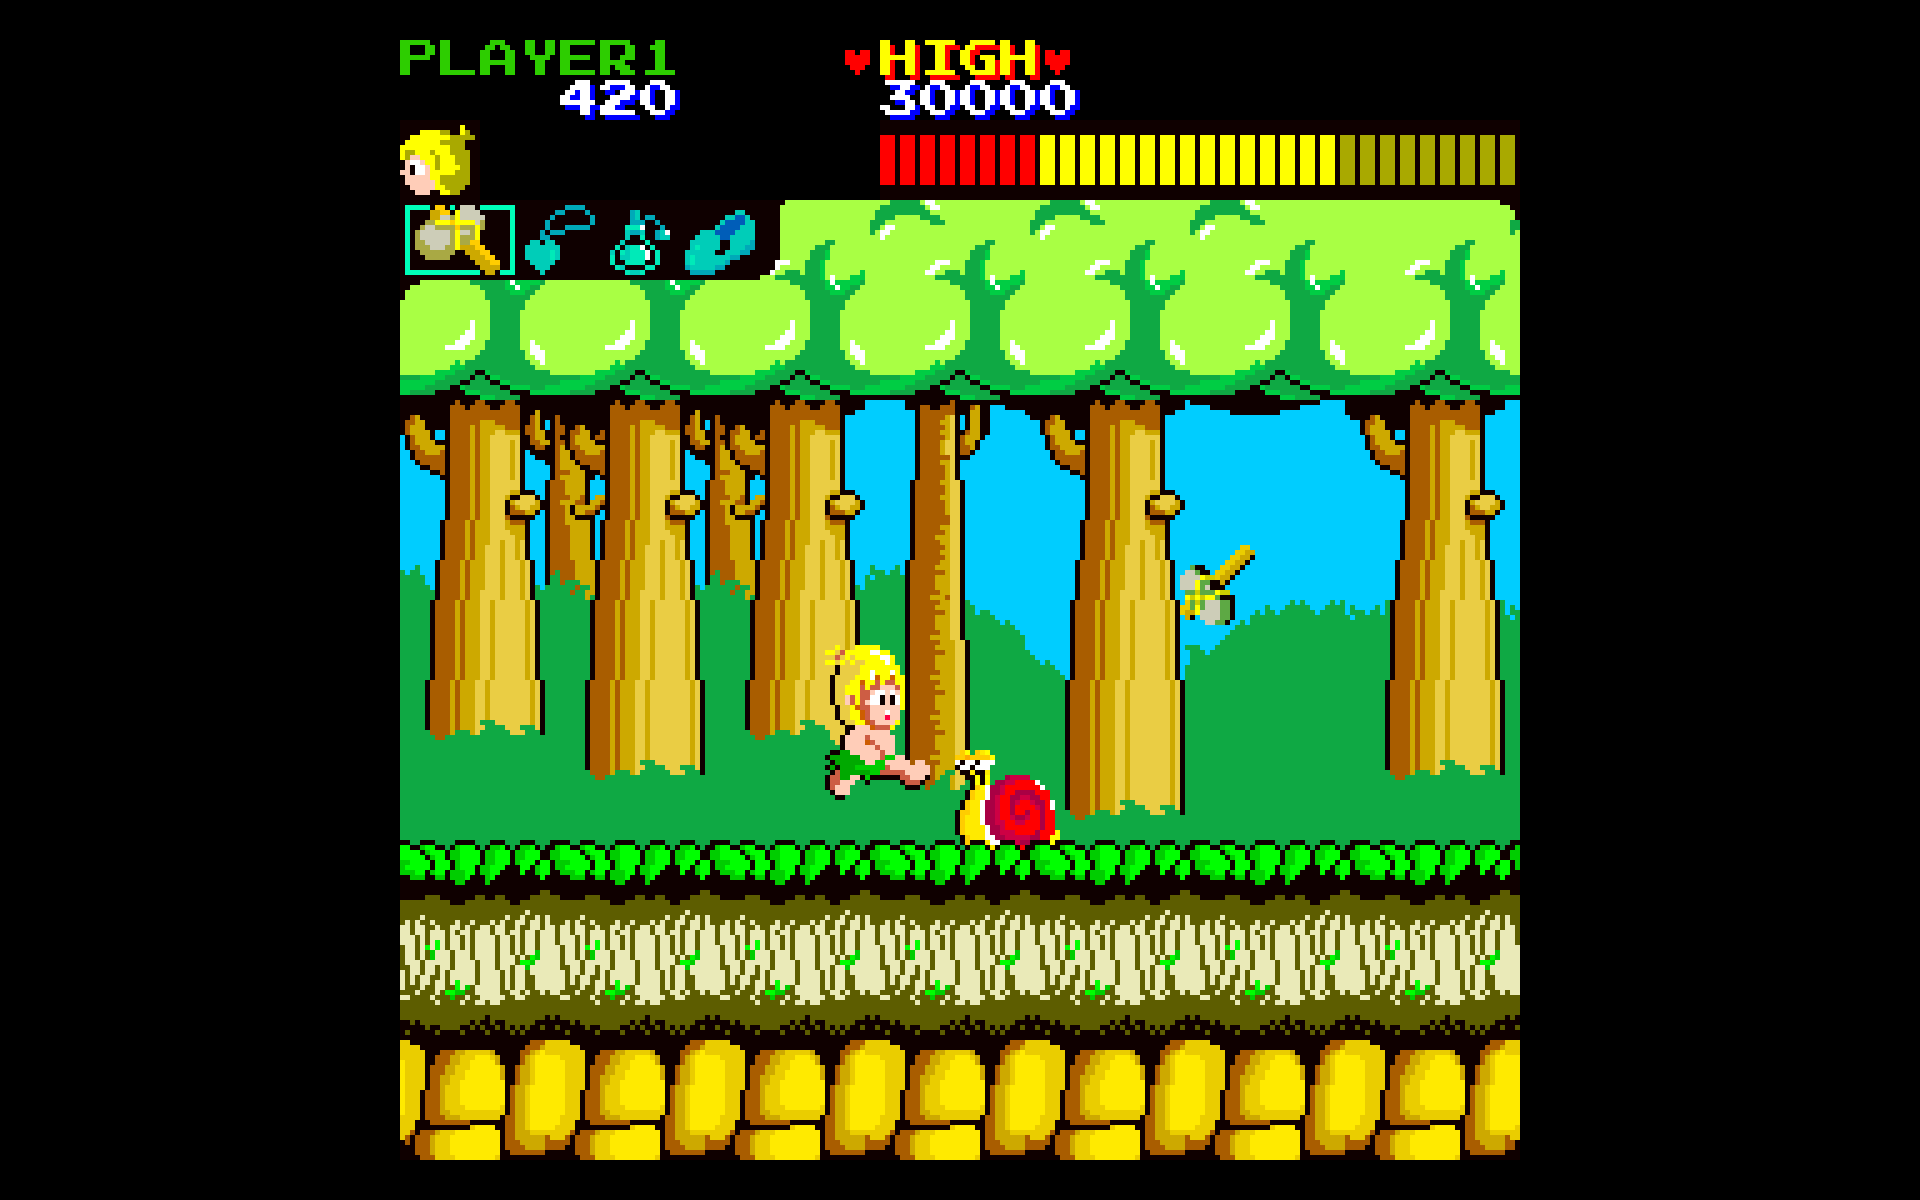
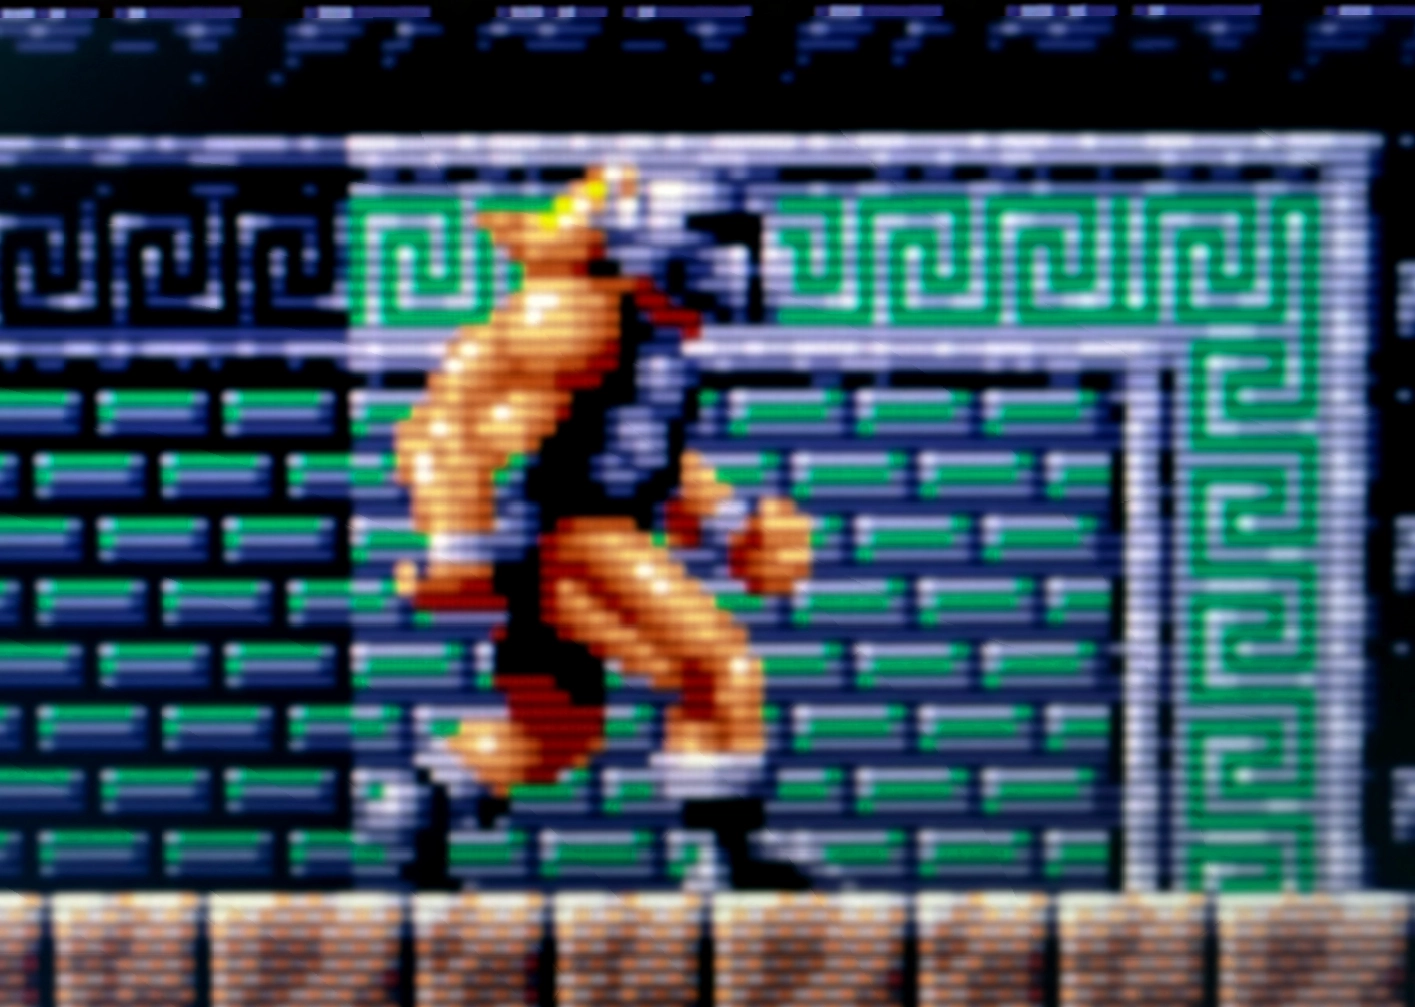
Wonder Boy raw output (on WUXGA)

Wonder Boy PAR adjusted (on WUXGA)
Wonder Boy has an apparent source aspect ratio of 8:7 or 256 x 224
pixels.
When you take a screen dump of Wonder Boy's output you'll notice that
it has 16 pixels of black border on each side.
When you subtract the borders you end up with an effective 224 x 224
resolution, which means a PAR of 4:3 will look better in order to
correctly stretch the image horizontally.
You can switch between the unadjusted aspect ratio and up to two
custom aspect ratios in the core's
Video
submenu under
The choice of PAR depends on the core's resolution and borders, your
display type, and your personal aesthetic preferences.
If the core needs an aspect ratio that isn't available in one of the
two existing custom aspect ratios (see
chapter 19 section XII)
then you can make a core exception instead.
Video processing lets you enjoy a close approximation of the authentic
CRT look on your modern display. Graphics were originally designed for
this smoother and deeper look - not the flat, blocky look.
Below are close-up photos taken of an Eizo 2456 flatscreen monitor,
showing Gods on the Amiga core.
Before video processing
With MegaAGS preset on
Video processing can be set in three ways:
Before adjusting video processing, your display needs basic user
calibration of brightness, contrast, color temperature, sharpness, and
response time.
If you have one of the displays mentioned in
chapter 10 section II,
please go to the addendum, and
come back here after calibration.
The horizontal filter sets the method used for interpolating or
upscaling the original low resolution output to a modern display.
The choice of interpolation mainly determines how smooth or sharp the
image looks.
Select
Filters/Upscaling/Recommended/GS_Sharpness_60.txt
or another value between 50 and 65.
A value of 50 will be
quite blurry, 65 will be very crisp.
The vertical filter sets the scanlines, i.e. the light intensity of
the horizontal lines in the image.
If it seems odd that the horizontal scanlines are performed by the
vertical filter, it's because they're drawn from the top of the screen
to the bottom, i.e. in a vertical motion, although they appear as
horizontal lines.
Strictly speaking, the bright lines are emulated scanlines, while the
dark lines are emulated gaps between the scanlines. In retro emulation
lingo they're collectively referred to as scanlines.
Scanlines should always appear lengthwise on the display, which means
the filters should remain unchanged with vertical shooters and when
you pivot your display.
Scanlines appear lengthwise
Monitor is pivoted, scanlines are still lengthwise
Use adaptive scanlines for the most authentic look, where bright
pixels blow-out the gaps, and dark pixels reveal the gaps.
Filters/Scanlines - Adaptive/SLA_Dk_80_Br_80.txt
The number after Dk (dark) represents the brightness of the gaps. The
number after Br (bright) represents the brightness of the scanlines
themselves.
SLA_Dk_50_Br_100
has the highest contrast between the dark and bright lines. This can
create depth in games that lack contrast, but it will look overblown
in already well-balanced games.
SLA_Dk_50_Br_50
is ideal only for very bright games, as it darkens the overall image,
and it can work as an alternative to lowering the gamma curve.
SLA_Dk_80_Br_80
is a subtle, all-round choice, which works well for most games.
This filter method is a poor man's alternative to adaptive scanlines. It's ignored by MiSTer even when set, unless you also activate Scandoubler Fx in the core's Video submenu. See more in chapter 22 section I.
Gamma controls the light intensity curve, affecting the balance
between dark, light, and mid-tones.
Gamma curves such as CRT Simulation and Poly Gamma affect color
vibrancy and temperature as well.
For a punchy, color-saturated TV-look:
Gamma/CRT Simulation.txt
For a cooler, monitor look:
Gamma/Poly_Gamma/2.3.txt
The Pure Gamma settings don't alter color curves in the same way, and
are mainly useful for extreme overall darkening or brightening.
The Contrast Boost gamma settings can be excellent for separating
sprites from the background in washed out games.
A shadow mask in a CRT blocks the electrons from hitting the wrong
colored phosphors. In retro emulation lingo, a shadow mask can also
refer to the aperture grille found specifically in Sony Trinitron
CRTs.
While scanlines appear as horizontal lines, the shadow mask appears as
a finely divided grid or mesh.
Applying a shadow mask in MiSTer texturizes pixels and creates depth,
similar to the look on a CRT.
Sony Trinitron (1968)
MG Stripe (Magenta Green)
Commodore 1084 Philips [Mr RePlay]
The Sony Trinitron aperture grille was invented in 1968 and was
produced up until 2004. Its rendition by TrashUncle is bundled with
MiSTer and works well for most arcade games and consoles:
Shadow_Masks/Sony Trinitron (1968).txt
The bundled MG Stripe (Magenta Green) is one of the more subtle
choices:
Shadow_Masks/MG Stripe (Magenta Green).txt
For the Commodore 64 and Amiga I recommend the Mr. RePlay Commodore
1084 Philips monitor shadow mask:
Shadow_Masks/Commodore 1084 Philips [Mr RePlay].txt
Download the shadow mask from the
Vault
and place it in the root of the
/media/fat/Shadow_Masks/
folder.
The shadow mask is intended to be used as part of the complete Mr.
RePlay Commodore video processing preset
04_Commodore_1084, as referenced in
chapter 19 section XV.
Use this checklist the first time you open a new arcade core!
This checklist can be used for all arcade cores. Some sections are relevant to home computer and console cores as well.
Not relevant with modern displays, so make sure it's turned all the way off. For CRTs it can be used for doubling the scanning frequency and adding effects. Instead, see chapter 21 section V on how to apply video processing with modern displays.
Check that the pixel aspect ratio appears proportional. If not, see chapter 20 section V and chapter 19 section XVI.
Check that the game is oriented correctly on the screen, then pivot
the display if necessary.
Rotation or orientation can be changed either in the core's menu under
Orientation
or in the
Video
submenu under
This is applicable to most vertical shooters, such as 1942, Galaga,
etc.
Some games can be flipped, either on the horizontal or vertical axis.
Originally this mode was used for cocktail cabinets, where the screen
was set down in a piece of furniture with a glass plate over it (for
drinks), and two players took turns playing.
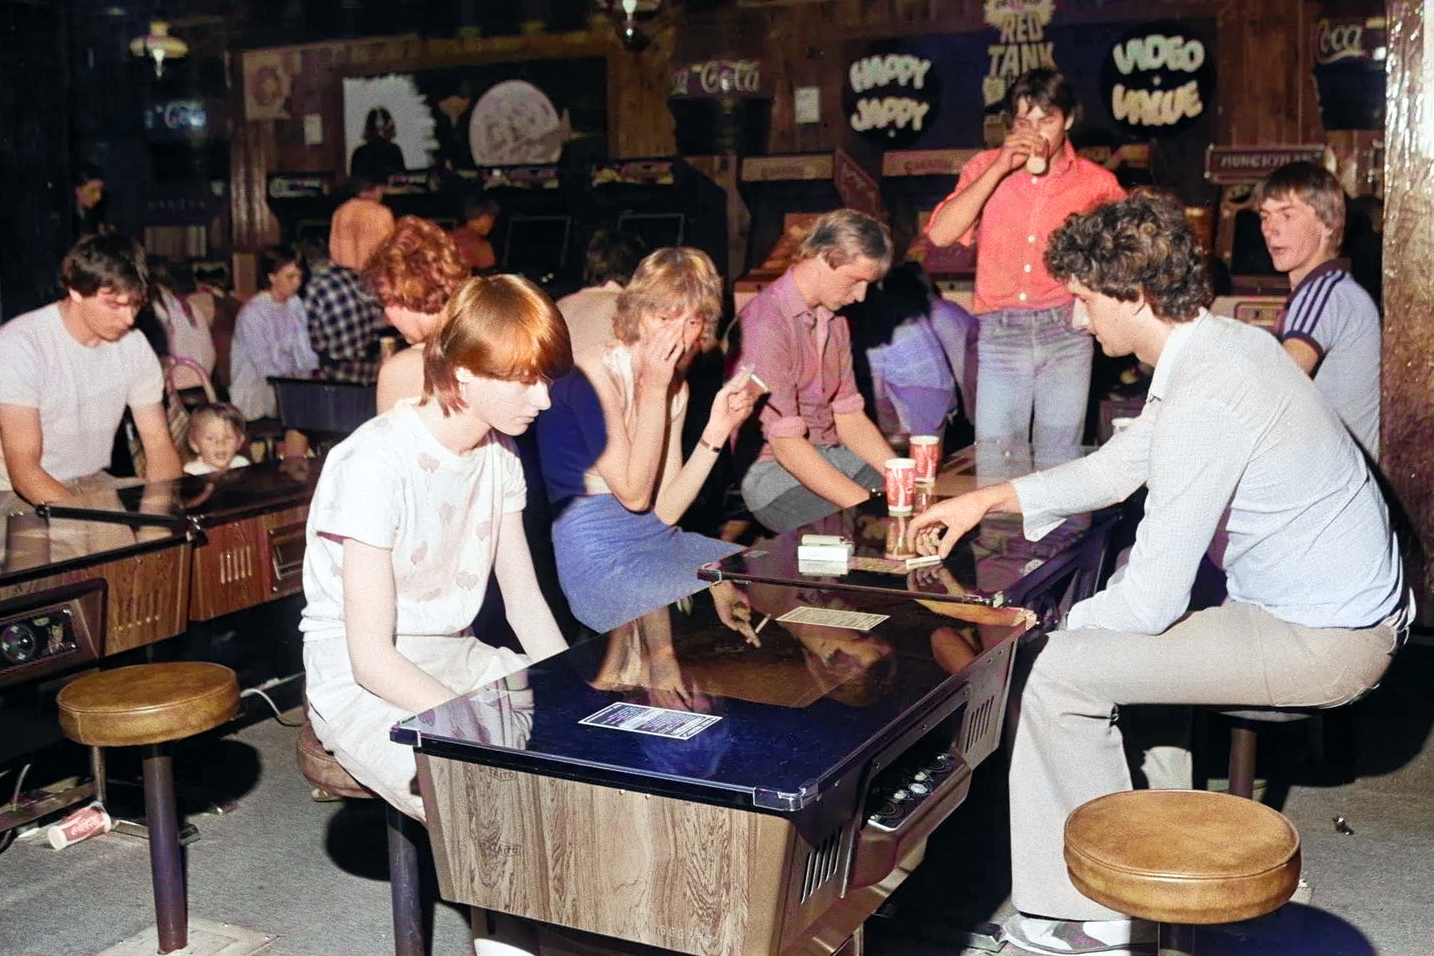
1980s amusement arcade with cocktail cabinets
With a modern display this feature can be used to control which
direction you want to pivot your display.
Flipping is typically found either in the core's main menu or under
DIP Switches. Any changes to the DIP switches require you to select
Reset to apply.
A few cores don't have DIP switches available in the menu, so search
online for how to activate the core's hidden service menu during core
startup.
If you've set a standard preset for post-processing in the INI file, e.g. the Mr. RePlay 01_Default_CRT preset, you can check if the lighter or darker version of the preset suits the game better, or you can make your own settings from scratch.
A few games can save high scores to the microSD card. This requires activation in the core's menu.
As mentioned in chapter 17 section II, most games require you to set up the controller's buttons per core.
Check that the game plays without dropouts or screen tearing. If not, see chapter 19 section VIII, IX, and XVI.
The following couple of chapters are dedicated to unique systems
A Commodore monitor-look can be obtained by using the Mr. RePlay
Commodore 1084 Philips monitor video procesing preset
04_Commodore_1084. See
chapter 19 section XV.
If you prefer a more straightforward look, try the AmigaVision
MegaAGS
preset, which works well with the Commodore 64, too. See
chapter 24.
04_Commodore_1084 preset (photo)
MegaAGS preset (photo)
The C64's sound chip, the SID, comes in two versions: the original
6581 SID and the later 8580 SID.
Generally speaking the 6581 works with all games, most classic
chiptunes, and with sample playback in games.
The 8580 is a common choice for modern chiptunes and demos, due to its
predictable filter, but it's underfiltered when used for most classic
chiptunes.
You can switch between SID versions in the C64 core, but I recommend
the 6581 for all-round use.
The original 6581 SID filter varies greatly between production
batches, so no two C64s sounds identical.
Contrary to popular belief this has little to do with the revision
number itself (6581 R2, R3, R4, R4 AR), but rather with the filter and
capacitor production tolerances.
See my website
Ultimate SID Collection
for more technical and historical information.
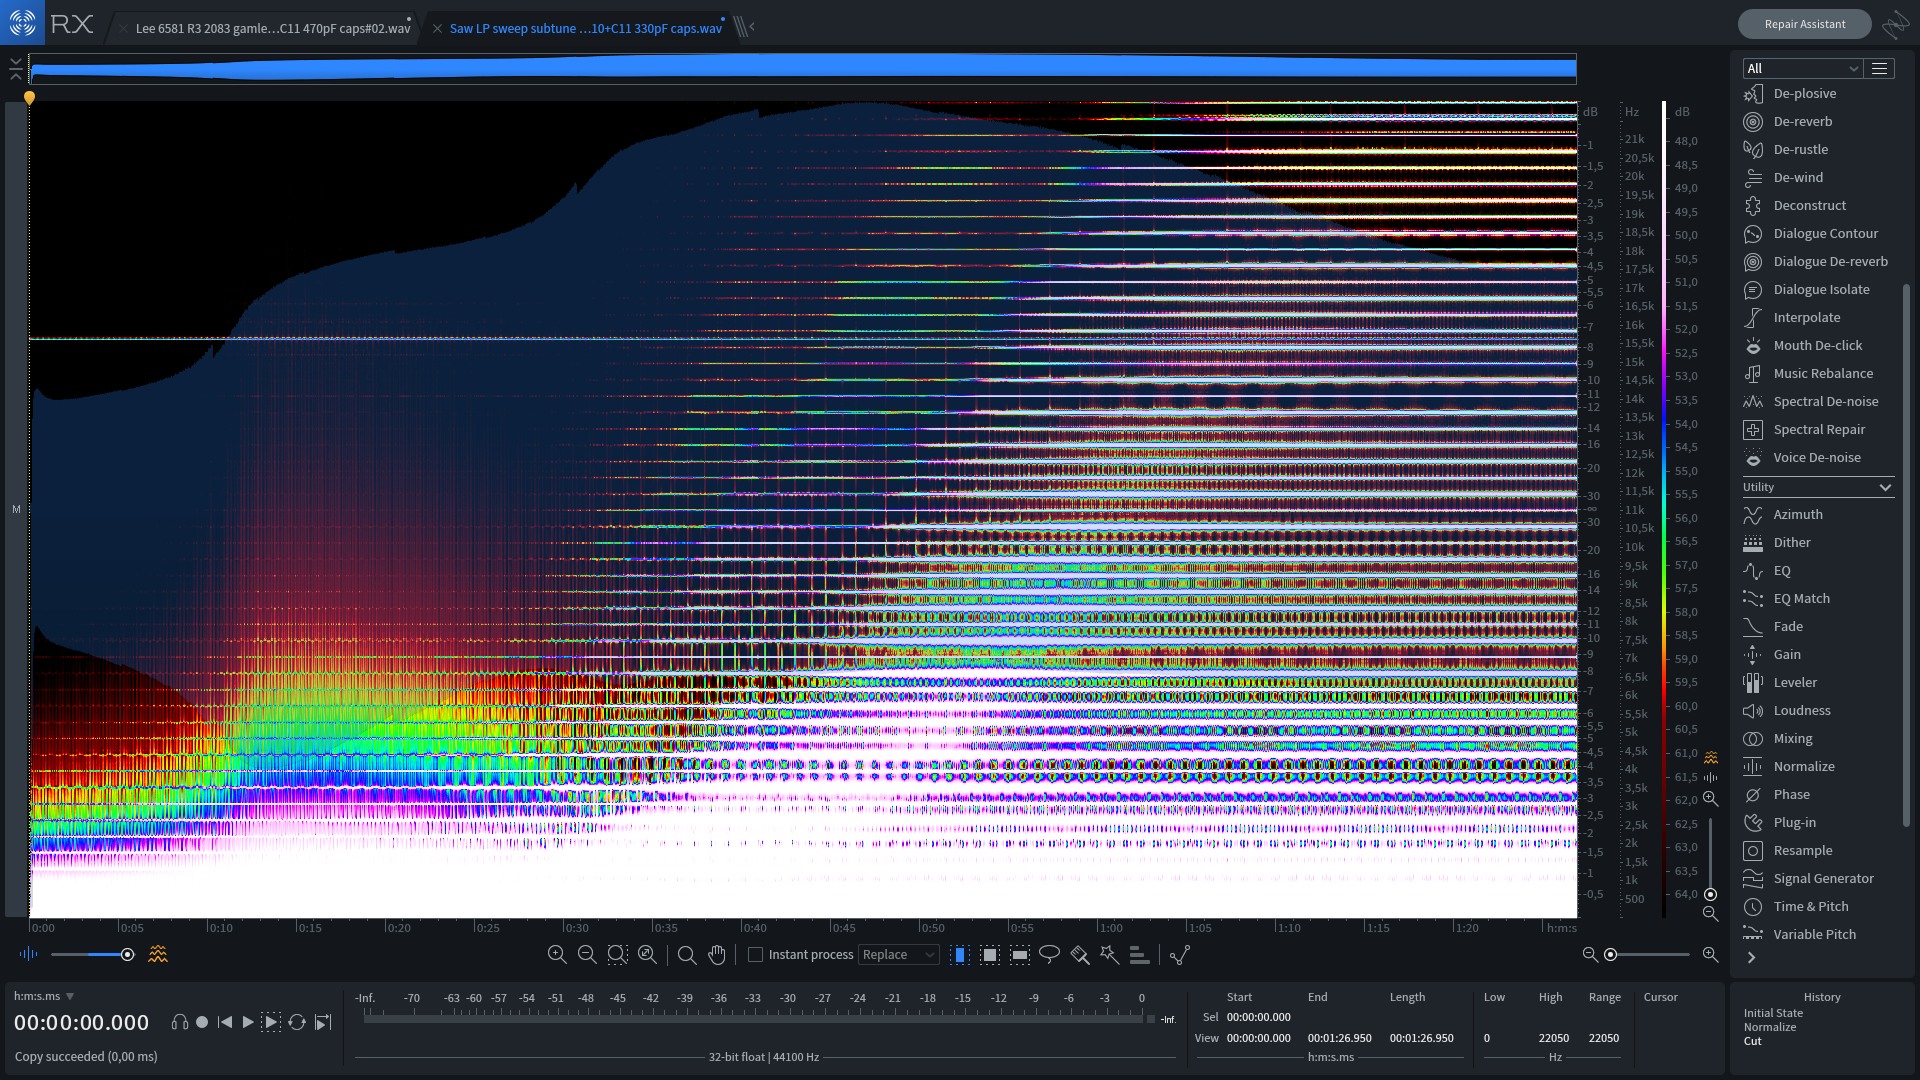
6581 filter sweep - Sweet spot
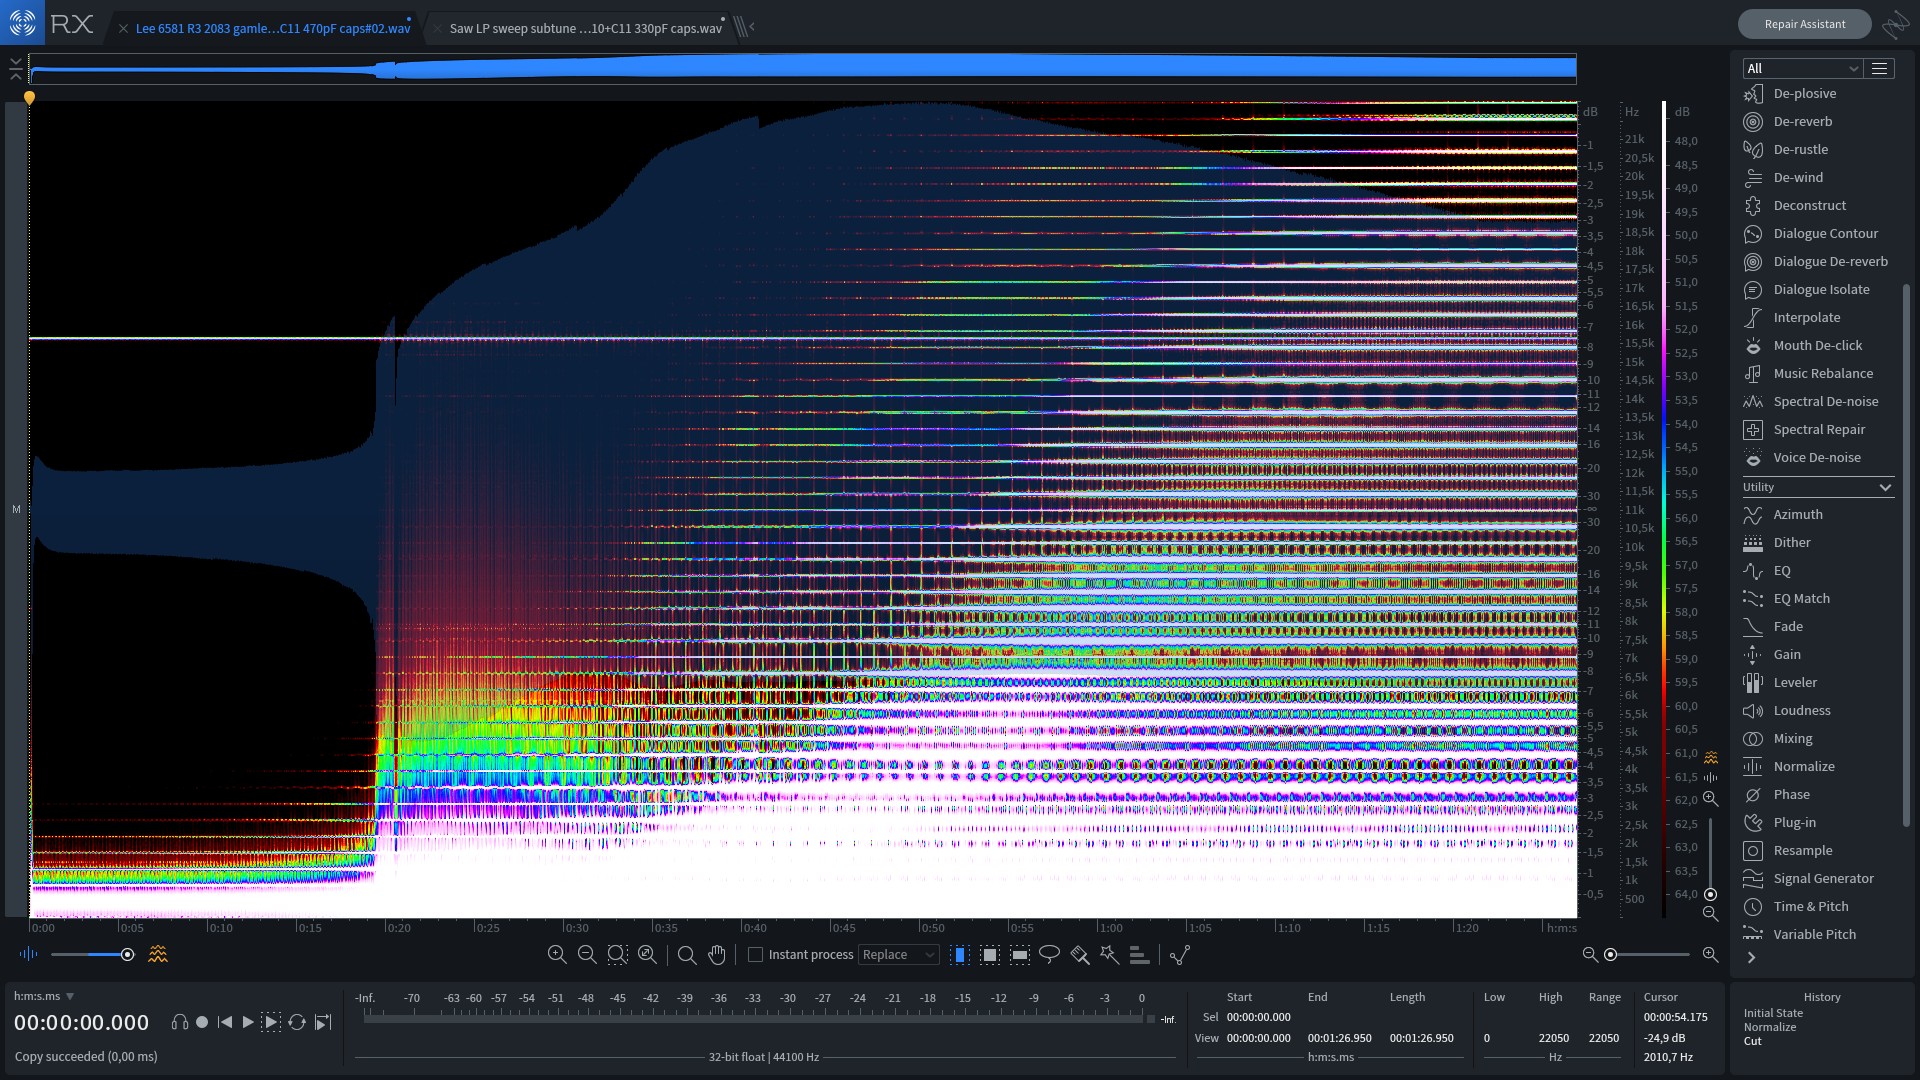
6581 filter sweep - Muffled
The following custom SID chip filter curve (by Antti S. Lankila,
converted by yxkalle) hits the sweetspot and works with the greatest
variety of games and chiptunes.
Here's how to install and enable it:
When a custom filter is loaded, there's no difference between custom
options
Custom 1,
2, and
3. Selecting
Default
switches back to the built-in filter curve.
Remember to save the core settings before exiting the core.
It's not difficult to find C64 games on the web, but for your
convenience there's a link to a preservation archive in the
Vault.
It features a curated and verified collection of retro games,
primarily from 1982-1993, alongside recent public domain games and
remakes.
Once downloaded to your computer, transfer the game subfolders into
/media/fat/games/C64/
on your MiSTer.
Commercial games from around 2017 and newer, such as Sam's Journey,
Steel Ranger, A Pig Quest, Knight 'n' Grail, Zeta Wing II, and Planet
Golf, aren't included and can be purchased from their respective
developers.
While browsing game folders in the menu, you can jump to any starting
letter by pressing the relevant character on your keyboard.
By default the C64 core comes with the speedloader DolphinDOS
activated for fast loading and shortcuts for disk operations.
Here's how to load a program directly from a game folder:
If the game folder appears empty, you need to mount the game as a disk image instead:
If there are multiple programs on the same disk, here's how to load a specific program:
If you get an error when trying to run the program or the disk loader stalls, you'll need to disable the DolphinDOS fastloader ROM and try a different method:
Repeat the steps 1 through 3 from section VIII, then:
When loading manually from the C64 startup screen:
The layout may vary if you have a localized PC keyboard or a Mac
keyboard.
The
Spacebar
is often used for skipping intros or manuals, occasionally so is
the C64's
RUN/STOP
key.
The latter is mapped to the
Esc
key on a modern keyboard.
Some games, such as Barbarian, don't show how to start or select
the number of players. These options are often placed on the
function keys from
F1
to
F7.
In-game, the function keys, the
Return
key, and especially the
Spacebar
are often used for special attacks, crawling / standing, or other
important functions.
P,
Q,
Esc
or the
Spacebar
are often used to pause an active game.
A few games use the
C=
(CBM) key, e.g. Ikari Warriors for toggling the shooting direction
lock. The CBM key is typically placed on the lower left
Alt
key on a modern keyboard.
See
chapter 6 section II
on how to use your original C64 joysticks with the MiSTer.
There's a
Swap Joysticks
option in the core menu which works with both USB joysticks
and adapters.
If an original joystick doesn't seem to work at first, try
simply unplugging and re-inserting the joystick HDMI adapter
cable.
The best ambidextrous original joysticks for the C64 and
Amiga are:
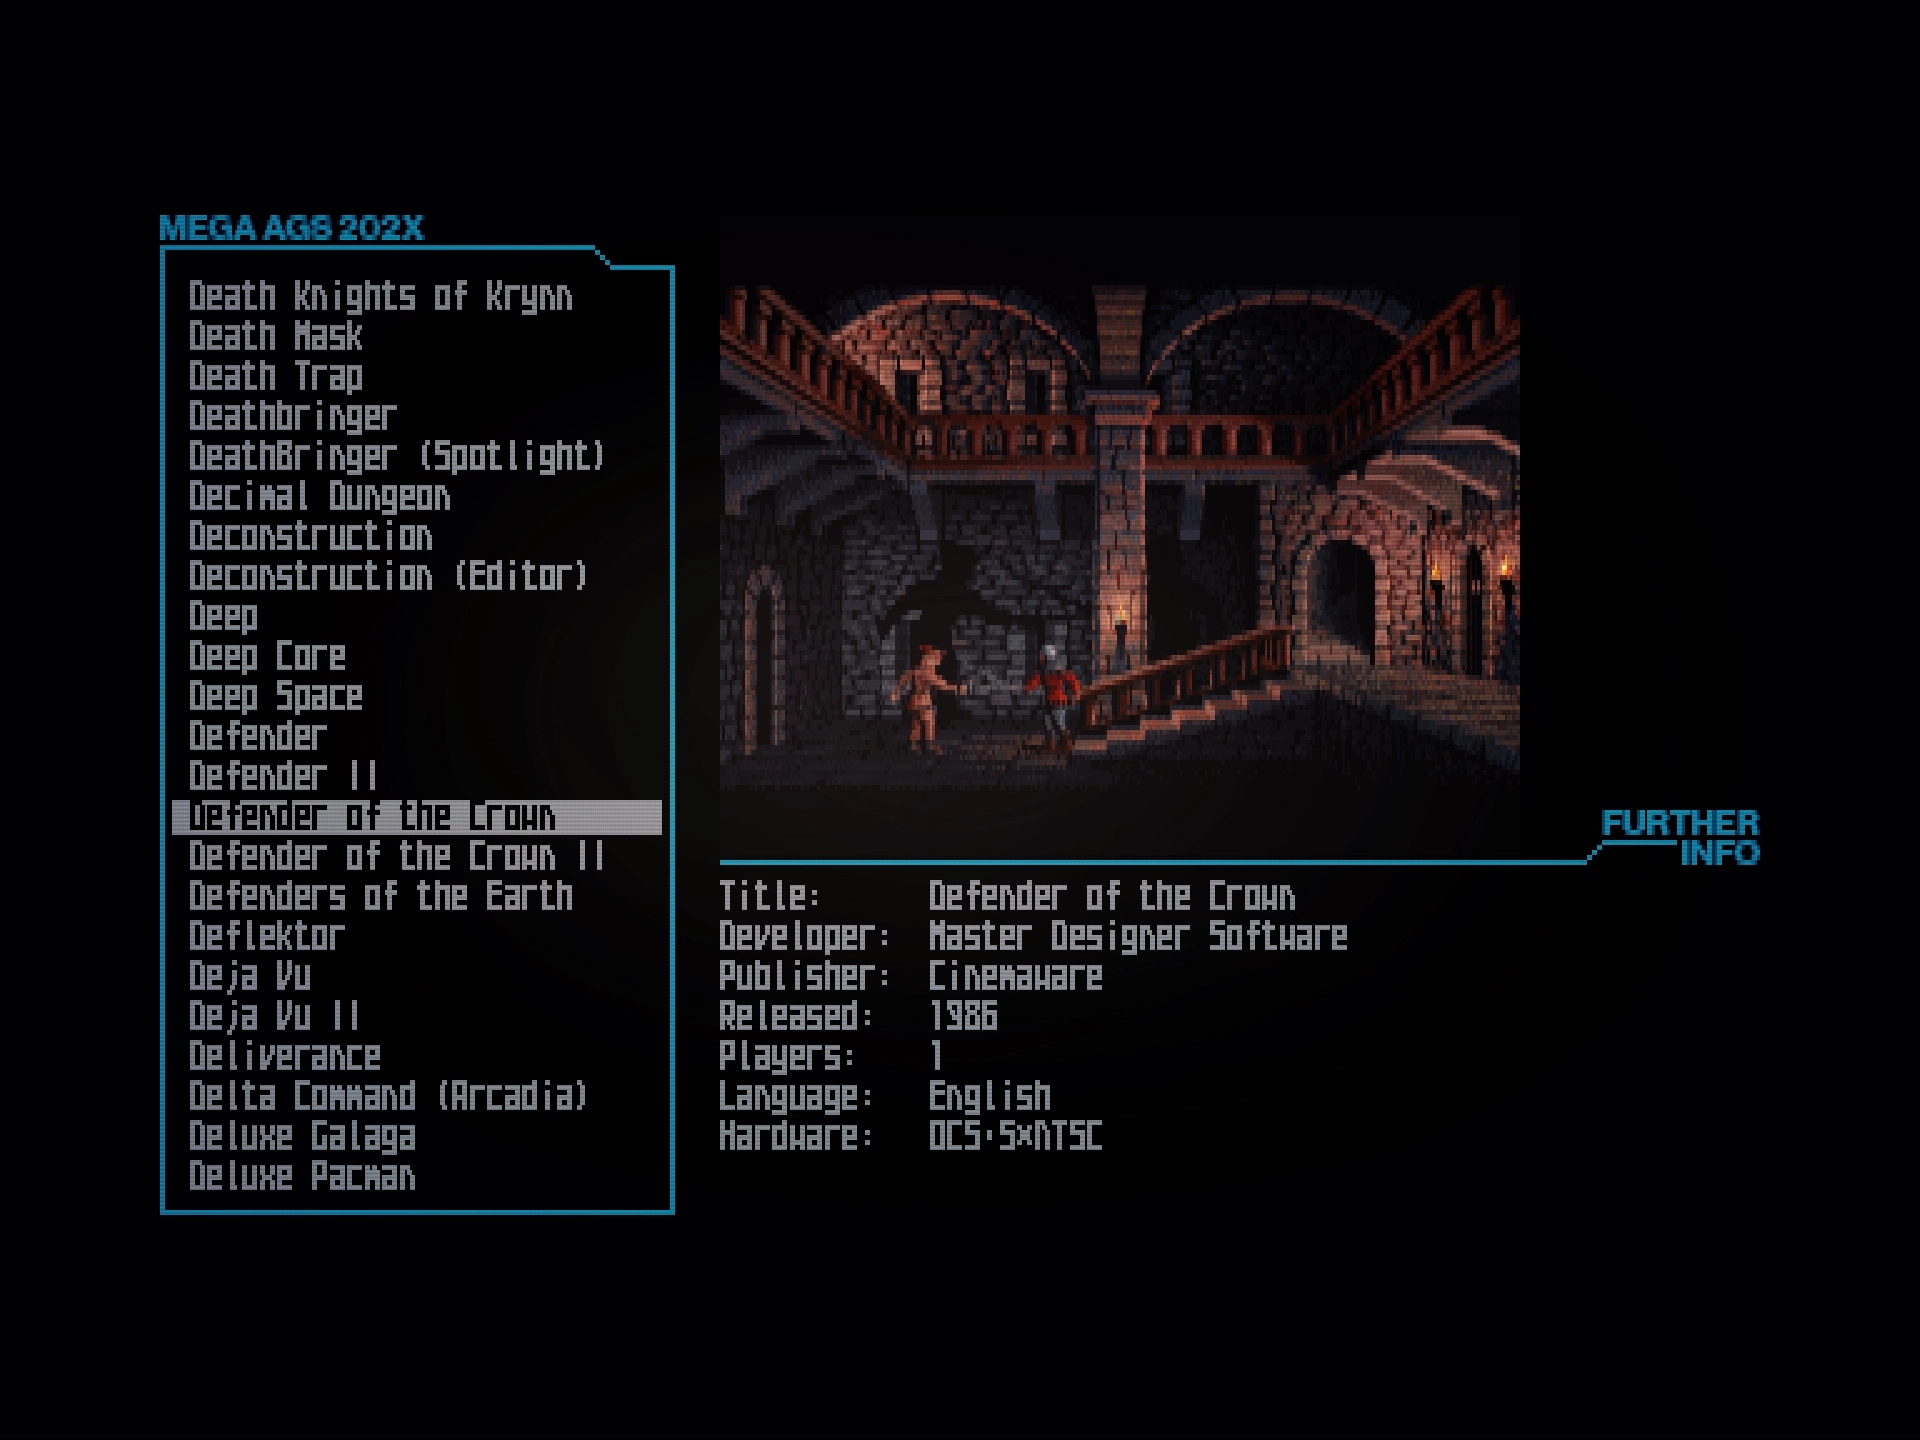
AmigaVision game selector
AmigaVision (formerly known as MegaAGS) is a must-have add-on for the
MiSTer's Amiga core, MiniMig.
AmigaVision adds the following handy features to the Amiga core:
Install AmigaVision in three steps:
It may take up to 45 minutes to remote transfer the entire package
with games to your MiSTer.
The contents of
Extras.7z
can be ignored - or unpacked and transferred in the same way, if
you wish. Read
Extras.txt
for more info.
AmigaVision needs a core exception to look and work correctly.
Inputting core exceptions in the MiSTer's INI file are explained in
chapter 19 section XVI.
I've included two core exceptions. Firstly, AmigaVision's own
recommendation for 1080p displays:
Secondly, my AmigaVision core exception recommendation for WUXGA (1920 x 1200) displays:
The above core exception predicates that you've already correctly set up your MiSTer's video mode, vertical scaling mode, and vsync adjust for WUXGA in your INI, as detailed in chapter 19.
Open the AmigaVision Amiga core, then
Use the keyboard or a controller / joystick to navigate the menu.
Add a game to AmigaVision
Favorites
by pressing the
Tab
key.
Remove an existing favorite by navigating to the game inside the
Favorites
folder and pressing
Tab
again.
Press the
Delete
key to exit a running game and return to the AmigaVision menu.
In the event of a malfunction or a blank screen in the AmigaVision
menu, reload the core from the core menu or reset the MiSTer. This
will lose any unsaved data.
You can save data in games or other Amiga software to a virtual hard
disk in AmigaVision.
However, you must exit the game or software properly by returning to
the AmigaVision menu first, in order to actually store the data on
your microSD card.
Exit a game properly by pressing the
Delete
key, returning you to the AmigaVision menu. Only then should you exit
the core or turn off your MiSTer.
AmigaVision isn't updated by the Update All script. Instead you repeat
this chapter's section II, using the latest AmigaVision version.
Before doing so, make a backup to your computer of your AmigaVision
user data. This contains your saved games and menu favorites.
All is stored in the file
/media/fat/games/Amiga/MegaAGS-Saves.hdf
on your MiSTer.
Once you've updated the AmigaVision files, transfer back your safety
copy of
MegaAGS-Saves.hdf
to your MiSTer, replacing the newly updated, but empty,
MegaAGS-Saves.hdf
file.
Most demos can run on the regular AmigaVision
Amiga
setup from the core selector, but otherwise use the separate
Amiga 500
setup.
See the section III warning about the vsync adjust core exception for
Amiga demos and some games.
Before you installed AmigaVision, there was already a core named
MiniMig
on the MiSTer. This is the actual Amiga core and is an
.rbf
file.
When you install AmigaVision, two or more (depending on whether you
installed Extras) new Amiga options are created in the menu
with names such as
Amiga,
Amiga 500, etc. Normally, you should just use
Amiga.
These new options from AmigaVision are
.mgl
files, which are configuration files that use the original
MiniMig
core.
As shown in
chapter 13 section II,
Update All lets you enable
Names TXT
in
5
Tools & Scripts. If this is enabled,
MiniMig
will be renamed
Amiga
in the menu.
When there are multiple options named
Amiga
in the core selector, AmigaVision's are the ones without a date.
Press
F2
to toggle core dates on and off to confirm which is which.
More technical information can be found here:
https://amiga.vision/docs, but all the essentials are covered in this guide.
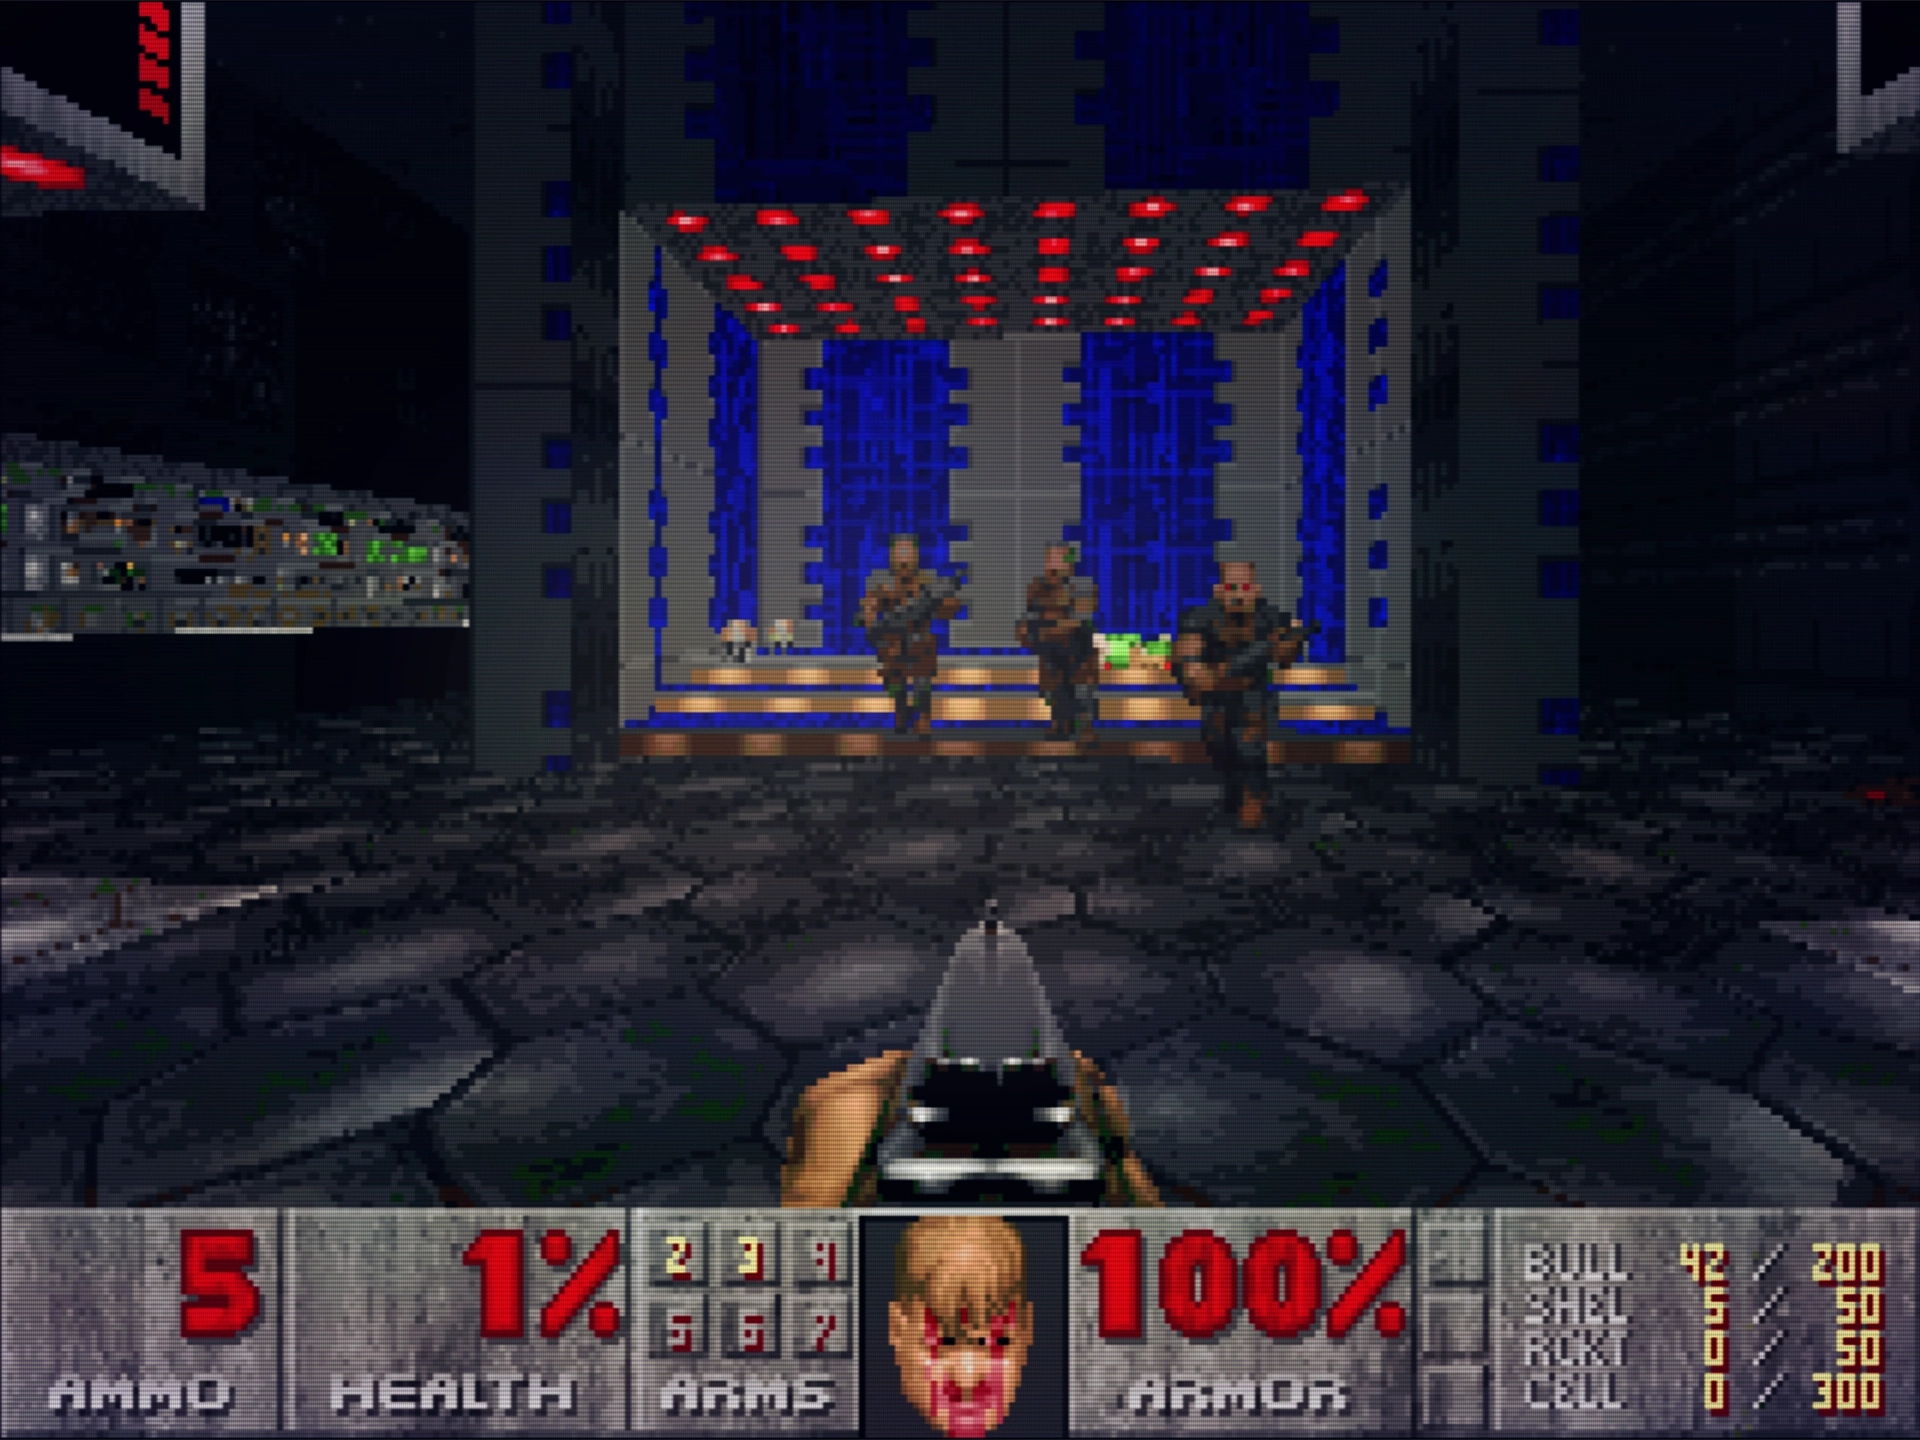
Yes, it runs DOOM (1993)
flynnsbit's 'MiSTer AO486 Top 300 DOS Games Pack (Total DOS Launcher Release)' contains two virtual hard disks: A bootable one with DOS and one with 300 classic games.
It may take more than a couple of hours to remote transfer the two virtual hard disks to your MiSTer.
The
ADDOS
folder contains the famous After Dark screensaver, which can be
transferred as well or ignored.
The
Manuals
folder contains PDF scans of the games manual, which can be saved on
your Mac or PC for future reference.
You'll need to run flynnsbit's eXoDOS Top 300 Game Pack Updater
script, since this pack isn't updated by theypsilon's Update All
script.
The updater script and instructions can be found here:
https://github.com/flynnsbit/Top300_updates
It'll also change the DOS menu from Total DOS Launcher to MyMenu. Once
you've completed section III in this guide, press the
F1
key to read the help menu.
Turbo presets may be disabled in MyMenu. To enable them again press
Alt+U
in MyMenu, select
MYMENU CONFIG, uncomment the first three turbo options in the MyMenu INI file,
save, and exit.
Use
F3
to change the turbo speed before loading a game, although it may be
overruled by individual game settings.
Finally, Seth Gregory has made a script that switches the boot rom for
the AO486. The script and instructions can be found here:
https://github.com/sethgregory/ao486_boot_switcher
Alternatively, you can simply make a backup of the
boot1.rom
file, rename the Trident rom file as
boot1.rom, and restart. Then reverse the procedure when you want to go back to
the normal rom.
The AO486 core menu exceptionally requires you to hold down Win+F12 to access it. You can still use the menu button you assigned on your joystick as well.
Your keyboard and mouse will work without further ado.
If prompted, select
1. HIRAM
for most games. A few exceptions will let you know to use a different
type of RAM upon startup.
Press
Ctrl+Alt+Delete
to reset, select the right type of RAM, and load the game again.
A few games require the alternative Trident boot rom. There's a script
for this procedure, as shown in section II.
Congratulations, you made it to the end - here's the addendum!
| Option | Setting |
|---|---|
| Preset | User 1 |
| Brightness | 100 |
| Contrast | 90 |
| Saturation | 50 |
| Hue | 50 |
| Color Temp | 5500K |
| RGB Tuning | 50 / 50 / 50 |
| Black Level | 50 |
| Sharpness | 0 |
| Trace Free | 20 |
| Aspect Control | Dot to Dot |
| Input Range | Auto |
| Blue Light Filter | Min |
| Media Sync | Off or On (for On, use the DisplayPort and enable VRR on your MiSTer) |
| Option | Setting |
|---|---|
| Preset | User Mode 1 |
| Blue Light Filter | Min |
| Brightness | 100 |
| Contrast | 90 |
| Saturation | 50 |
| Hue | 50 |
| Color Temp | 5500K |
| Gamma | 2.2 |
| Black Level | 50 |
| Sharpness | 0 |
| Trace Free | 40 |
| Aspect Control | Full |
| Input Range | Auto |
| Vivid Pixel | 0 |
| Adaptive Sync | Off or On (for On, use the DisplayPort and enable VRR on your MiSTer) |
| Option | Setting |
|---|---|
| Preset | User1 |
| Auto EcoView | Off |
| EcoView Optimizer 2 | Off |
| Brightness | 100% |
| Picture Expansion | Aspect Ratio |
| Sharpness | 0 |
| Input Range | Auto |
| Color Mode | User1 |
| Brightness | 100 |
| Contrast | 85 |
| Temperature | 5000 K |
| Gamma | 2.2 |
| Hue | 0 |
| Saturation | 5 |
| Gain (R) | 100 |
| Gain (G) | 96 |
| Gain (B) | 80 |